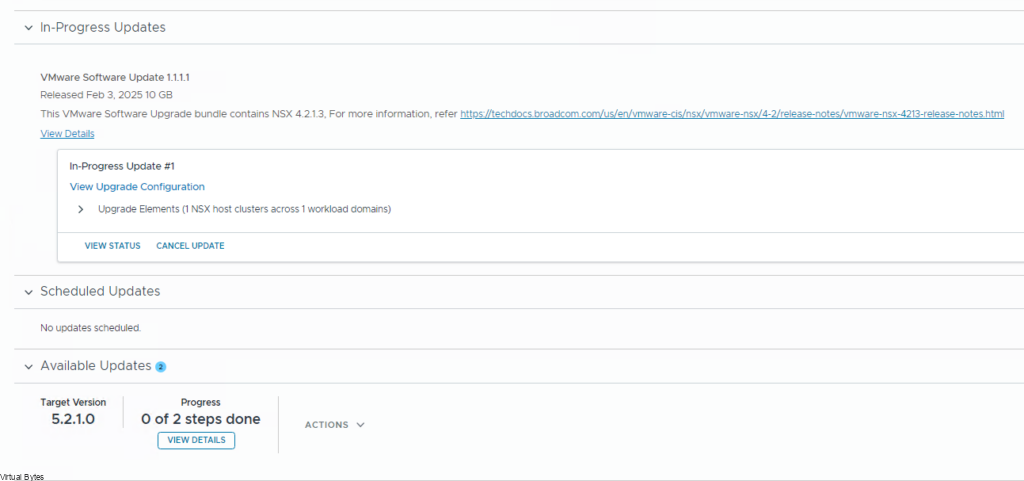
VMware Cloud Foundation (VCF) has revolutionized the way organizations deploy, manage, and secure their on-premises infrastructure. With the recent release of VCF 5.2, VMware continues to push the boundaries of hybrid-cloud innovation, offering enhanced features, improved scalability, and streamlined management capabilities.
One of the most significant enhancements in VCF 5.2 is the introduction of Flexible Bill of Materials (BOM), a game-changing approach to infrastructure upgrades. Gone are the days of rigid, one-size-fits-all upgrade paths; with Flexible BOM, administrators can now customize their upgrade process to meet the unique needs of their organization.
In this blog post, we’ll delve into the world of VCF 5.2 and Flexible BOM, exploring the benefits, best practices, and step-by-step procedures for a successful upgrade. Whether you’re a seasoned VCF administrator or just starting your hybrid-cloud journey, this guide will provide you with the insights and expertise needed to elevate your infrastructure to the next level
Flexible BOM Process
Downloading The Bits:
The files will be downloaded with a internet connected laptop/desktop or virtual machine.
Note: I am using “03102025” as the directory structure for this process, you can use any name you like for the folder.
First, let’s open up the Offline Bundle Utility Tool (LCM) and start preparing commands to enter, you may copy below and replace to fit your system and your credentials.
(Since, I am using windows for downloading the bundles you will want to run the LCM with out the ./lcm-bundle… as executable, so it would just be “lcm-bundle… for windows” )
lcm-bundle-transfer-util --download --manifestDownload --depotUser <email> --outputDirectory C:\03102025
lcm-bundle-transfer-util --download --bundleManifests --depotUser <email> --bundleManifestsDir C:\03102025
lcm-bundle-transfer-util --download --compatibilityMatrix --depotUser <email> --outputDirectory C:\03102025Note: If you do not have a VXRAIL Platform, you and disregard the –pdu dell_depot_email, remove it from the syntax as below in the screenshot.

lcm-bundle-transfer-util --depotUser <email> --download productVersionCatalog --outputDirectory C:\03102025
Uploading The Bits:
Once you have downloaded all the updates and manifest files, upload them to the SDDC manager appliance. Keep all the files extracted in the /home/vcf/ directory.
For actual bundles those will be uploaded to the /nfs/vmware/vcf/nfs-mount/ due to the large size and /home/vcf/ is limited on space.
File Structure Table
Note: This will provide simplified way of uploading and ingesting the VCF files and updates following the table below.
--bundleManifests | /home/vcf/bundleManifests | Upload the bundleManifests directory into /home/vcf/ |
--compatibilityMatrix | /home/vcf/Compatibility/ | Upload the Compatibility directory into /home/vcf/ |
productVersionCatalog | /home/vcf/ | Upload the productVersionCatalog.json in /home/vcf/ directory |
--sourceManifestDirectory | /home/vcf/lcm/ | Upload the lcm directory into /home/vcf/ |
bundleManifests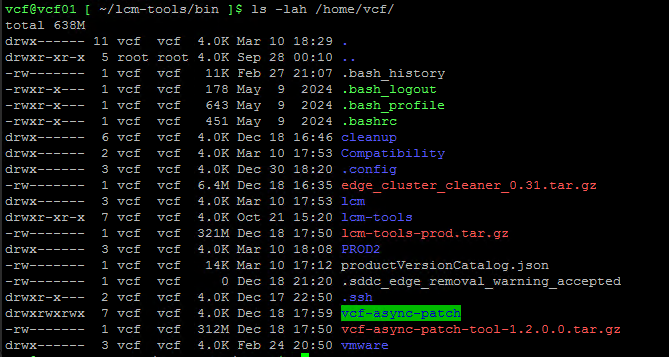
./lcm-bundle-transfer-util --update --sourceManifestDirectory /home/vcf --sddcMgrFqdn FQDN --sddcMgrUser [email protected]
./lcm-bundle-transfer-util --upload --bundleManifests --bundleManifestsDir /home/vcf/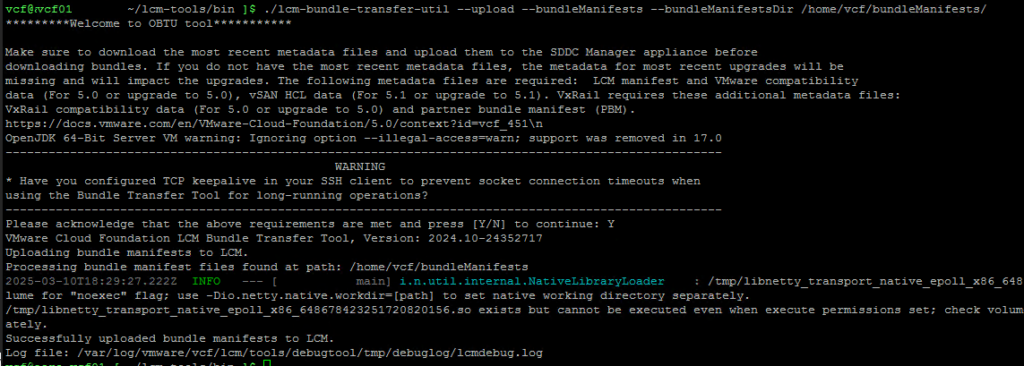
./lcm-bundle-transfer-util --update --compatibilityMatrix --inputDirectory /home/vcf --sddcMgrFqdn FQDN --sddcMgrUser [email protected]
./lcm-bundle-transfer-util --upload productVersionCatalog --inputDirectory /home/vcf --sddcMgrFqdn FQDN --sddcMgrUser [email protected]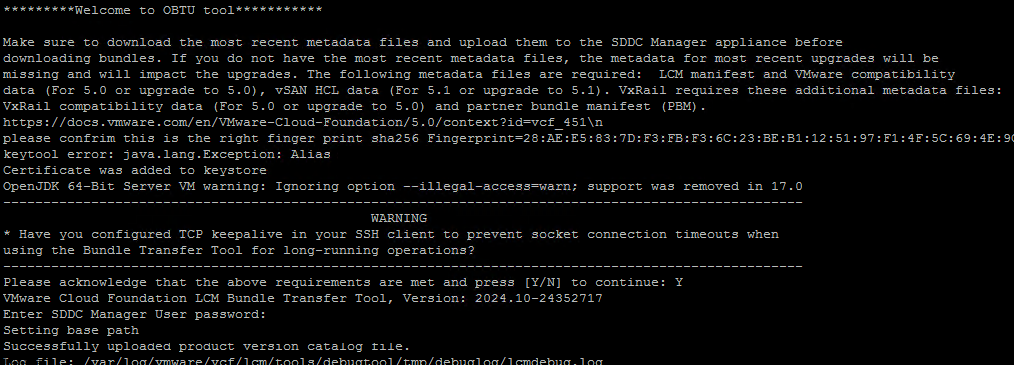
After you have completed the above steps for updating the BOM and Products, Manifests. Next we will go to the workload domain you want to patch. Select Plan Patching -> Select the Products you want to upgrade/patch.

./lcm-bundle-transfer-util –generatePlannerFile –sddcMgrFqdn <your FQDN> –sddcMgrUser [email protected] –outputDirectory /home/vcf –domainNames vcf-m01 -p 5.2.1.0

An Example of the plannerFile.json below:
[{"id":"f486b010-2441-4ee3-93a3-1cae8d375e1e","type":"VMWARE_SOFTWARE","description":"This VMware Software Upgrade bundle contains vSphere ESXI 80U3d, for more information, refer https://techdocs.broadcom.com/us/en/vmware-cis/vsphere/vsphere/8-0/release-notes/esxi-update-and-patch-release-notes/vsphere-esxi-80u3d-release-notes.html","version":"608.169.14-83637536","severity":null,"vendor":"VMware","releasedDate":"2025-02-24T12:00:00Z","isCumulative":false,"isCompliant":null,"sizeMB":606.376953125,"downloadStatus":"PENDING","components":[{"description":"ESXI bundle element","vendor":"VMware","releasedDate":"2025-02-24T12:00:00Z","toVersion":"8.0.3-24585383","fromVersion":"1.1.1-1","imageType":"PATCH","id":"54bf5dce-40e1-408b-9a1d-6ebb63b3dabe","type":"HOST"}],"applicabilityStatus":"PENDING","applicabilityOrder":2,"isPartiallyUpgraded":false},{"id":"d70ed6b4-26b7-4e40-a516-57492b7ddb72","type":"VMWARE_SOFTWARE","description":"This VMware Software Upgrade bundle contains NSX 4.2.1.3, For more information, refer https://techdocs.broadcom.com/us/en/vmware-cis/nsx/vmware-nsx/4-2/release-notes/vmware-nsx-4213-release-notes.html","version":"310.71.51-83059794","severity":null,"vendor":"VMware","releasedDate":"2025-02-03T12:00:00Z","isCumulative":false,"isCompliant":null,"sizeMB":9070.224609375,"downloadStatus":"PENDING","components":[{"description":"NSX-T Manager patch bundle element","vendor":"VMware","releasedDate":"2025-02-03T12:00:00Z","toVersion":"4.2.1.3.0-24533884","fromVersion":"1.1.1-1","imageType":"PATCH","id":"2b89cce2-b0e9-4595-964e-0df5711b0a9d","type":"NSX_T_MANAGER"}],"applicabilityStatus":"AVAILABLE","applicabilityOrder":1,"isPartiallyUpgraded":false}]Once you have generated the file, copy it from the SDDC Manager onto your internet connected machine.
lcm-bundle-transfer-util --download --plannerFile C:\03102025\plannerFile.json --depotUser <your username for VMware Depot>Once your bundles have been downloaded, you will want to transfer them to the system that will be upgraded. After everything is uploaded into the NFS Directory on SDDC Manager, you will want to make sure that you elevate to root by su for ingesting bundles.
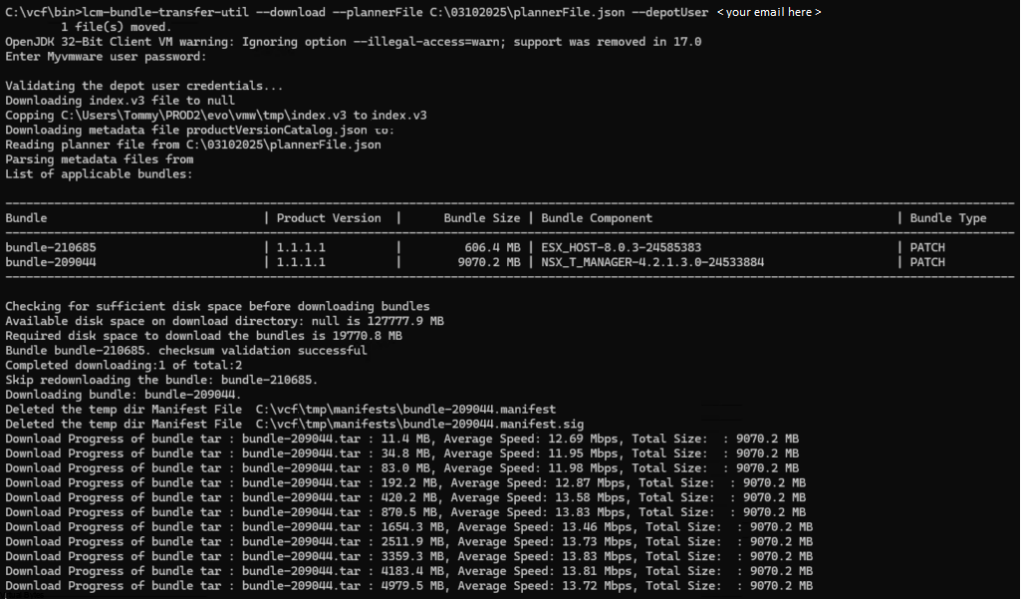
Now we will go back to the SDDC Manager, upload the actual bundles into the /nfs/… share and ingest them with command below.
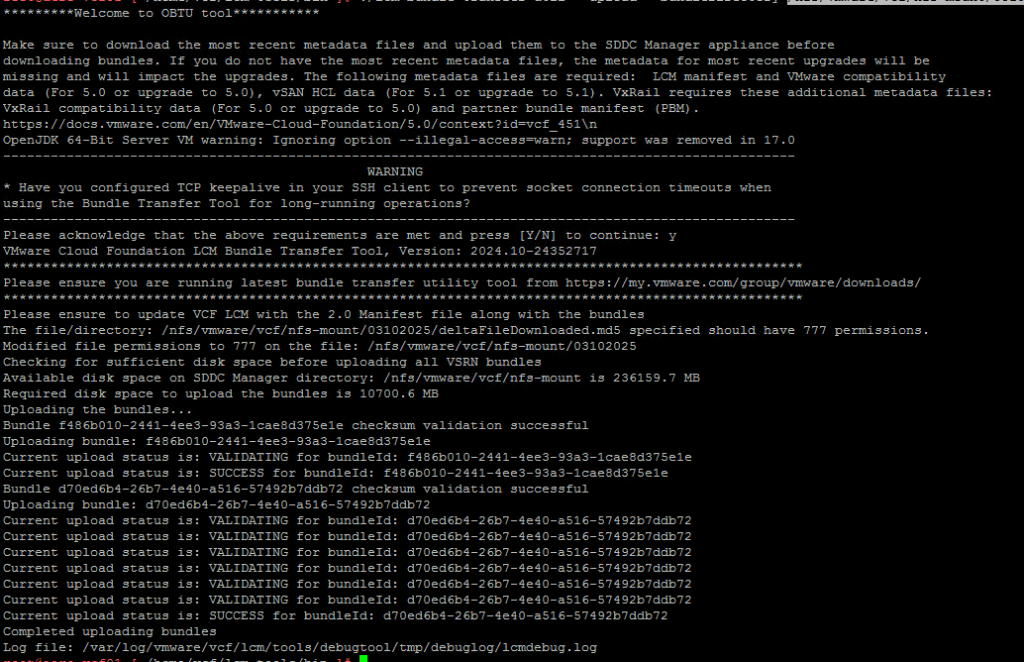
./lcm-bundle-transfer-util --upload --bundleDirectory /nfs/vmware/vcf/nfs-mount/03102025/If you have a VXRAIL VCF Deployment you will want to upload the Partner Bundles with the command below:
./lcm-bundle-transfer-util --upload "uploadPartnerBundle" --bundleDirectory directory-pathOnce all update bundles have been uploaded, go back to the SDDC Manager User Interface, and you should see that the Update Now button shows up and lets you proceed with the upgrade!
