Top Posts
What’s New In VMware Cloud Foundation 9.0
Deploying & Configuring the VMware LCM Bundle Utility...
VMware Cloud Foundation: Don’t Forget About SSO Service...
VMware Explore Las Vegas 2025: Illuminating the Path...
Securing Software Updates for VMware Cloud Foundation: What...
VMware Cloud Foundation 5.2: A Guide to Simplified...
VMware Cloud Foundation 5.2: Unlocking Secure Hybrid Cloud...
VMware Cloud Foundation – Memory Tiering: Optimizing Memory...
Decoding VMware Cloud Foundation: Unveiling the numerous amount...
VMware Cloud Director 10.6.1: Taking Cloud Management to...
Virtual Bytes
  • Home
  • Home Data Center 2025
  • VMware
    • Cloud
    • Datacenter & Cloud Infrastructure
      • VMware ESXi
      • VMware vCenter
      • VMware vSAN
    • Networking & Security
    • Desktop & App Virtualization
      • Omnissa Horizon
    • Troubleshooting
    • Ansible
  • Education
  • Hardware
    • Hardware Tips & Tricks
  • Events
  • About
    • About Me
    • Home Lab Archives
      • Home Lab 2020-2022
      • Home Lab 2016-2020
Tag:

VMware Cloud Foundation

Events

VMware Explore 2022 – My Journey!

by Tommy Grot September 14, 2022
written by Tommy Grot 2 minutes read

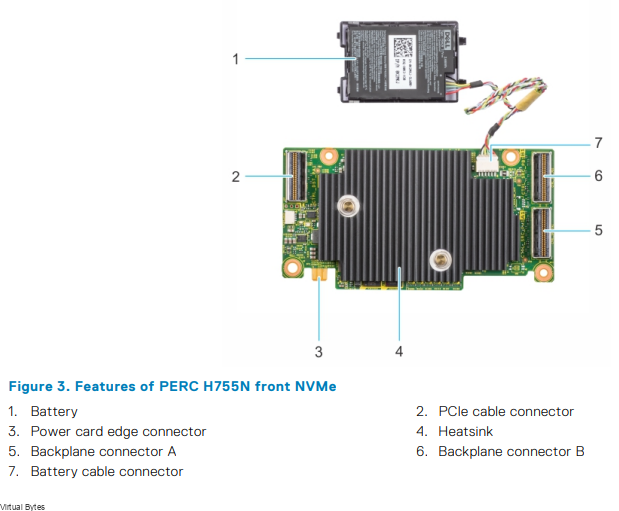
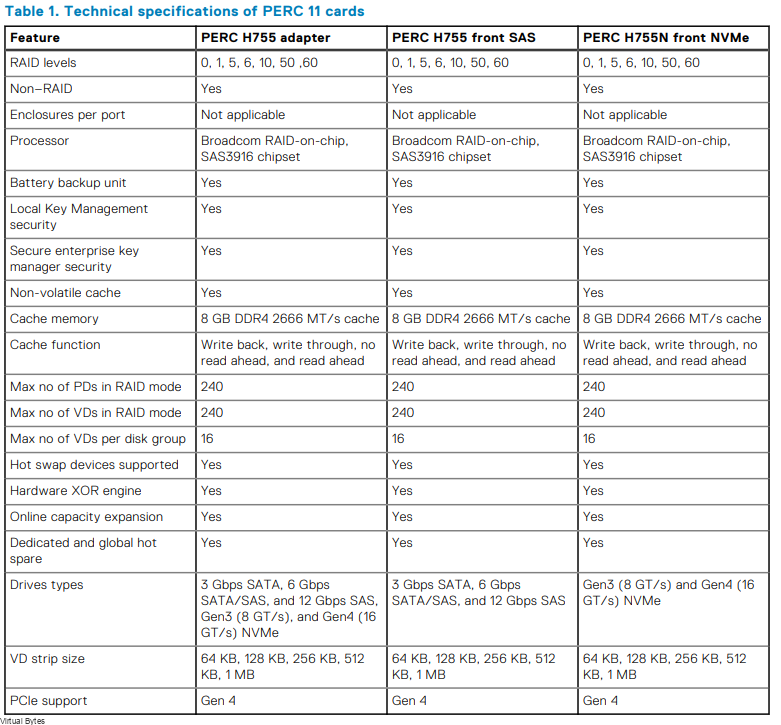
An early morning on August 28th, 2022, I got ready and drove toward Denver International Airport. Got there at 3AM. Then went on my way to the gate and was ready and excited to be at VMware Explore! When I was on my flight, I met two guys on my flight that were as well attending VMware Explore as they were local to Denver.

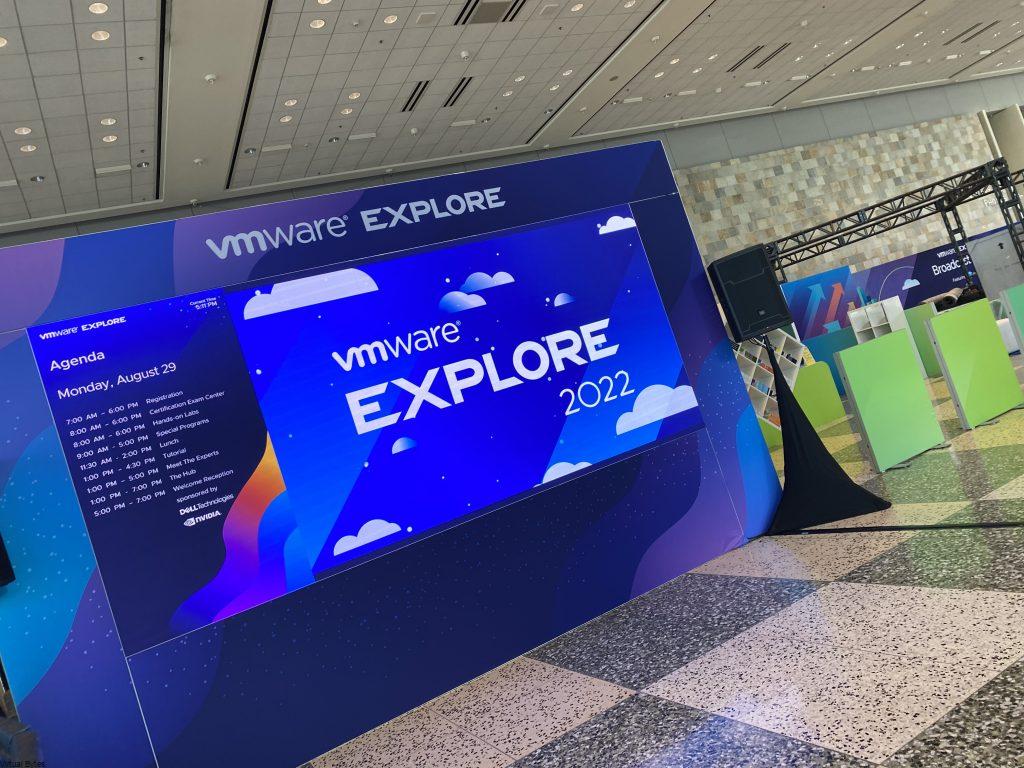
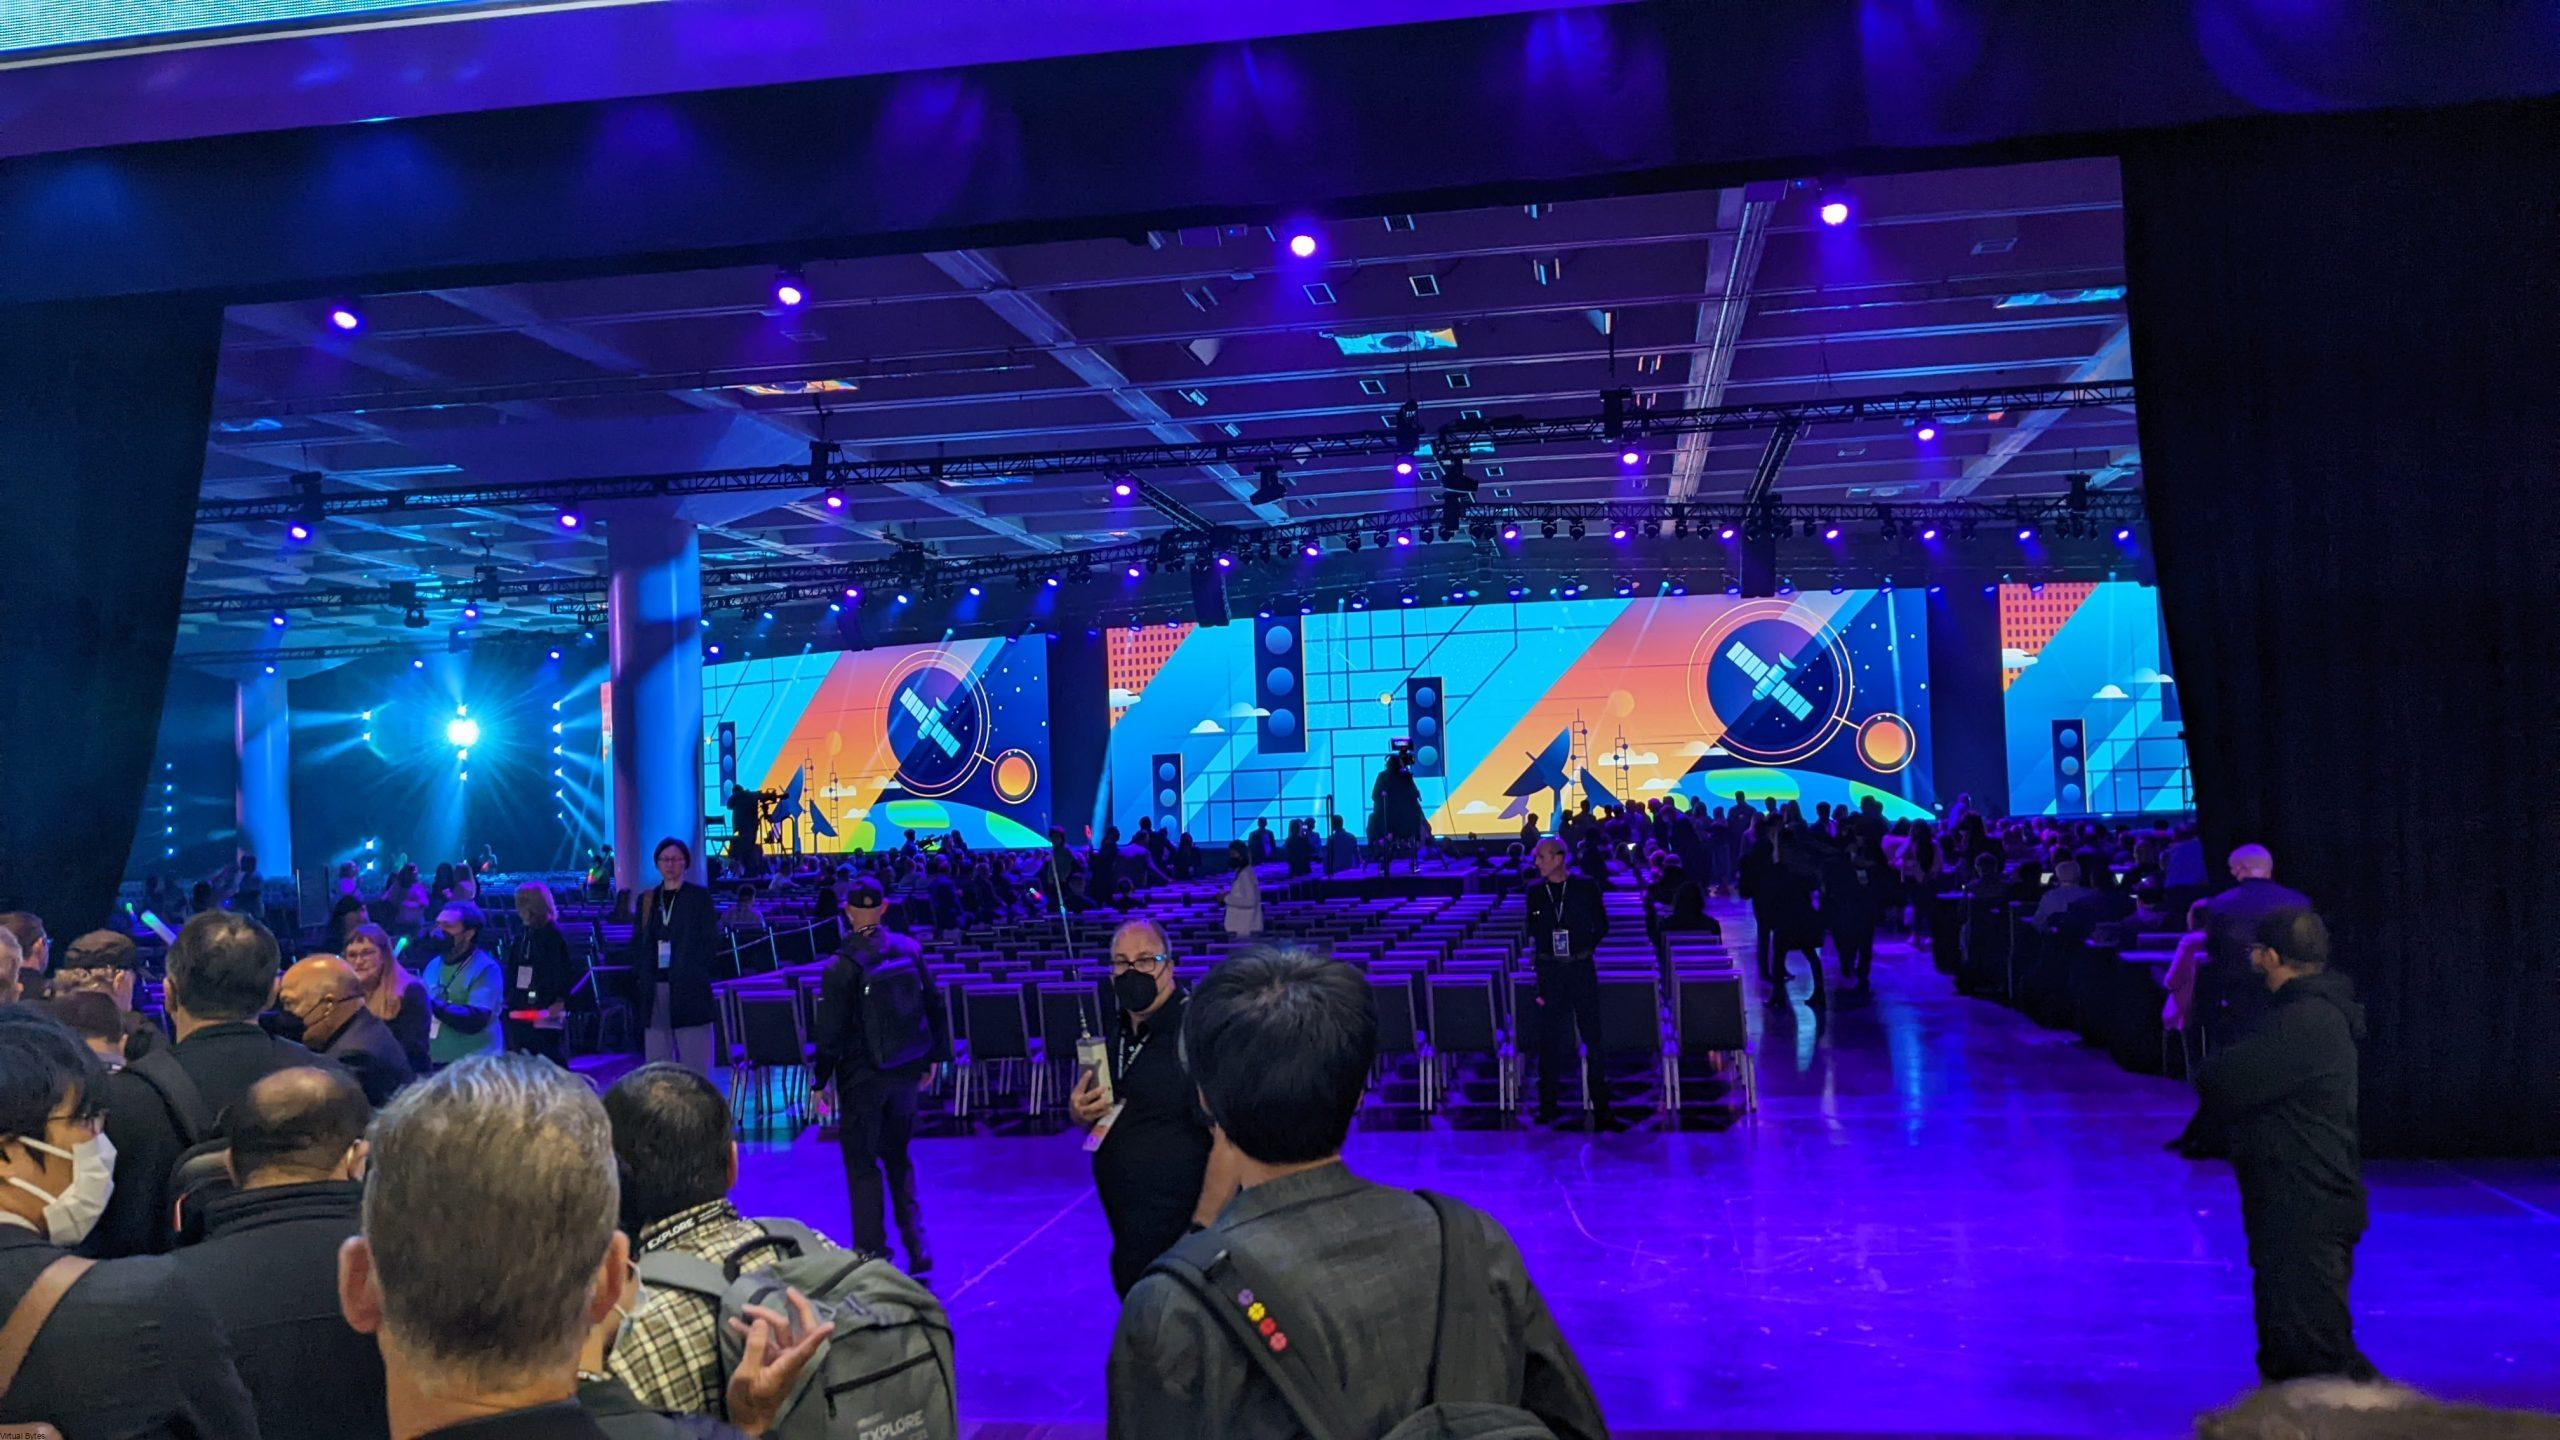
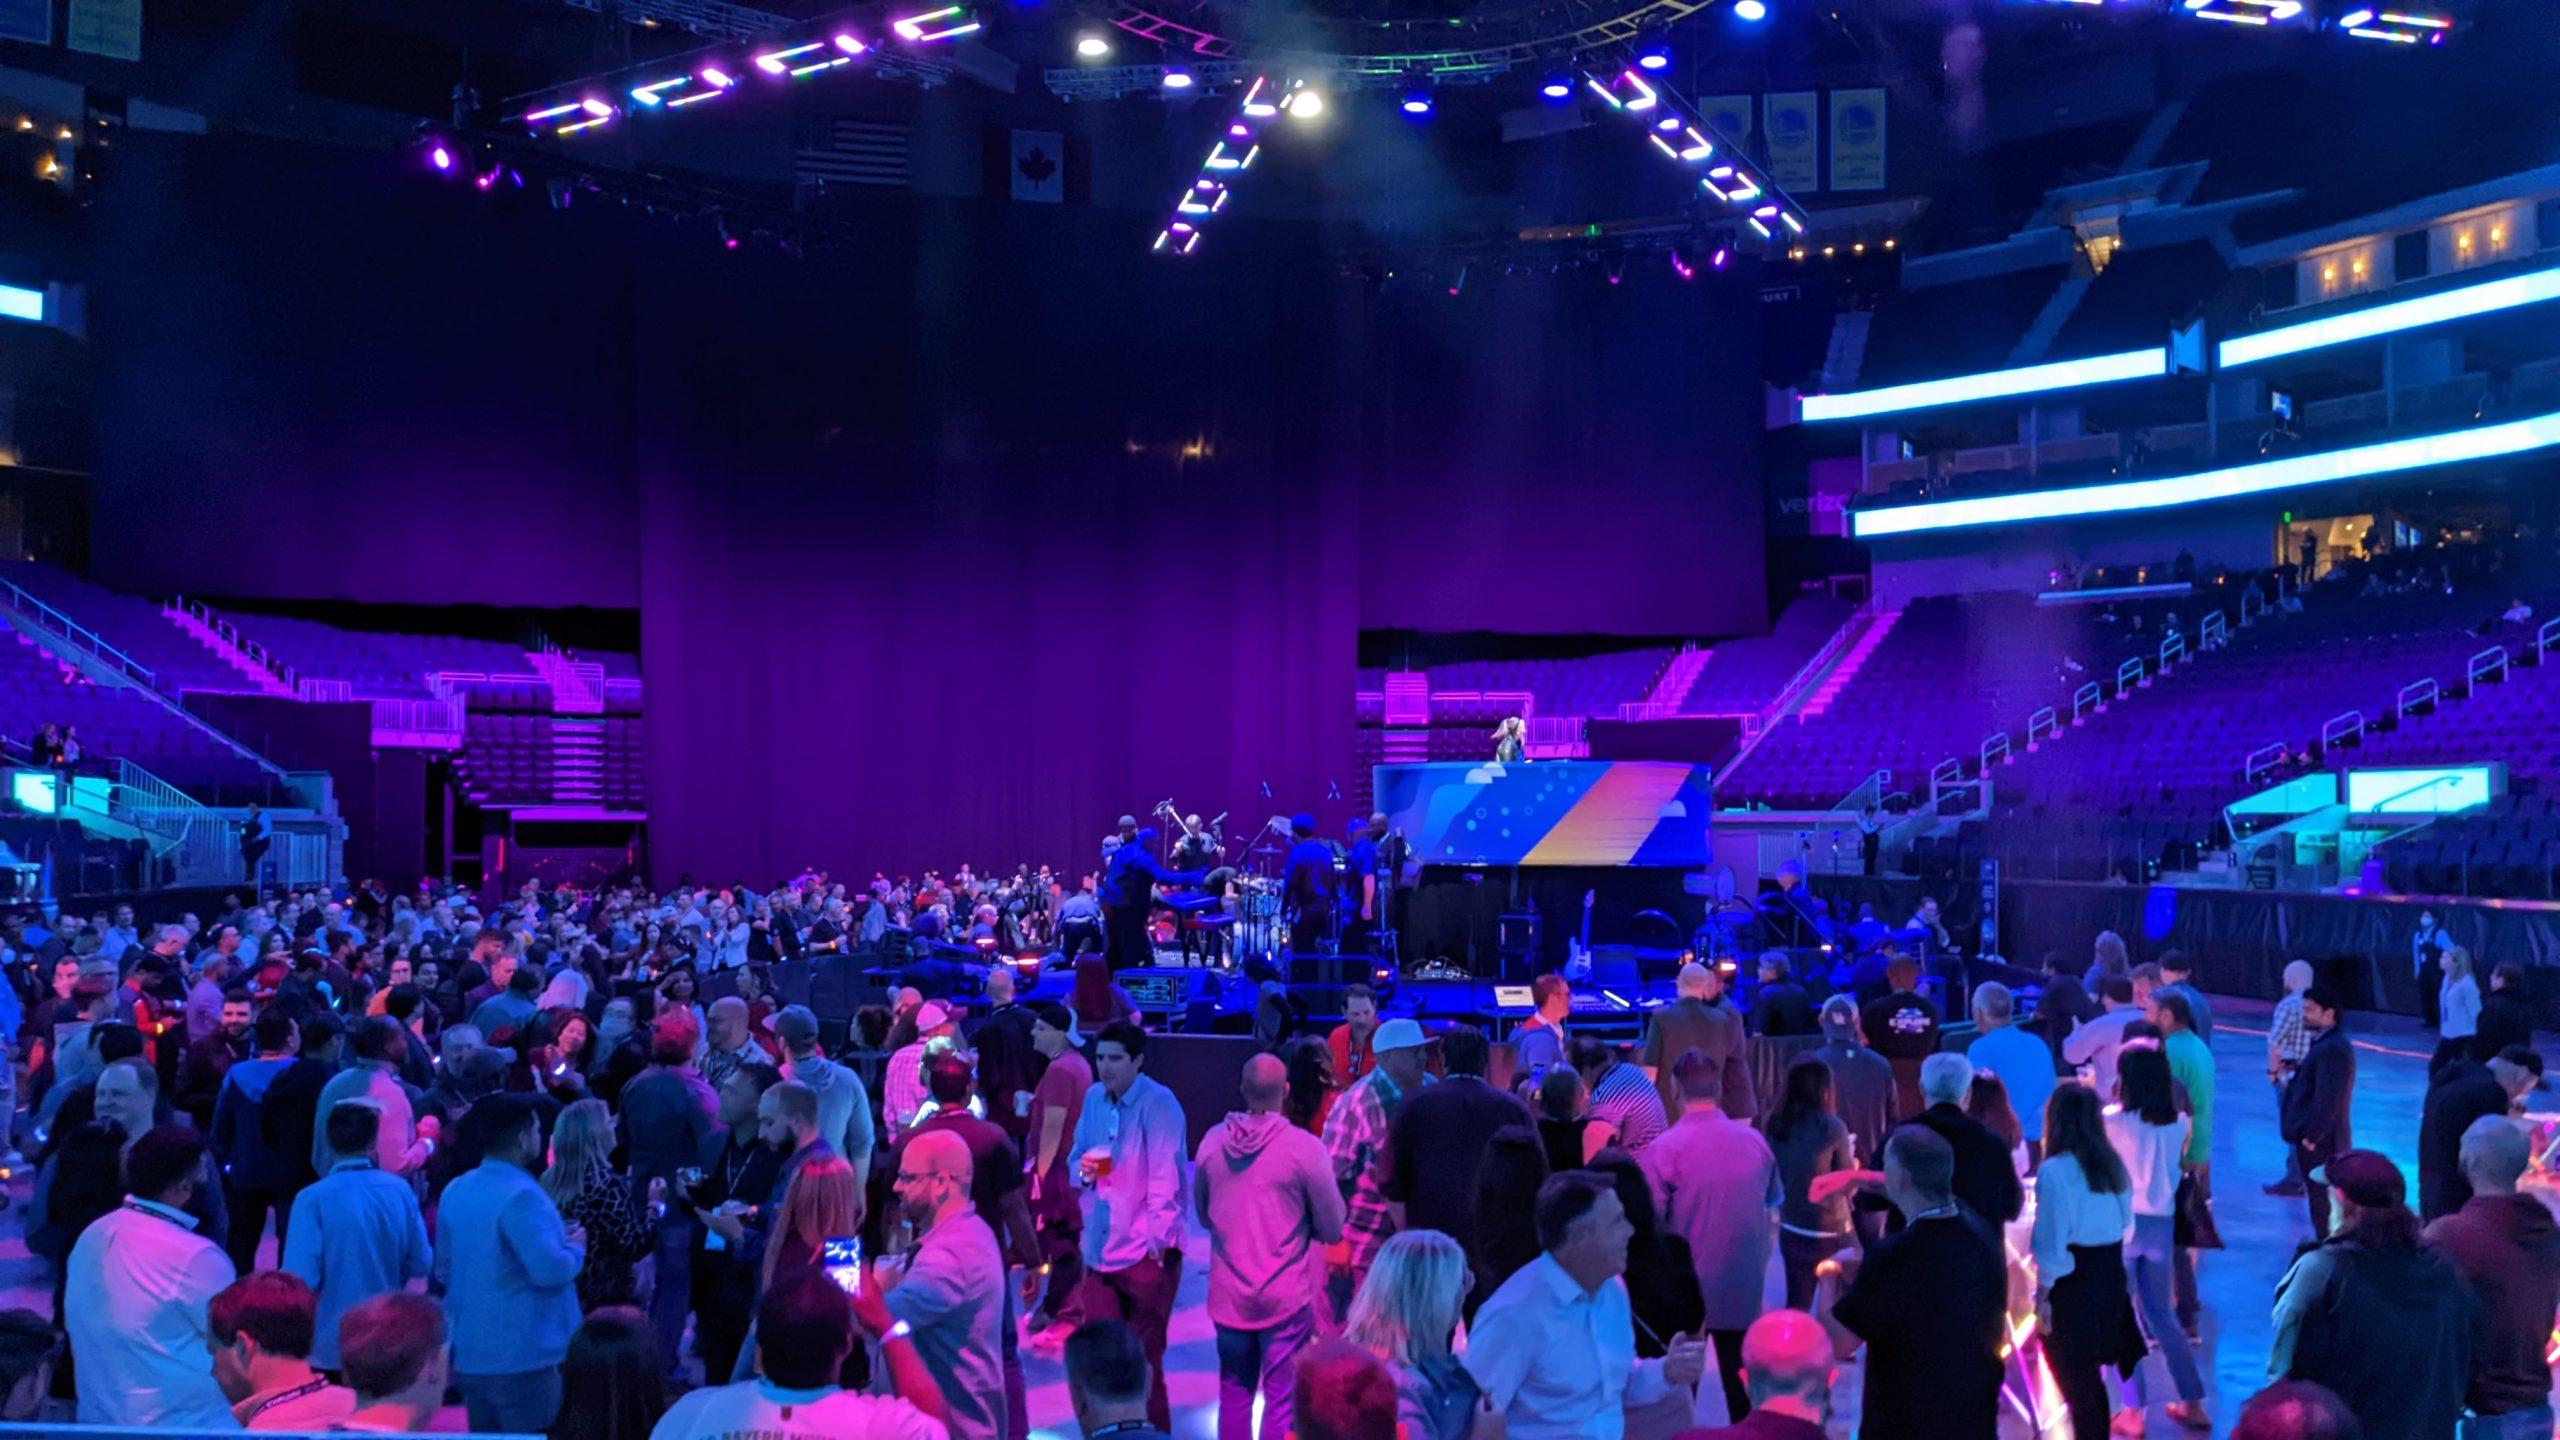
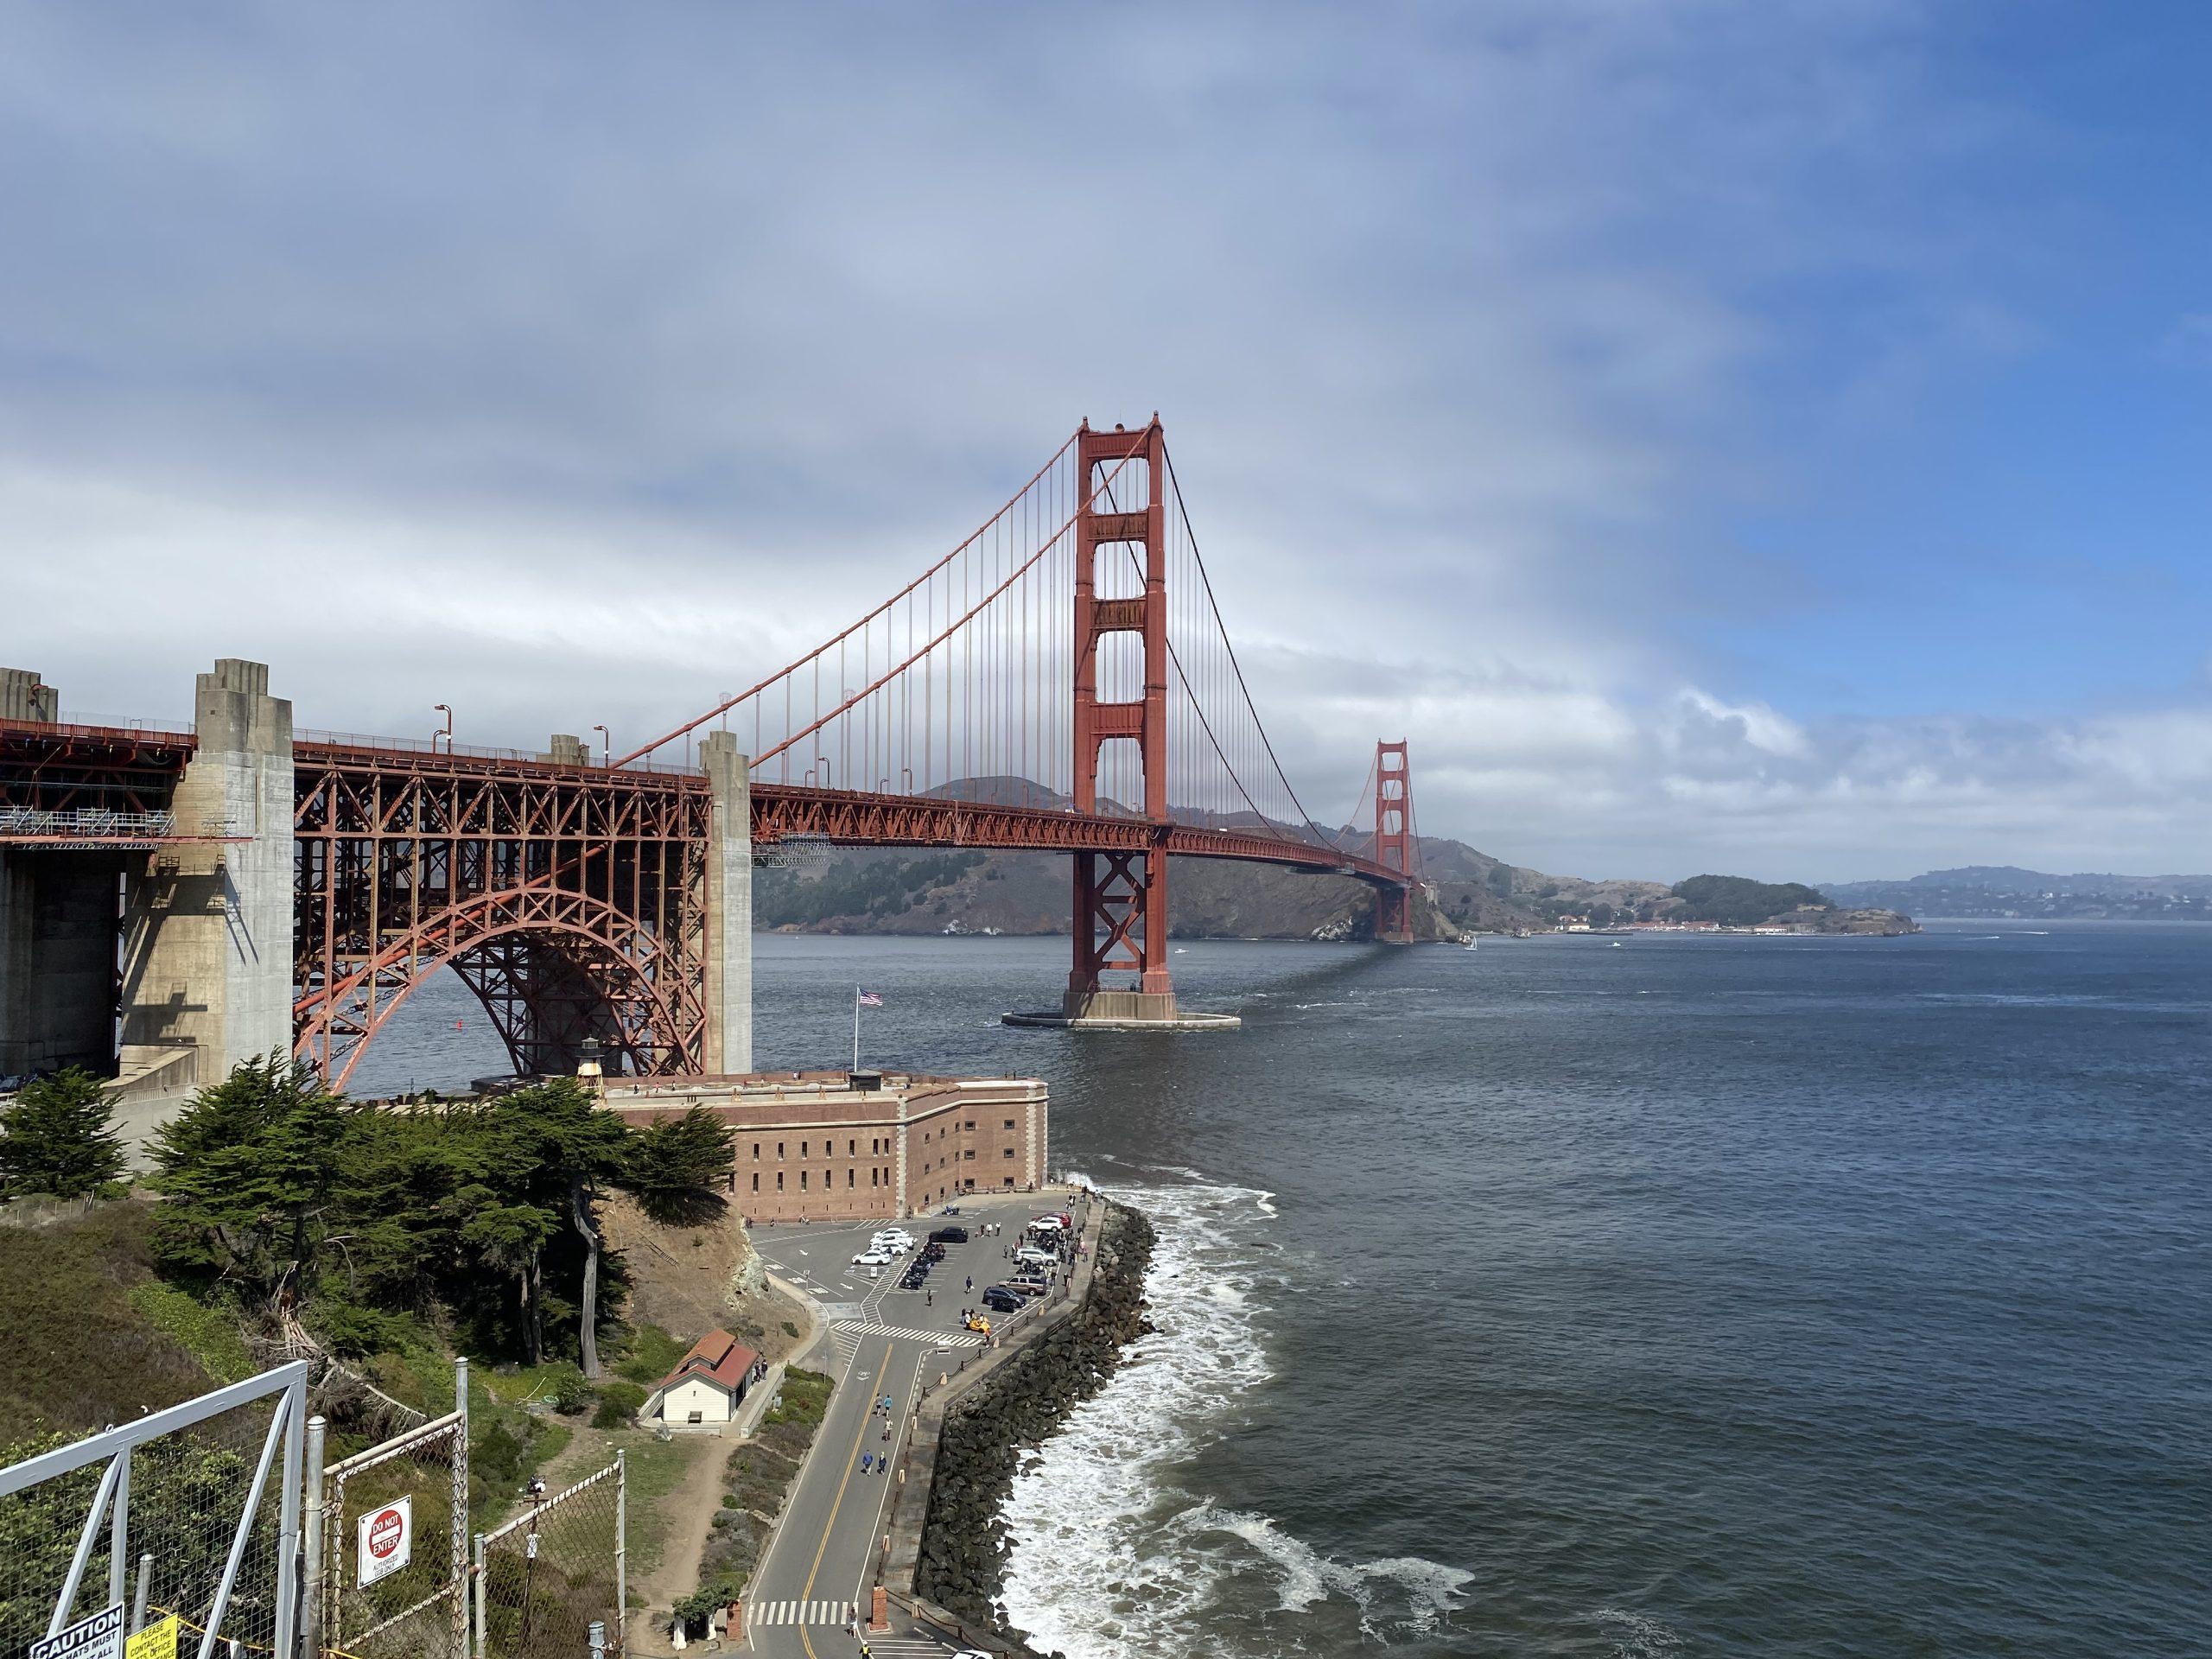
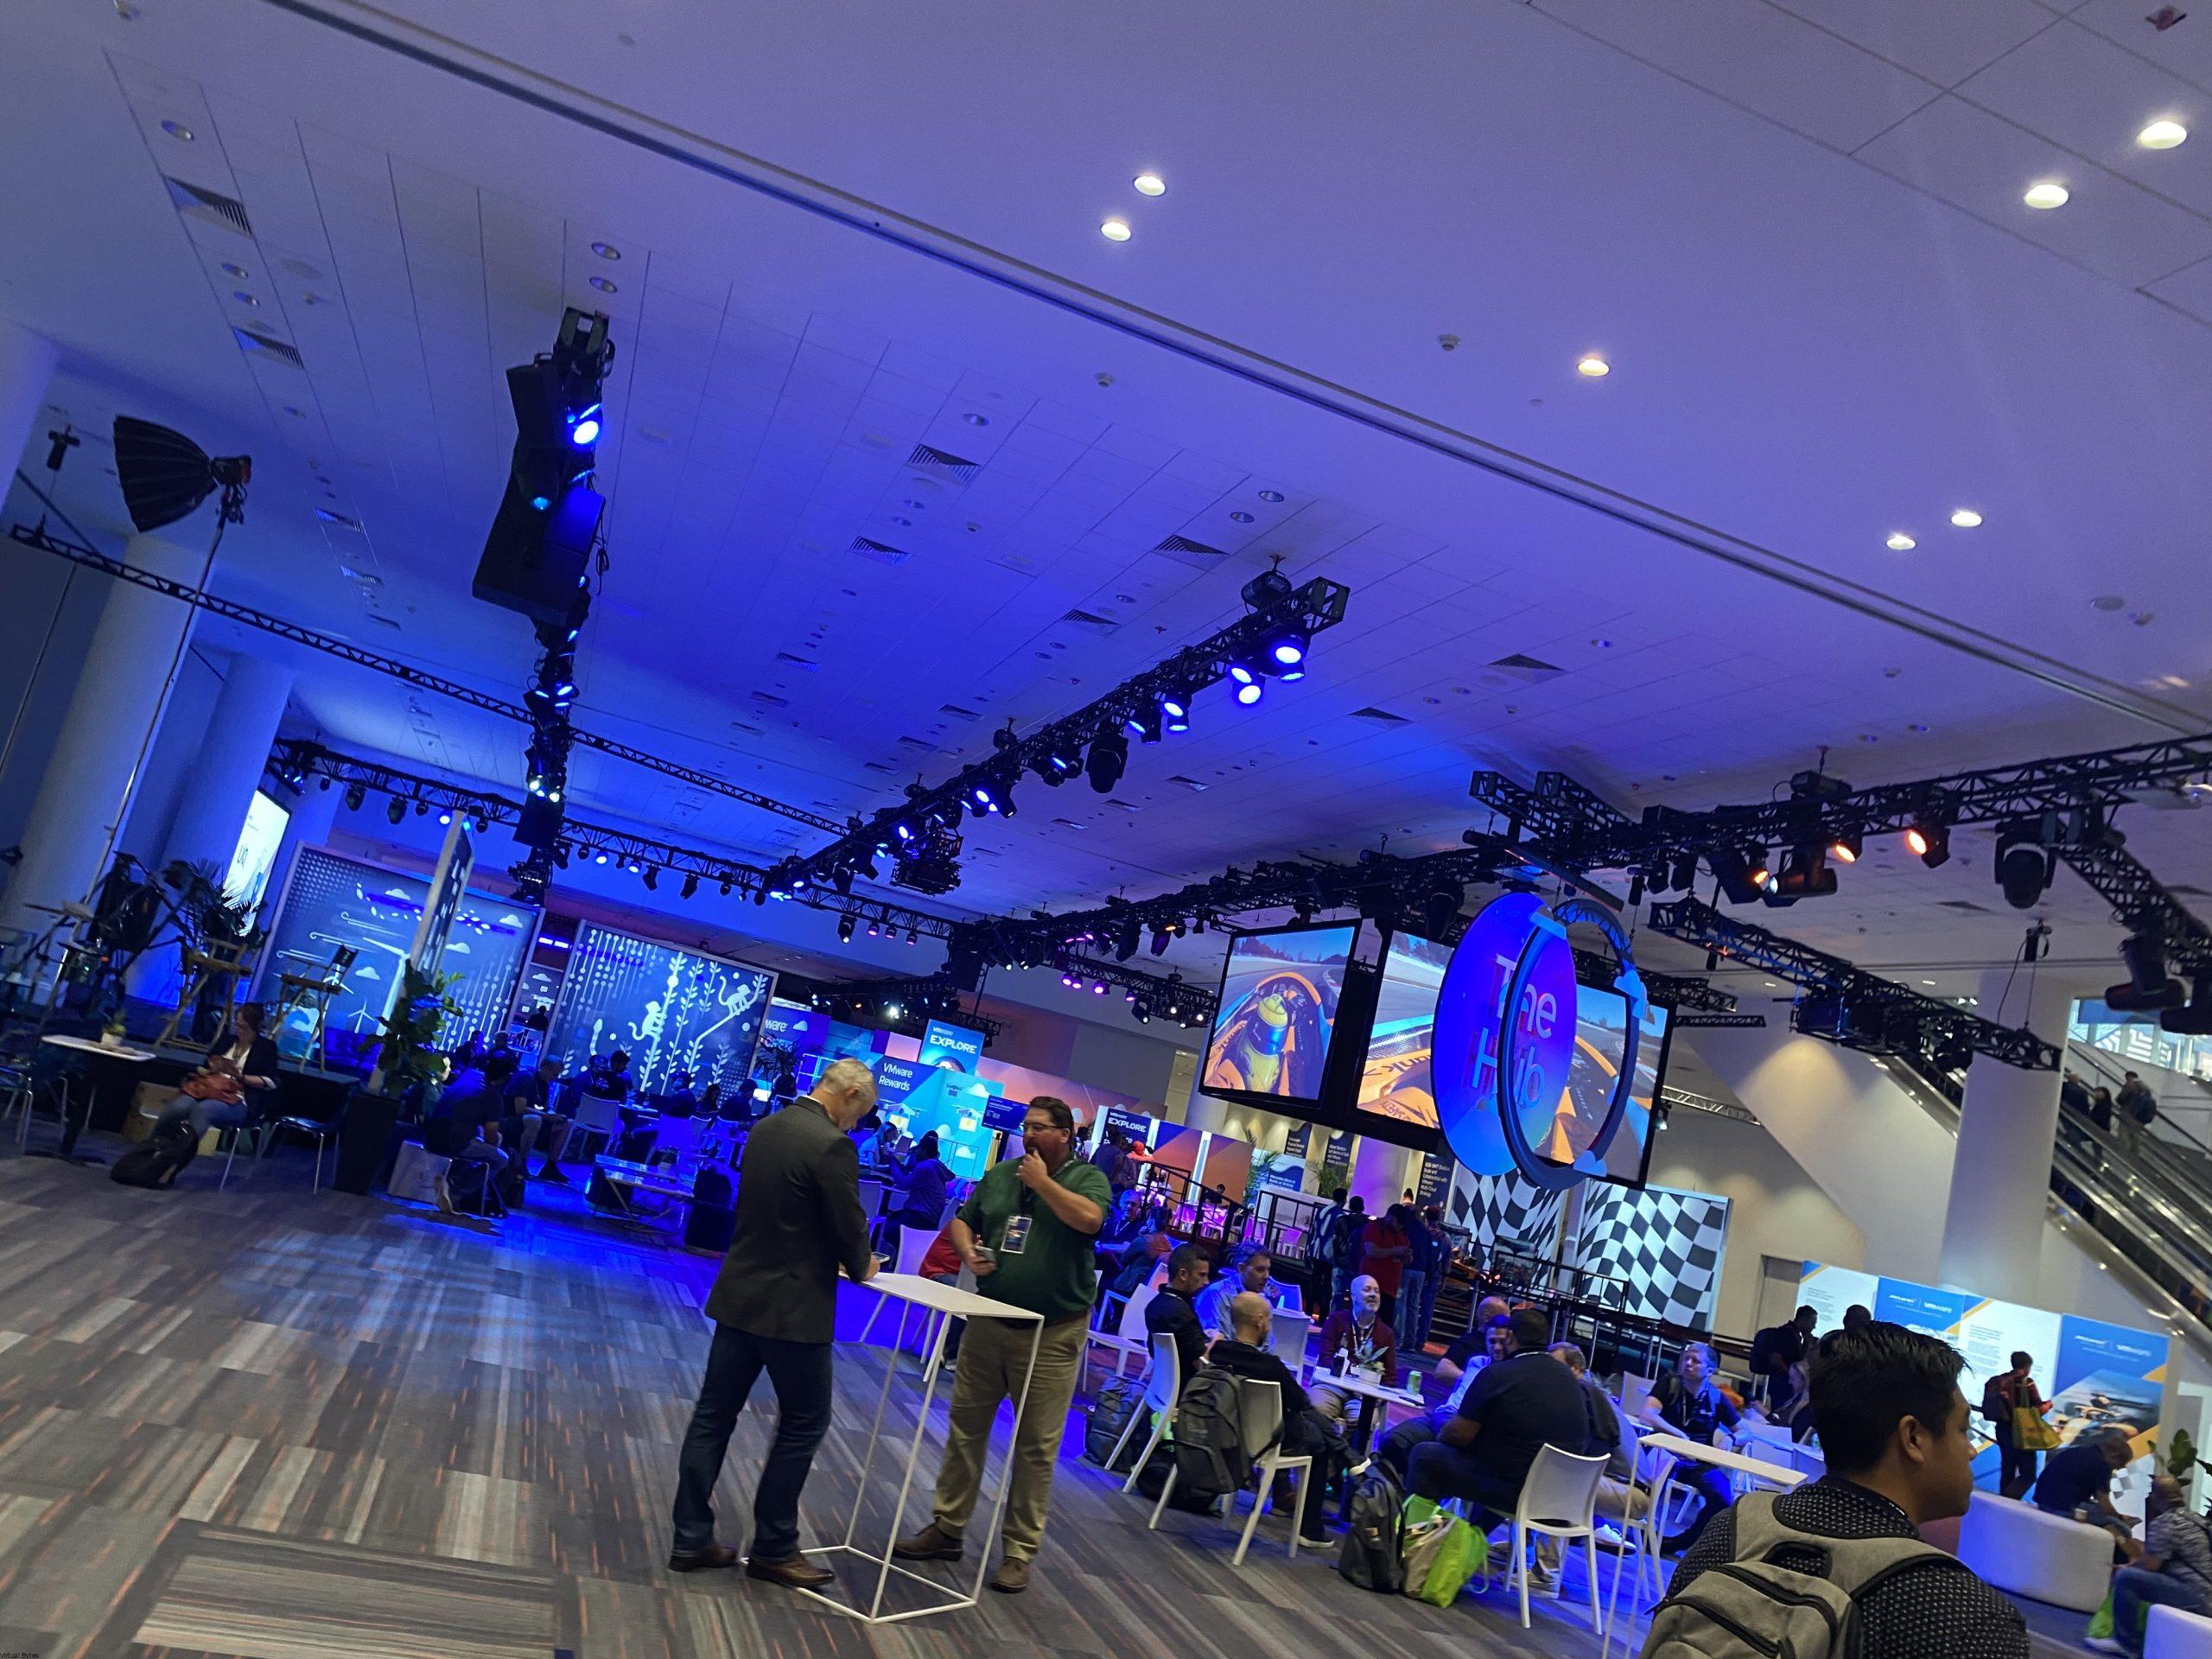
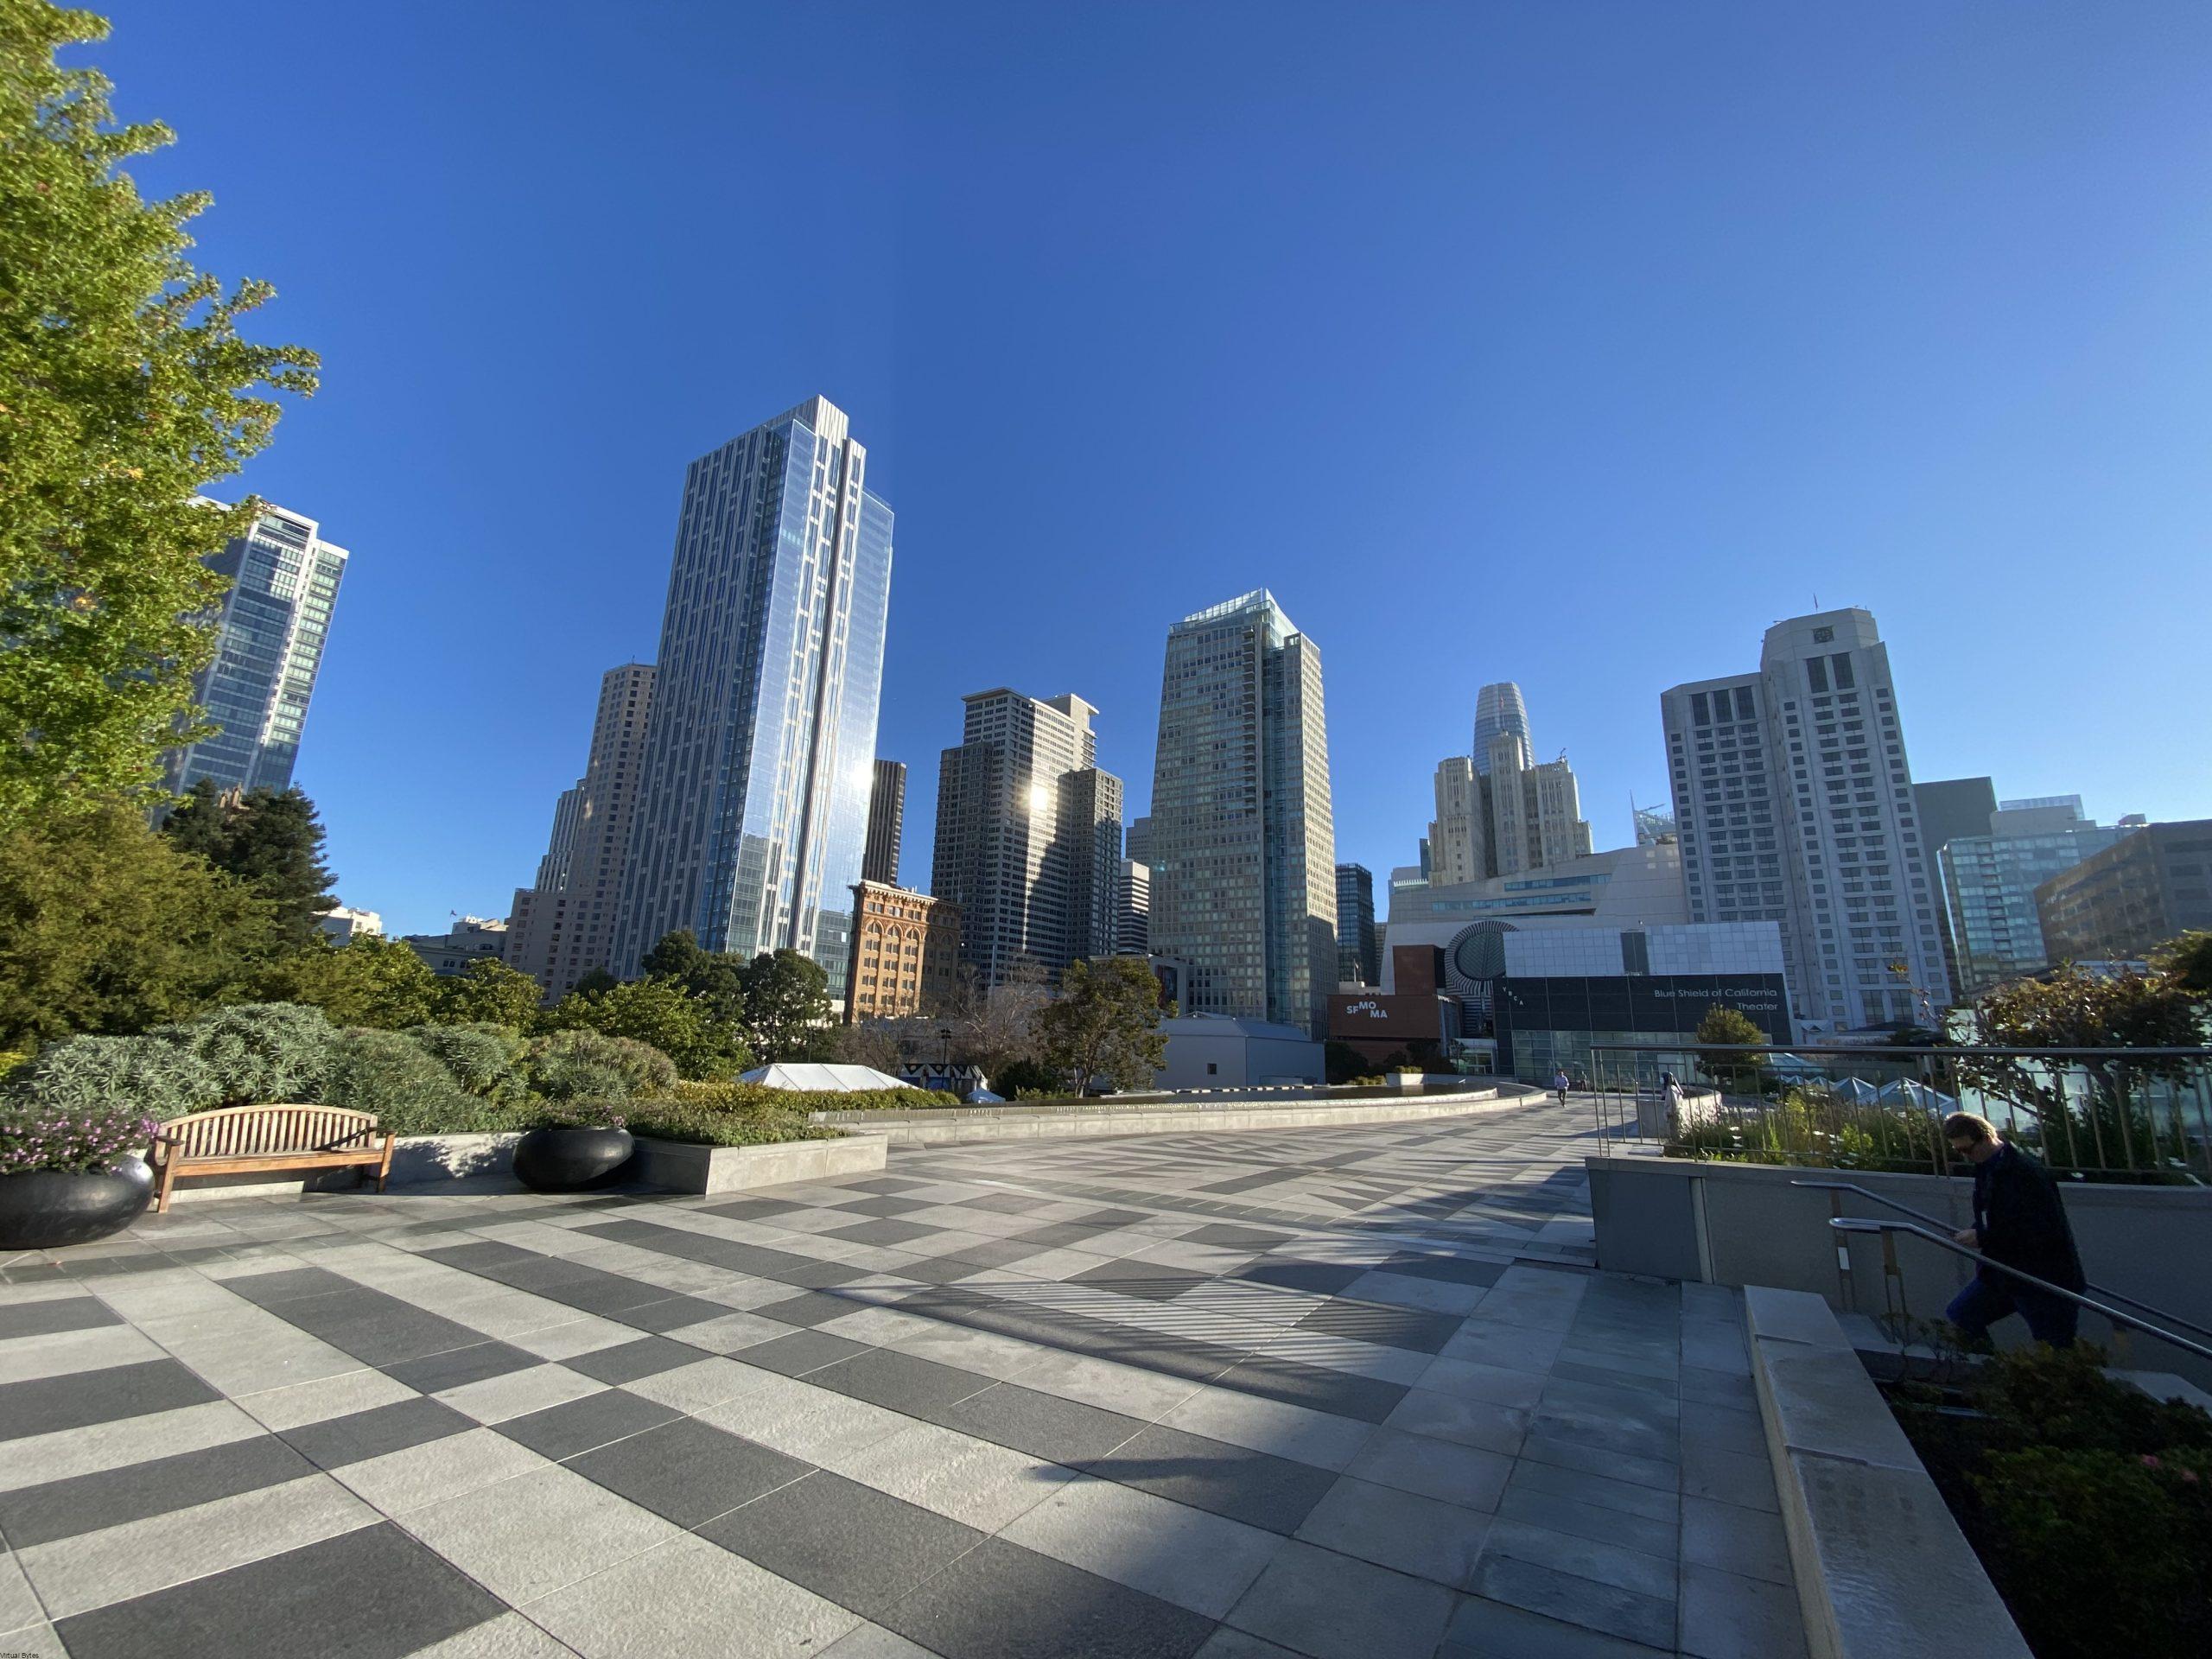
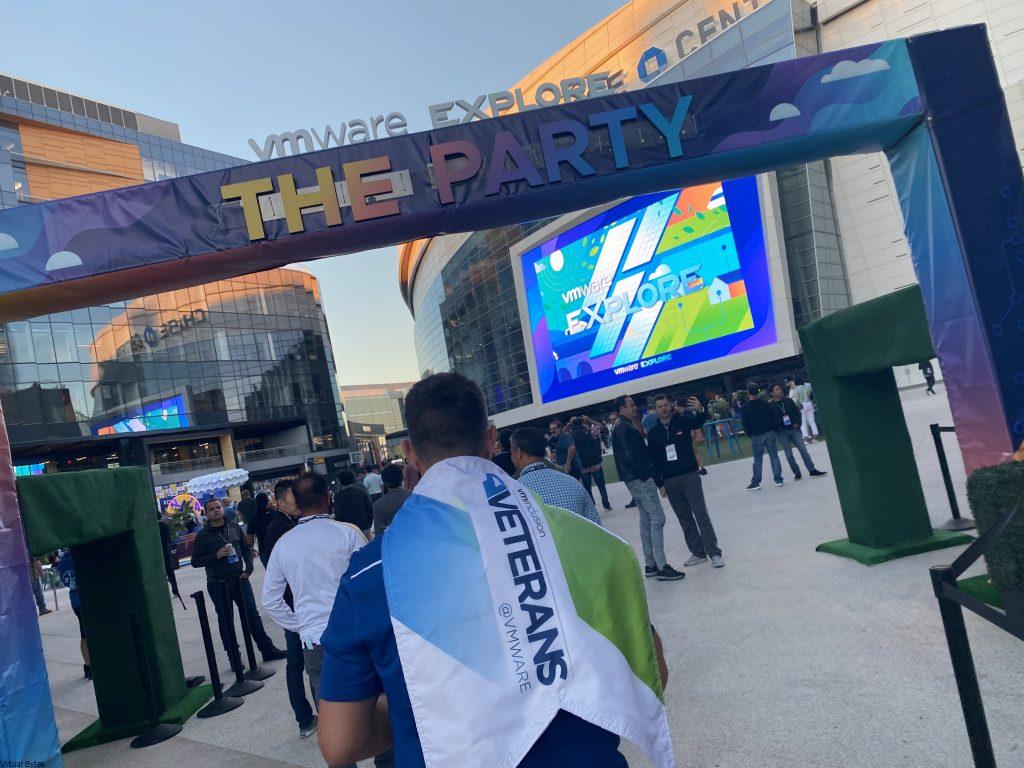
When we arrived at San Francisco it was a busy day with lots of exploration and adventures, the two guys I met on the plane we all got to explore San Francisco, Golden Gate Bridge and check out the Pier! We were all patiently waiting to get to our hotels and get our VMware Explore badges that Sunday we arrived! 
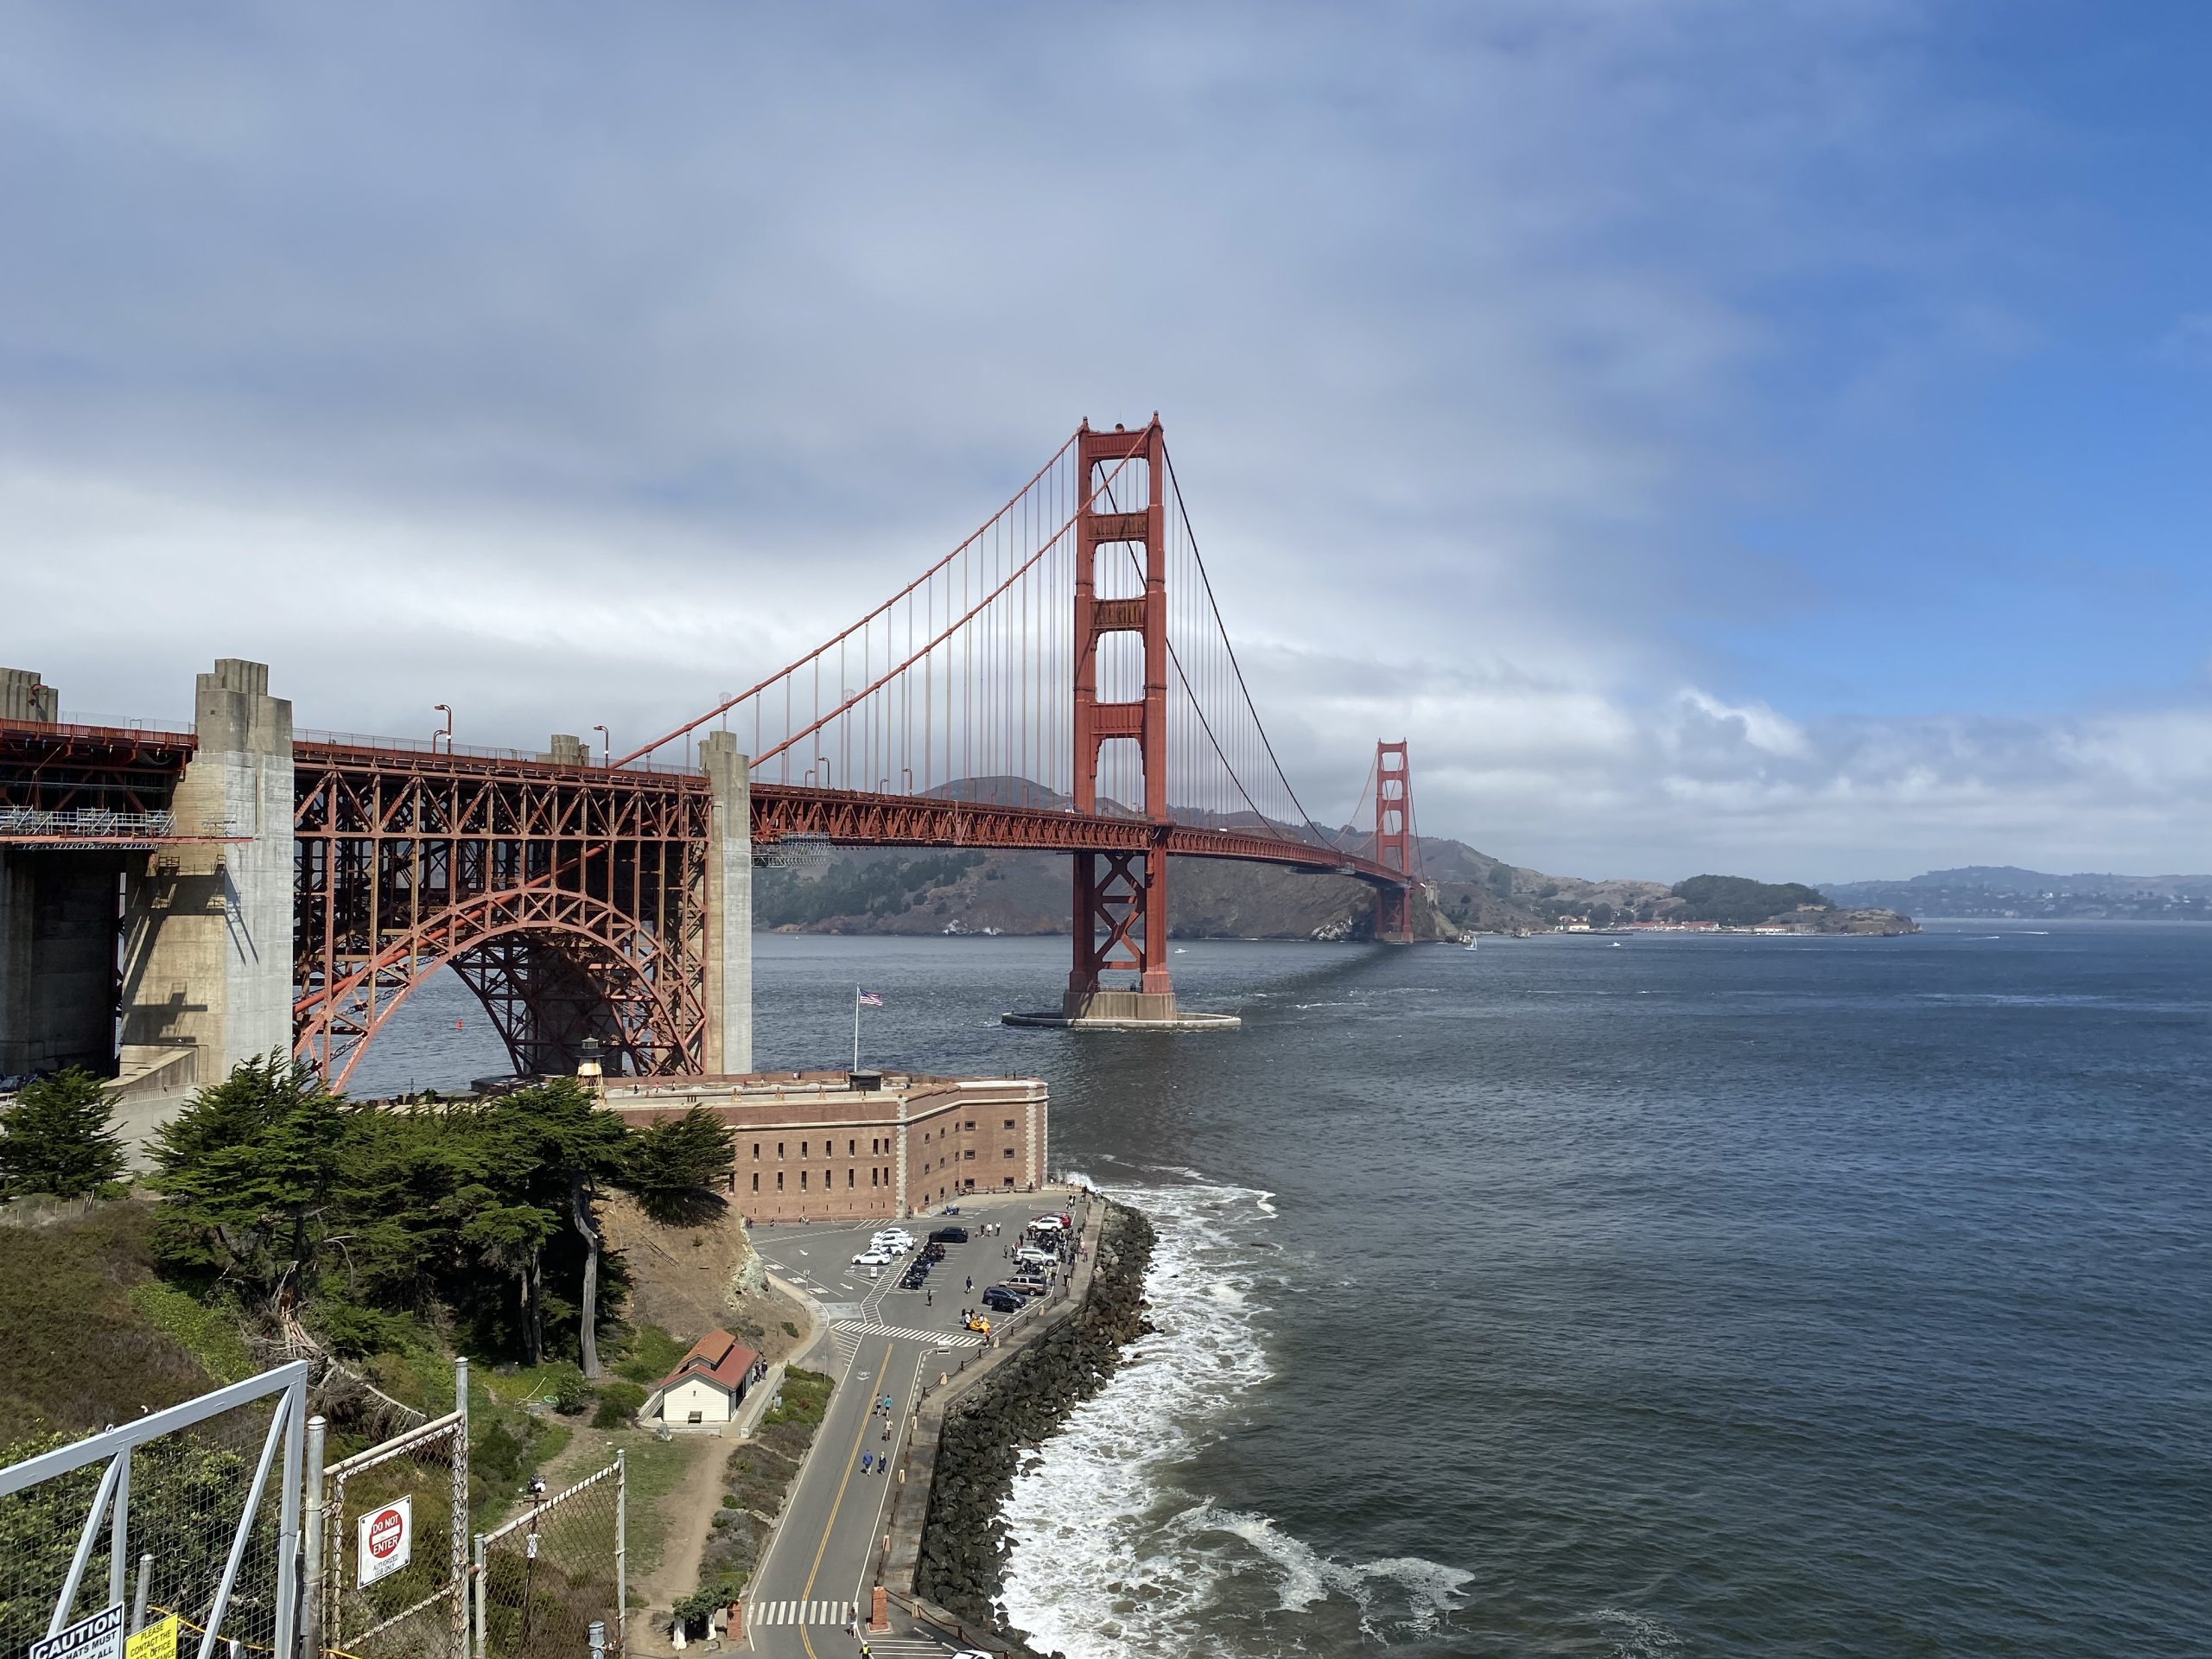
Monday came around the corner, I was so excited to go to the Moscone Convention Center and start exploring! I met even more people and even tagged along with many VMware employees! I have attended so many breakout sessions, and HOL events. It was hard to keep track of time. The General Session at Explore was amazing with the creativity and intros and how everything was laid out and well-presented it was amazing to experience it in person!
Picture of General Session – thousands of people were coming in!
The first day The Expo opened up!
I had the pleasure of meeting lots of other people and being able to collab and exchange knowledge and experiences. During my week with all the busy events, breakout sessions, I had meetings setup with a lot of the Vice Presidents & Management members of many of the Business Units within VMware (VMware Cloud Foundation, R&D Engineering, NSX ALB Team, VP of Products, Engineers and even the creator of VMware Cloud Director himself! ) It was a blast! and being able to exchange information and show case what I have been architecting and engineering a solution for my work. As with all those meetings going on, my most favorite was meeting Mark Gabryjelski #23 VCDX! He is Polish! just as I am, he and I got to geek out and show him my home lab! I even started the thought and goal I want to achieve, of being a VMware Certified Design Expert myself! Here I come for the VCDX!
(Me on Left, Mark Gabryjelski, VCDX#23 on right Right)
Overall, my experience at VMware Explore was amazing with the 41 Miles of walking I did, I can go on with so much more detail and keep talking about it but it might become a book! The VMware Party at the Chase Center Arena was awesome, tons of yummy food and tons of people! Local bands and DJ were playing live music!
                                                             THE PARTY!

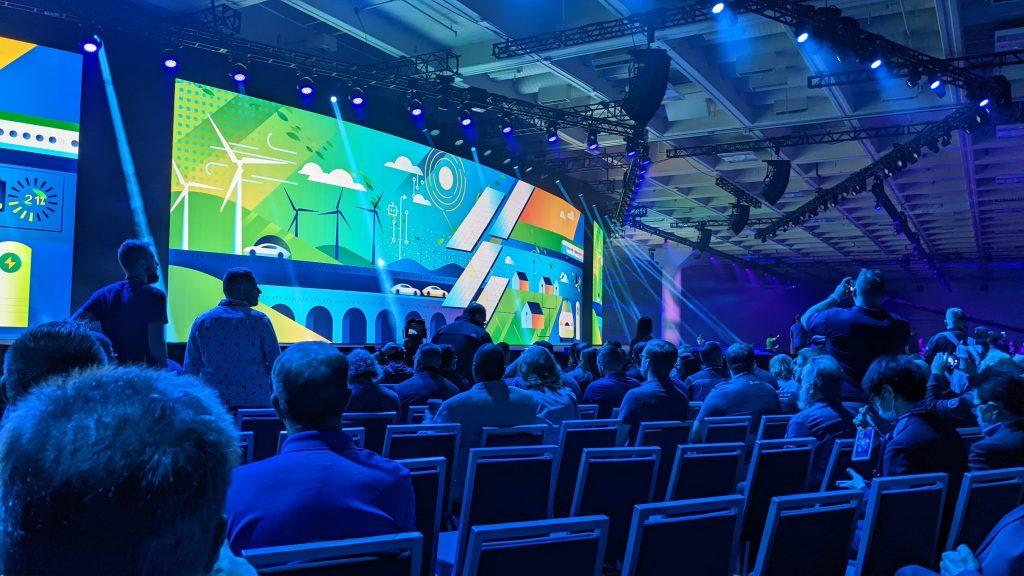
VMware Explore 2023 – Here I come!

September 14, 2022 0 comments 667 views
0 FacebookTwitterLinkedinEmail
Cloud

VMware Cloud Director – Customization & Branding w/ API

by Tommy Grot September 9, 2022
written by Tommy Grot 3 minutes read

A in depth post on how to customize your VMware Cloud Director! If your organization has a specific theme and logo, well tonight’s post will guide you through the steps to get it all configured and looking all spiffy!

By default, installation Cloud Director offers two types of themes, the default white mode and dark mode. You can manage, create, and add your own themes to VCD. The steps we will be following through will be done system level so all Tenants and the Provider will see the updated VCD UI!

First connect to VCD Cell appliance via SSH –

Change Directory to

cd /opt/vmware/vcloud-director/bin

Run the Cell Management Tool

./cell-management-tool manage-config -n backend.branding.requireAuthForBranding -v false

Next we will utilize Postman to do the next few tasks

Access Token Authentications

You will want to get your Access Token and API Version, below I will explain on how to do that to get your API version

Get -> https://<Your-IP-Here>/api/versions

Authorization Tab

  • Basic Auth – Username: “administrator@system” & Password: <your password>

Headers Tab

  • Key: Accept Value: application/*;version=37.0

Below is the supported version I utilized, I did not used the beta version.

</VersionInfo>
<VersionInfo deprecated="false">
    <Version>37.0</Version>
    <LoginUrl>https://172.16.204.120/cloudapi/1.0.0/sessions</LoginUrl>
    <ProviderLoginUrl>https://172.16.204.120/cloudapi/1.0.0/sessions/provider</ProviderLoginUrl>
</VersionInfo>

POST API Sessions

Now we will create a POST within Postman.

POST https://172.16.204.120/api/sessions

Authorization Tab

  • Basic Auth – Username: “administrator@system” & Password: <your password>

NOTE -> Once you execute the POST, make sure you get a 200 OK status before proceeding futher.

Next you will want to save the token above as sampled in the image, you will need it for the Beare Token.

Headers

  • KEY: x-vcloud-authorization VALUE: e31a8bd0d1244282bed8b4b809ba9e1f
  • KEY: X-VMWARE-VCLOUD-ACCESS-TOKEN VALUE: <eyJ….>

Cloud Director Web Portal Customization

For this next section you will need to execute GET calls to get the current portal configuration with the above Bearer Token KEYS and VALUES

GET https://172.16.204.120/cloudapi/branding

Once you execute the call you will want to go to the Body section and you will see something like this, but a fresh installation of VCD – Portal Name will be ” VMware Cloud Director” and the theme name would be “Default” Which mine is set to Dark mode.

Sample Body Configuration

{
    "portalName": "Virtual Bytes Cloud",
    "portalColor": null,
    "selectedTheme": {
        "themeType": "BUILT_IN",
        "name": "Dark"
    },
    "customLinks": [
        {
            "name": "help",
            "menuItemType": "override",
            "url": null
        },
        {
            "name": "imprint",
            "menuItemType": "override",
            "url": null
        },
        {
            "name": "about",
            "menuItemType": "override",
            "url": null
        },
        {
            "name": "vmrc",
            "menuItemType": "override",
            "url": null
        }
    ]
}

    Then once you get your custom configuration ready you will want to do a PUT Call via Postman

Once you POST your Branding configuration, go back to Web UI of VCD and hit refresh! You should see something like below 🙂

Cloud Director Web Portal Logo Customization

Now. for our logo we will do another API call via Postman to PUT a png file for the system level logo.

Authorization Tab

  • Bearer Token from previous API call we did

Headers

  • KEY: Accept VALUE: application/*;version=37.0
  • KEY: x-vcloud-authorization VALUE: “e31a8bd0d1244282bed8b4b809ba9e1f” <- Put your value for the call not mine 🙂
  • KEY: X-VMWARE-VCLOUD-ACCESS-TOKEN VALUE: “eyJhbGciOiJSUzI…..” <- I shorted the Bearer Token

Go to Body – Change it to binary and find your logo.png file to upload and then hit Send.

Top right corner you will see the logo I uploaded to Cloud Director!

September 9, 2022 0 comments 1.7K views
0 FacebookTwitterLinkedinEmail
CloudVMware Cloud Foundation

VMware Cloud Foundation 4.4.0 Offline Bundle Walkthrough

by Tommy Grot September 4, 2022
written by Tommy Grot 1 minutes read

Hey there tech enthusiasts! Are you ready to dive into the nitty-gritty details of upgrading your VMware Cloud Foundation offline bundle? Well, you’ve come to the right place! In this blog post, we’ll be breaking down everything you need to know about upgrading your VMware Cloud Foundation offline bundle, step by step.

This Offline Walkthrough is valid for any VMware Cloud Foundation – Offline Upgrade, ensure you have at lease the most up-to-date bundle utility to proceed

Go to Drivers & Tools

Download Bundle Transfer Utility

Upload the Bundle Utility tool to SDDC Manager appliance via WINSCP or SCP.

Change Director to

/opt/vmware/vcf/lcm/lcm-tools/bin

Then run the command below to generate a marker file (This lets the bundle utility know what is needed to be downloaded)

./lcm-bundle-transfer-util --generateMarker

Then open up WINSCP and connect to SDDC Manager (Login as VCF user)

Once you copeid them from the /root/ directory to your home/vcf directory, then refresh your WinSCP window and you shall see the marker file.

If you do run into permission issues, elevate from vcf to root via ” su ” , type in password and then once your as root, run these commands.

chmod 777 markerFile
chmod 777 markerFile.md5
chown vcf:vcf markerFile
chown vcf:vcf markerFile.md5

Then copy the two maker files into your vcf directory on C:\

Run the command, you will see a long list of bundles-(xxxxx) to download, some will be patches, and installs, but you want the correct version for your VCF Bill of Materials.

Run the command below

./lcm-bundle-transfer-util -upload -bundleDirectory /nfs/vmware/vcf/nfs-mount/offlinebundle

Thats all! Now let the bundles keep getting ingested, this will take a bit depending on the amount of bundles.

September 4, 2022 1 comment 2.1K views
0 FacebookTwitterLinkedinEmail
VMware NSX

VMware NSX 4.0.0.1 Upgrade from NSX-T 3.2.1

by Tommy Grot August 7, 2022
written by Tommy Grot 2 minutes read

Want to upgrade to VMware NSX? Yes, thats the new name for VMware NSX-T Datacenter. It has been renamed. More information from VMware.

Product Name Change: With the release of 4.0.0.1 the product name changes from “VMware NSX-T Data Center” to “VMware NSX.” This new name better reflects the multi-faceted value that NSX brings to customers. This update is apparent in the product graphical user interface as well as documentation. This change has no impact to the functionality of the product or changes to the API that impacts compatibility with previous releases. Want More info? Check out VMware’s site

First things first! Lets log into your NSX-T primary node. Then go to System and Upgrade.

Upload the VMware-NSX-upgrade-bundle-4.0.0.1.0.20159689.mub file.

This will take few min to upload, depending on your connection speeds.

This will verify the matrix and other settings prior to upgrading.

Once, the compatibility has been checked. Next you will need to accept the EULA.

Now, lets fire up the upgrade! This will upload the required files to each of the NSX-T Managers.

Continuation of the Upgrade Preperation

Run a Pre-Check before you execute the upgrade!

After, everything has passed the pre-checks. You may start the upgrades, but make sure you have backups if something happens and you need to restore! If you need to know how to setup backups check out my other post.

This will take few minutes, you may step away and come back, you should see the progress go through, starting from the NSX Edge Nodes, then ESXi Hosts, then VMware NSX Managers.

This will start the upgrade of the NSX Managers. Make sure again, that you have backups configured!!

After 15-20 minutes, depending on the environment your upgrade should be done! And that is it! Very simple way to upgrade NSX without any downtime!

August 7, 2022 0 comments 5.4K views
0 FacebookTwitterLinkedinEmail
Hardware ReviewsHome-Labs

DellEMC PowerEdge R750 – Review & Benchmarks

by Tommy Grot July 21, 2022
written by Tommy Grot 8 minutes read

I have gotten my hands on a DellEMC PowerEdge R750. I have been grateful to collaborate with Express Computer Systems to get access to try out and create an awesome review of this hardware. This enterprise rack mount server is a powerful workhorse being powered by the 3rd Generation Intel Xeon Scalable Processors, is a dual socket/2U rack mount server. Of course, I have racked and installed it in my Home Lab 😊. During the initial unboxing, I was amazed on how this server is built from DellEMC, I mean all DellEMC Servers are built to be tough and reliable and a cool feature to see within Dell line up of servers is Water Cooling!! Yes, the DellEMC PowerEdge R750 support an optional Direct Liquid Cooling for keeping up with the increasing power and thermal workloads.


Need Enterprise Hardware? Contact Parker at Express Computer Systems
  • Parker Ware – 949-553-6445
  • [email protected] or [email protected]


Now, lets get into the deep dive of the DellEMC PowerEdge R750!

When I first opened the top cover of the chassis, I was amazed. The modular architecture that DellEMC is implementing into their new 15th Generation Servers. PCIe Risers are now much more modular than before, the tool less design – allows the riser card to be removed and install your choice of PCIe card and install it back into the server without any tools.


Specifications

  • 2x Intel® Xeon Gold 6342 2.80GHz 24 Core
  • 4x Dell 2.5” U.3 1.92TB PCIe Gen4 NVMe SSD
  • 2x Dell PERC H755n NVMe RAID Controllers
  • 8x Hynix 128GB DDR4 PC4-3200AA DIMMs
  • 2x Dell 1400W Hot swap EPP PSU
  • 1x Dell/Intel E810 Quad Port 10/25

Front View with Security Bezel

Picture of the DellEMC PowerEdge R750 next to my DellEMC PowerEdge R740.

Now, we will start breaking down the review and we will get into all aspects of the server.


Processors

Intel® Xeon® Gold 6342 Processor (36M Cache- 2.80 GHz)

The Processors installed within the DellEMC PowerEdge R750XD, consist of 2 Intel® Xeon® Gold 6342 Processor (36M Cache- 2.80 GHz). These CPUs are very efficient power consumption for the core/watt ratio. We will get in more depth on the Power Usage in the Power / Efficiency section of the blog. Below are the Specifications from Intel’s Website, there are more features these CPUs offer, if interested check Intel’s website – here.

  • Status Launched – Launch Date Q2’21
  • Lithography 10 nm
  • Total Cores 24
  • Total Threads 48
  • Max Turbo Frequency 3.50GHz
  • Processor Base Frequecny 2.80GHz
  • Cache 36MB
  • Intel® UPI Speed 11.2GT/s
  • Max # of UPS Links 3
  • TDP – 230W
  • Max Memory Size – 6TB
  • Memory Types DDR4-3200
  • Maximum Memory Speed – 3200MHz
  • Max # of Memory Channels 8
  • ECC Memory Supported – Yes
  • Intel® Optane™ Persistent Memory Supported – Yes
  • Sockets Supported – FCLGA4189
  • TCASE 81°C
  • Intel® Speed Select Technology – Core Power – Yes
  • Intel® Speed Select Technology – Turbo Frequency – Yes
  • Intel® Deep Learning Boost (Intel® DL Boost) – Yes
  • Intel® Speed Select Technology – Base Frequency – Yes
  • Intel® Resource Director Technology (Intel® RDT) – Yes
  • Intel® Speed Shift Technology – Yes
  • Intel® Turbo Boost Technology ‡ 2
  • Intel® Hyper-Threading Technology ‡ + Yes
  • Intel® Transactional Synchronization Extensions – Yes
  • Intel® 64 ‡ – Yes
  • Instruction Set Extensions – Intel® SSE4.2 | Intel® AVX | Intel® AVX2 | Intel® AVX-512

CPU Benchmarks – pulled from CPUBenchmark.net

CPU Average Results
  • Integer Math
  • Floating Point Math
  • Find Prime Numbers
  • Random String Sorting
  • Data Encryption
  • Data Compression
  • Physics
  • Extended Instructions
  • Single Thread
  • 193,556 MOps/Sec
  • 111,134 MOps/Sec
  • 233 Million Primes/Sec
  • 87 Thousand Strings/Sec
  • 37,043 MBytes/Sec
  • 666.5 MBytes/Sec
  • 3,820 Frames/Sec
  • 52,433 Million Matrices/Sec
  • 2,453 MOps/Sec

Memory Features

The memory, that is installed is SK Hynix 128GB DDR4 PC4-3200AA DIMM, total of 8 DIMMS. I have attached below a table of the memory specifications.

Capacity128GB
SpeedDDR4 3200 (PC4 25600)
CAS Latency13
Voltage1.20 Volts
Load ReducedLoad Reduced
Rank4Rx4


Storage

The server has 4 Dell 2.5” U.3 1.92TB PCIe Gen4 NVMe SSD. These NVMe PCIe disks have shown outstanding performance runs. I have compiled some benchmark tests with Crystal Disk Mark, below are few pictures I have taken of the Disks. The Controller that is backing these NVMe U.3 Gen4 SSDs are two PERC H755N Front NVMe.

Crystal Disk Mark – Benchmark Tests.

The speeds that are shown below are tested on a virtual machine on VMware ESXi 7.03f with specifications 6vCPUs, 16GB Memory, 90GB VMDK Disk.

I was shocked, when I saw these results of a single server being able to offer these kind of speeds. I cant imagine having a RDMA setup with a vSAN Cluster with 4 of these Dell PowerEdge R750 servers. RDMA = Remote Direct Memory Access

Test on the left – 9 x 1GB Temp Files

Test on the right -9 x 8GB Temp Files

There are few configurations of the DellEMC PowerEdge R750 Series –
  • Front bays:
    • Up to 12 x 3.5-inch SAS/SATA (HDD/SSD) max 192 TB
    • Up to 8 x 2.5-inch NVMe (SSD) max 122.88 TB
    • Up to 16 x 2.5-inch SAS/SATA/NVMe (HDD/SSD) max 245.76 TB
    • Up to 24 x 2.5-inch SAS/SATA/NVMe (HDD/SSD) max 368.84 TB
  • Rear bays:
    • Up to 2 x 2.5-inch SAS/SATA/NVMe (HDD/SSD) max 30.72 TB
    • Up to 4 x 2.5-inch SAS/SATA/NVMe (HDD/SSD) max 61.44 TB
PERC H755N Front NVMe

If you would like to read up more on the Storage Controller, here is the website to DellEMC’s website.


Power

I was shocked on the power consumption, at peak I have seen 503 watts consumed, where at idle workloads the server sits around 360-390 watts with two beefy Intel Xeon Scalable CPUs and 1TB of Memory and 4 NVMe SSDs.

Below is the current power reading as the server is operational and there is workload running on it.

I have pulled a snippet of the Historical Trends from iDRAC. As you can see the power usage for the performance per watt is a great ROI on any investment where datacenters need consolidated designs where power and space are limitations.

This DellEMC PowerEdge R750 that I have up and running has two 1400watt power supplies. I have both of these connected n two seperate PDUs with Eaton UPS Systems.

Detailed Info about the Power Supplies (DellEMC)

Power Supply Units(PSU) portfolioDell’s PSU portfolio includes intelligent features such as
dynamically optimizing efficiency while maintaining availability
and redundancy. Find additional information in the Power
supply units section.
Industry ComplianceDell’s servers are compliant with all relevant industry
certifications and guidelines, including 80 PLUS, Climate
Savers, and ENERGY STAR
Power monitoring accuracyPSU power monitoring improvements include:
● Dell’s power monitoring accuracy is currently 1%, whereas
the industry standard is 5%
● More accurate reporting of power
● Better performance under a power cap
Power cappingUse Dell’s systems management to set the power cap limit for
your systems to limit the output of a PSU and reduce system
power consumption.
Systems ManagementiDRAC Enterprise provides server- level management that
monitors, reports, and
controls power consumption at the processor, memory, and
system level.
Dell OpenManage Power Center delivers group power
management at the rack, row, and
data center level for servers, power distribution units, and
uninterruptible power supplies.
Rack infrastructureDell offers some of the industry’s highest- efficiency power
infrastructure solutions, including:
● Power distribution units (PDUs)
● Uninterruptible power supplies (UPSs)
● Energy Smart containment rack enclosures

Cooling & Acoustics

I have pulled Temperature statistics, as of writing this review. The CPUs are staying very cool, which the new “T” shape cooler design spreads the heat out evenly and which allows the CPUs to cool down quicker than the older traditional tower heat sinks where the heat had to rise up through the copper pipes.

Direct Liquid Cooling – New 15G PowerEdge platforms will offer CPUs with higher power than ever before. Dell is introducing new Direct Liquid Cooling (DLC) solutions to effectively manage these growing thermal challenges. Dell DLC solutions cool the CPU with warm liquid which has much greater (~4x) heat capacity versus air. Thus, DLC is a higher performance cooling solution for managing the CPU temperature while also enabling higher performance and better reliability more info at (DellEMC)

Thermal Statistics & Fans


High-performance fan (Gold grade) fans – Power Specifications 6.50A 12 Volts.

Disclaimer! Mixing of STD, HPR SLVR, or HPR GOLD fan is not supported.


Front & Rear I/O

In the front, the Dell PowerEdge R750 offers:

  • 1x USB
  • 1x VGA
  • 1x Maintaince port
  • 1x Power Button
  • 1x iDRAC Locator & iDRAC Sync

In the rear, the Dell PowerEdge R750 offers:

  • 2x DellEMC Boss Card Slots
  • 2x 1Gb LOM
  • 6x Large PCIe Slots
  • 4x 10/25Gb NDC
  • 1x iDRAC
  • 2x USB 3.0
  • 1x VGA

The Riser topology that DellEMC has started using within the Dell Line up of 15Generation servers is really neat, I like how easy and quick it is to take out a PCIe riser. No Tools are needed! Within minutes I was able to take apart the server and have all the risers out, there is two cables that are connected to Riser 1 which is the Dell Boss NVMe/SSD card which is labeled “0,1” once you disconnect those two cables it’s a breeze!

Dell BOSS S2 module – They are now hot swappable! Before when you needed to swap out a boss card, you had to migrate off your workloads, and shut down the server and pull the top cover, then pull out the PCIe Dell Boss card from the riser and unscrew the NVMe / SATA SSD from it. Which that would impact workloads to business continuity. Now, with Dell 15th Gen Dell PowerEdge R750. You can HOT SWAP! This will improve efficiency of replacing failed boot disk and bringing workloads back up in matter of minutes rather than hours!

Dell PowerEdge R750 – Racked and Powered on! Beautiful Lights!!

References to Websites – in direct links in each section with any content from DellEMC / VMware etc.

July 21, 2022 0 comments 4.1K views
3 FacebookTwitterLinkedinEmail
CloudNetworking

Workspace One Access Integration with NSX-T

by Tommy Grot May 29, 2022
written by Tommy Grot 1 minutes read

Tonight’s quick walkthrough on how to integrate NSX-T and Workspace One Access (VIDM) This allows workspace one to create a OAuth connection with NSX-T where you can control user access via WSOA and leverage Active directory and instead of trying to manage local accounts and dealing with a mess!

Login into NSX-T Manager -> System

User Managment -> Edit

Then Login into Workspace One Access ->Catalog ->Settings

Go to Remote App Access -> Click on Create Client

Fill in the Name of the Client ID, I chose nsx-mgr-OAuth-wsoa

Generate Shared Secret, copy it so then when we go back to Workspace One Access we can paste it in.

Now. that we are back in NSX-T, fill in your FQDN for your workspace one appliance if you have a load balancer setup then enable it but for this walk through we are doing a single Workspace One Appliance.

Now, that we have the few things filled out, Dont click Save Just yet!

SSH into your Workspace One Appliance. We will get the SSL Thumbprint.

Change directory to /usr/local/horizon/conf

If you are using a CA Signed Certificate you will need to follow the prompt below.

openssl s_client -servername workspace.yourfqdn.io -connect workspace.yourfqdn.io:443 | openssl x509 -fingerprint -sha256 -noout

There is our fingerprint! Now we copy and go back to NSX-T

After the Integration is complete, now go back to Workspace One and add the users / groups through Active Directory.

May 29, 2022 0 comments 2.4K views
0 FacebookTwitterLinkedinEmail
EducationNetworking

VMware NSX Ninja Program

by Tommy Grot May 13, 2022
written by Tommy Grot 1 minutes read

So where to begin? My goal I have is to become a VCIX within DCV and NV, but it will come soon! I have been passionate about learning and progressing my skill sets within VMware Solutions and creating complex environments, but with coming along with few folks at VMware which invited me into VMware NSX Ninja Program for NSX-T and VCF Architecture. As this Program is geared toward the Intermediate / Expert level it does challenge you but I have managed to succeed! I have finished Week 1 of 3, the VMware Certified Instructors are amazing they teach and walk-through real-world solutions which let you get a good understanding of the many bells and whistles that NSX-T and VCF can offer! As i go through the journey of the NSX Ninja, I will be adding more great content to this post! Stay Tuned 🙂

NSX Ninja Week 1 – Overview

May 13, 2022 0 comments 1.5K views
1 FacebookTwitterLinkedinEmail
Cloud

VMware Cloud Director 10.3.3: Creating a Tenant

by Tommy Grot April 15, 2022
written by Tommy Grot 3 minutes read

A little about what VMware Cloud Director is – it is a CMP or also known as a cloud managment plane which supports, pools and abstracts the VMware virtualization infrastructure as (VDC) Virtual Data Centers. A provider can offer many different flavors and specifcations of a Tenant to a customer, it could be a Gold, Silver or Bronze types of capacity and tiering which allows a good allocation model depending on a customer that needs a higher guarenteed resource usage or allocation where as a lower tier customer wants to test few software solutions they could use a bronze tier and be able to save costs.

Once you are logged in, then you will want to create few things first! But my previous blog post already explains on how to add a vCenter Server and NSX-T integration here at this post.

Well lets begin! First we will want to create a Network pool which is a VXLAN that will reside within the tenant environment will run ontop of Geneve on the overlay!

  • Login into the Provider portal of VCD with the administrator account
  • https://<vcd-ip>/provider/

Go to Network Pools

The network will be Geneve backed to ride the NSX-T overlay

Select the NSX-T Manager

The network pool which is backed by NSX-T Transport Zone we will want to select the transport zone that you have created for your edge nodes during the NSX-T setup.

Once you have your Network Pool setup and followed the steps you should see something like this!

Network Pool has been successfully created as shown below

After a network pool has been created, next we will create the Provider VDC ( Virtual Data Center)

Select the Provider vCenter you have configured within the Infrastructure portion

Select the Cluster, for me – I have a vSAN Cluster

Once you select the vSAN or Cluster you have in your envirnonemnt, you may proceed but the Hardware Version should be left as default since this is the maximum hardware version VCD can run and accept.

Select vSAN Storage Policy if you have vSAN if not then select the proper storage policy your storage platform is using
The network pool we created earlier, this is where we get to consume it and we let NSX-T manager and Geneve network pool run out VCD environment
  • Next, we will create an organization for us to be able to attach a VDC to
    it, which for this walk through my org is Lab-01. That will be the same name
    you use when you login as a tenant into VCD.
  • An organization is just a logical group of resources that are presented to customers, where each organization has its own isolation/security boundaries and their own Web UI which they can use an identity manager to integrate such as LDAP for seamless user management.

Once a New Organization has been created, next we will create a Organization VDC (Virtual Data Center)

Click on Organizations VDCs and Create “NEW” Organization

Type a name of the organization you wish to create

Attach that organization to the provider virtual datacenter we created earlier

Select the allocaiton model, I have seen the Flex model be the most flexible to have the ability to have better control over the resources even at the VM level. More information is here on VMware’s website

For this demonstration, I am not allocating and resource I am giving my Tenant unlimited resources from my vSAN Cluster, but for a production environment you will want to use the proper allocation model and resources.

Select the Storage policy along with i like to enable Thin provision to save storage space!

Each organization will have its own Network Pool but it will run ontop of the Geneve overlay

About to finish up the setup of a VDC!

We have logged into the new Tenant space we have created! 🙂

April 15, 2022 0 comments 1.4K views
0 FacebookTwitterLinkedinEmail
Cloud

Upgrading VMware Cloud Director to 10.3.3

by Tommy Grot April 14, 2022
written by Tommy Grot 4 minutes read

Upgrading VMware Cloud Director from 10.3.2.1 to 10.3.3, primarily to fix a Security Vulnerability.

Also, there are some enhancements which follow:

What is New?!

The VMware Cloud Director 10.3.3 release provides bug fixes, API enhancements, and enhancements of the VMware Cloud Director appliance management user interface:

  • Backup and restore of VMware Cloud Director appliance certificates. VMware Cloud Director appliance management interface UI and API backup and restore now includes VMware Cloud Director certificates. See Backup and Restore of VMware Cloud Director Appliance in the VMware Cloud Director Installation, Configuration, and Upgrade Guide.
  • New /admin/user/{id}/action/takeOwnership API to reassign the owner of media.
  • Improved support for routed vApp network configuration of the MoveVApp API.

This release resolves resolves CVE-2022-22966. For information, see https://www.vmware.com/security/advisories.

There are also lots of fixes, if your VCD is having issues there is a possibility this upgrade could fix lots of issues!

All the Fixes are listed on this site : https://docs.vmware.com/en/VMware-Cloud-Director/10.3.3/rn/vmware-cloud-director-1033-release-notes/index.html

First things first, lets download the newest release for VMware Cloud Director 10.3.3 – File Name: VMware_Cloud_Director_10.3.3.7659-19610875_update.tar.gz

Then shutdown your VCD Cells if you have multiple of them. Once they are turned off take a snapshot of all of them, along with the NFS Transfer Service Server usually it is a VM, take a snapshot of it too just in case you want to roll back if any issues occur.

Next we will want to upload the tar.gz file via WINSCP to the primary VCD Cell if you have a HA VCD topology, then the secondary get upgraded after the primary is finished.

I have logged into the VCD appliance with root account

Then open up a Putty session to the VCD appliance login as root,

Then change directory to /tmp/

Once in the directory:

Make Directory with the command below:

mkdir local-update-package

Start to upload the tar.gz file for the upgrade into /tmp/local-update-package via WINSCP

File has been successfully uploaded to the VCD appliance.

Then next steps we will need to prepare the appliance for the upgrade:

We will need to extract the update package in the new directory we created in /tmp/

tar -zxf VMware_Cloud_Director_v.v.v.v–nnnnnnnn_update.tar.gz \ -C /tmp/local-update-package

You can run the “ls” command and you shall see the tar.gz file along with manifest and package-pool

After you have verified the local update directory then we will need to set the update repository.

vamicli update – -repo file:///tmp/local-update-package

Check for update with this command after you have set the update package into the repository address

vamicli update – -check

Now, we see that we have a upgrade that is staged and almost ready to be ran! But, we will need to shutdown the cell(s) with this command

/opt/vmware/vcloud-director/bin/cell-management-tool -u <admin username> cell –shutdown

Next is to take a backup of the database, so if your cloud director appliance was orginally version 10.2.x initially and you have upgraded it throughout its life span, then your next command will be little different which is /opt/vmware/appliance/bin/create-backup.sh – (which i have noticed it gets renamed during a upgrade process from 10.2.x to 10.3.1)

But if your appliance is 10.3.x and newer then /opt/vmware/appliance/bin/create-db-backup will be your backup to run.

I changed directory and went all the way down to the “bin” of the backup file and now i executed the script.

Backup was successful! Now, time for the install 🙂

Apply the upgrade for VCD, the command below will run will install the update

vamicli update – -install latest

Now, the next step is important, if you have any more VCD Cell appliances you will want to repeat first few steps and then just run the command below to upgrade the other appliances:

/opt/vmware/vcloud-director/bin/upgrade

Select Y to Proceed with the upgrade

After successful upgrade, you may reboot VCD appliance and test!

April 14, 2022 0 comments 2.8K views
1 FacebookTwitterLinkedinEmail
Cloud

Deploying VMware Cloud Director Availability 4.3

by Tommy Grot March 24, 2022
written by Tommy Grot 4 minutes read

Todays topic is deploying VMware Cloud Director Availability for VMware Cloud Director! Todays topic is deploying VMware Cloud Director Availability for VMware Cloud Director! This walkthrough will guide you on how to deploy VCDA from a OVA to an working appliance. All this is created within my home lab. A different guide will be on how to setup VCDA and multi VCDs to create a Peer between and show some Migrations and so on! 🙂

A little about VCDA! – From VMware’s site

VMware Cloud Director Availability™ is a Disaster Recovery-as-a-Service (DRaaS) solution. Between multi-tenant clouds and on-premises, with asynchronous replications, VMware Cloud Director Availability migrates, protects, fails over, and reverses failover of vApps and virtual machines. VMware Cloud Director Availability is available through the VMware Cloud Provider Program.VMware Cloud Director Availability introduces a unified architecture for the disaster recovery and migration of VMware vSphere ® workloads. With VMware Cloud Director Availability, the service providers and their tenants can migrate and protect vApps and virtual machines:

  • From an on-premises vCenter Server site to a VMware Cloud Director™ site
  • From a VMware Cloud Director site to an on-premises vCenter Server site
  • From one VMware Cloud Director site to another VMware Cloud Director site

Cloud SiteIn a single cloud site, one VMware Cloud Director Availability instance consists of:

  • One Cloud Replication Management Appliance
  • One or more Cloud Replicator Appliance instances
  • One Cloud Tunnel Appliance

Links!

Replication Flow – Link to VMware

  • Multiple Availability cloud sites can coexist in one VMware Cloud Director instance. In a site, all the cloud appliances operate together to support managing replications for virtual machines, secure SSL communication, and storage of the replicated data. The service providers can support recovery for multiple tenant environments that can scale to handle the increasing workloads.

Upload the OVA for VCDA

Create a friendly name within this deployment, i like to create a name that is meaningful and corellates to a service.

Proceed to step 4

Accept this lovely EULA 😛

Since in my lab for this deployment i did a combined appliance. I will also do a seperate applaince for each service configuration.

Choose the network segment you will have your VCDA appliance live on, i put my appiliance on a NSX-T backed segment on the overlay network.

Fill in the required information, also create an A record for the VCDA appliance so that when it does its recersive DNS it will succesffuly generate a self signed certificate and allow the appliance to keep building, successfuly.

After you hit submit and watch the deployment you can open the vmware web / remote console and just watch for any issues or errors that may cause the deployment to fail.

I ran into a snag! What happened was the network configuration did not accept all the information i filled in for the network adapter on the VCDA appliance OVA deployment. So here, I had to login as root into the VCDA appliance, it did force me to reset the password that I orginally set on the OVA deployment.

Connect to the VMware Cloud Director Availability by using a Secure Shell (SSH) client.

Open an SSH connection to Appliance-IP-Address.
Log in as the root user.

To retrieve all available network adapters, run: /opt/vmware/h4/bin/net.py nics-status

/opt/vmware/h4/bin/net.py nic-status ens160

/opt/vmware/h4/bin/net.py configure-nic ens160 — static –address 172.16.204.100/24 –gateway 172.16.204.1

After you have updated all the network configuration you can check the config by :

To retrieve the status of a specific network adapter,

/opt/vmware/h4/bin/net.py nic-status ens160

After the networking is all good, then you may go back to your web browser and go to the UI of the VCDA. Here we will configure next few steps.

Add the license you have recived for VCDA – this license is different than what VMware Cloud Director utilizes.

Configure the Site Details for your VCDA. I did Classic data engines since I do not have VMware on AWS.

Add your first VMware Cloud Director to this next step

Once you have added the first VCD, then you will be asked for the next few steps. Here we will add the look up service which is the vCenter Server lookup service along with the Replicator 1 which for my setup i did a combined appliance so the IP is the same as my deployment of VCDA but my port will be different.

Then I created a basic password for this lab simulation. Use a secure password!! 🙂

Once All is completed you shall see a dashboard like this below. We have successfully deployed VMware Cloud Director Availability! Next blog post we will get into the nitty gritty of the the migration and RPOs, and SLAs as we explore this new service which is a addon to VMware Cloud Director!

March 24, 2022 0 comments 3.3K views
0 FacebookTwitterLinkedinEmail
Newer Posts
Older Posts


Recent Posts

  • What’s New In VMware Cloud Foundation 9.0
  • Deploying & Configuring the VMware LCM Bundle Utility on Photon OS: A Step-by-Step Guide
  • VMware Cloud Foundation: Don’t Forget About SSO Service Accounts
  • VMware Explore Las Vegas 2025: Illuminating the Path to Cloud Excellence!
  • Securing Software Updates for VMware Cloud Foundation: What You Need to Know

AI AVI Vantage cloud Cloud Computing cloud director computing configure cyber security director dns domain controller ESXi How To las vegas llm llms multi-cloud multicloud NSx NSX-T 3.2.0 private AI servers ssh storage tenant upgrade vcd vcda VCDX vcenter VCF VDC vexpert Virtual Machines VMs vmware vmware.com vmware aria VMware Cloud Foundation VMware cluster VMware Explore VMware NSX vrslcm vsan walkthrough

  • Twitter
  • Instagram
  • Linkedin
  • Youtube

@2023 - All Right Reserved. Designed and Developed by Virtual Bytes

Virtual Bytes
  • Home
  • Home Data Center 2025
  • VMware
    • Cloud
    • Datacenter & Cloud Infrastructure
      • VMware ESXi
      • VMware vCenter
      • VMware vSAN
    • Networking & Security
    • Desktop & App Virtualization
      • Omnissa Horizon
    • Troubleshooting
    • Ansible
  • Education
  • Hardware
    • Hardware Tips & Tricks
  • Events
  • About
    • About Me
    • Home Lab Archives
      • Home Lab 2020-2022
      • Home Lab 2016-2020