A in depth post on how to customize your VMware Cloud Director! If your organization has a specific theme and logo, well tonight’s post will guide you through the steps to get it all configured and looking all spiffy!
By default, installation Cloud Director offers two types of themes, the default white mode and dark mode. You can manage, create, and add your own themes to VCD. The steps we will be following through will be done system level so all Tenants and the Provider will see the updated VCD UI!
First connect to VCD Cell appliance via SSH –
Change Directory to
cd /opt/vmware/vcloud-director/binRun the Cell Management Tool
./cell-management-tool manage-config -n backend.branding.requireAuthForBranding -v false
Next we will utilize Postman to do the next few tasks
Access Token Authentications
You will want to get your Access Token and API Version, below I will explain on how to do that to get your API version
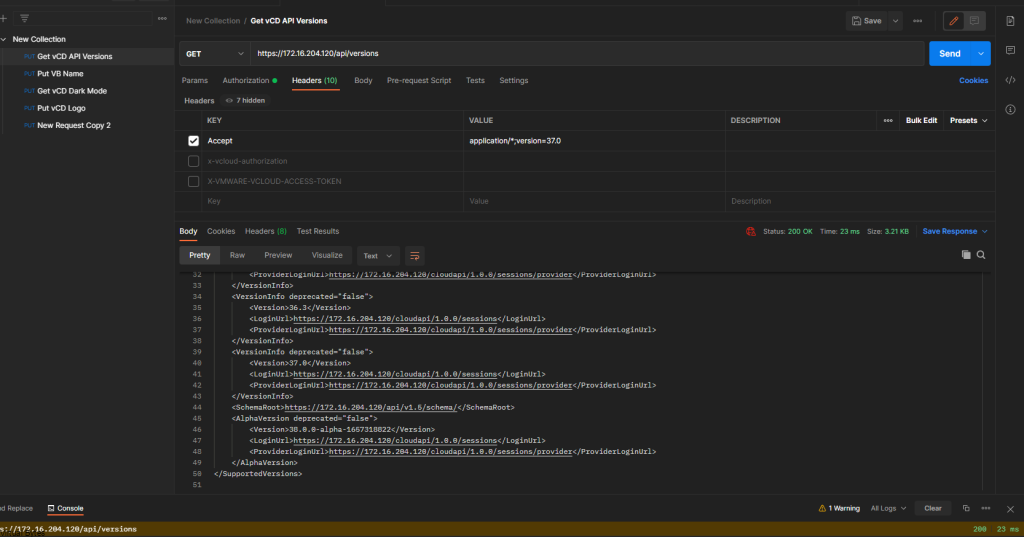
Get -> https://<Your-IP-Here>/api/versions
Authorization Tab
- Basic Auth – Username: “administrator@system” & Password: <your password>

Headers Tab
- Key: Accept Value: application/*;version=37.0
Below is the supported version I utilized, I did not used the beta version.
</VersionInfo>
<VersionInfo deprecated="false">
    <Version>37.0</Version>
    <LoginUrl>https://172.16.204.120/cloudapi/1.0.0/sessions</LoginUrl>
    <ProviderLoginUrl>https://172.16.204.120/cloudapi/1.0.0/sessions/provider</ProviderLoginUrl>
</VersionInfo>
POST API Sessions
Now we will create a POST within Postman.
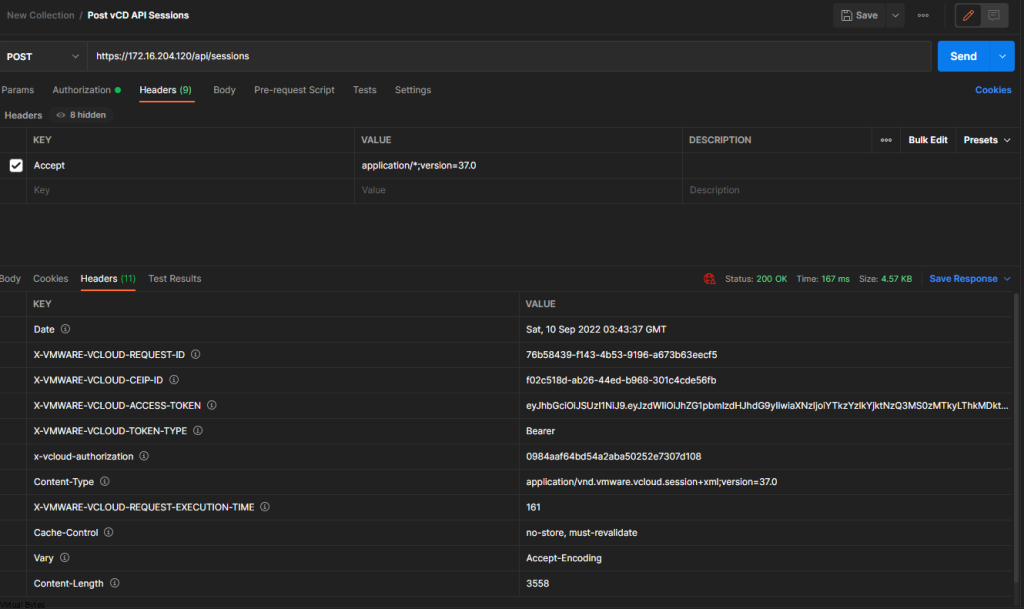
POST https://172.16.204.120/api/sessions
Authorization Tab
- Basic Auth – Username: “administrator@system” & Password: <your password>

NOTE -> Once you execute the POST, make sure you get a 200 OK status before proceeding futher.

Next you will want to save the token above as sampled in the image, you will need it for the Beare Token.
Headers
- KEY: x-vcloud-authorization VALUE: e31a8bd0d1244282bed8b4b809ba9e1f
- KEY: X-VMWARE-VCLOUD-ACCESS-TOKEN VALUE: <eyJ….>
Cloud Director Web Portal Customization
For this next section you will need to execute GET calls to get the current portal configuration with the above Bearer Token KEYS and VALUES
GET https://172.16.204.120/cloudapi/branding

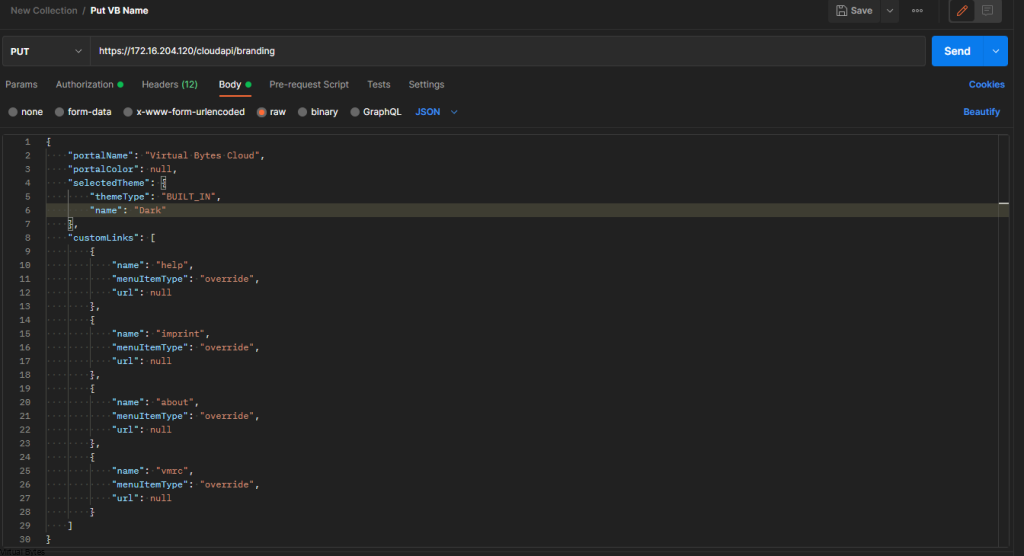
Once you execute the call you will want to go to the Body section and you will see something like this, but a fresh installation of VCD – Portal Name will be ” VMware Cloud Director” and the theme name would be “Default” Which mine is set to Dark mode.
Sample Body Configuration
{
    "portalName": "Virtual Bytes Cloud",
    "portalColor": null,
    "selectedTheme": {
        "themeType": "BUILT_IN",
        "name": "Dark"
    },
    "customLinks": [
        {
            "name": "help",
            "menuItemType": "override",
            "url": null
        },
        {
            "name": "imprint",
            "menuItemType": "override",
            "url": null
        },
        {
            "name": "about",
            "menuItemType": "override",
            "url": null
        },
        {
            "name": "vmrc",
            "menuItemType": "override",
            "url": null
        }
    ]
}
Then once you get your custom configuration ready you will want to do a PUT Call via Postman

Once you POST your Branding configuration, go back to Web UI of VCD and hit refresh! You should see something like below 🙂

Cloud Director Web Portal Logo Customization
Now. for our logo we will do another API call via Postman to PUT a png file for the system level logo.
Authorization Tab
- Bearer Token from previous API call we did

Headers
- KEY: Accept VALUE: application/*;version=37.0
- KEY: x-vcloud-authorization VALUE: “e31a8bd0d1244282bed8b4b809ba9e1f” <- Put your value for the call not mine 🙂
- KEY: X-VMWARE-VCLOUD-ACCESS-TOKEN VALUE: “eyJhbGciOiJSUzI…..” <- I shorted the Bearer Token
Go to Body – Change it to binary and find your logo.png file to upload and then hit Send.

Top right corner you will see the logo I uploaded to Cloud Director!
