Top Posts
What’s New In VMware Cloud Foundation 9.0
Deploying & Configuring the VMware LCM Bundle Utility...
VMware Cloud Foundation: Don’t Forget About SSO Service...
VMware Explore Las Vegas 2025: Illuminating the Path...
Securing Software Updates for VMware Cloud Foundation: What...
VMware Cloud Foundation 5.2: A Guide to Simplified...
VMware Cloud Foundation 5.2: Unlocking Secure Hybrid Cloud...
VMware Cloud Foundation – Memory Tiering: Optimizing Memory...
Decoding VMware Cloud Foundation: Unveiling the numerous amount...
VMware Cloud Director 10.6.1: Taking Cloud Management to...
Virtual Bytes
  • Home
  • Home Data Center 2025
  • VMware
    • Cloud
    • Datacenter & Cloud Infrastructure
      • VMware ESXi
      • VMware vCenter
      • VMware vSAN
    • Networking & Security
    • Desktop & App Virtualization
      • Omnissa Horizon
    • Troubleshooting
    • Ansible
  • Education
  • Hardware
    • Hardware Tips & Tricks
  • Events
  • About
    • About Me
    • Home Lab Archives
      • Home Lab 2020-2022
      • Home Lab 2016-2020
Tag:

vsan

Events

Exciting New Sessions at VMware Explore 2024!

by Tommy Grot June 18, 2024
written by Tommy Grot 4 minutes read

The VMware Explore 2024 content library is now live! Get ready for a week of insightful sessions, thought-provoking discussions, and innovative showcases from industry leaders and VMware experts. 💡

Beyond the insightful keynotes and thought-provoking discussions, VMware Explore 2024 offers an unparalleled opportunity to get your hands dirty with the latest technologies and deepen your knowledge in various domains.

Here’s what awaits you in the hands-on labs:

  • Practical workshops: Master new skills in areas like Kubernetes, security, networking, and more.
  • Solution-focused labs: Solve real-world challenges with hands-on guidance from VMware experts.
  • Dedicated lab environments: Ensure a focused and productive learning experience with curated lab settings.

Make sure to stop by the Hands On Labs during a break or downtime where you can test, learn and enjoy tinkering with HOL Environments that are provided to you during the event!

General sessions will cover a diverse range of topics:

  • Industry trends: Explore the future of technology across sectors like healthcare, finance, and sustainability.
  • Product updates: Get the latest news and insights on new products. Many exciting new advancements in private cloud, AI, app delivery and the edge.
  • Customer success stories: Learn how organizations are leveraging VMware solutions to achieve business outcomes.

Keynotes will inspire and challenge you:

  • Visionary leaders: Gain valuable perspectives from industry leaders who will share their insights on the most pressing challenges and opportunities in technology.
  • Inspiring talks: Prepare to be captivated by thought-provoking discussions covering a wide range of topics, from digital transformation to sustainability.

Session Recommendations!

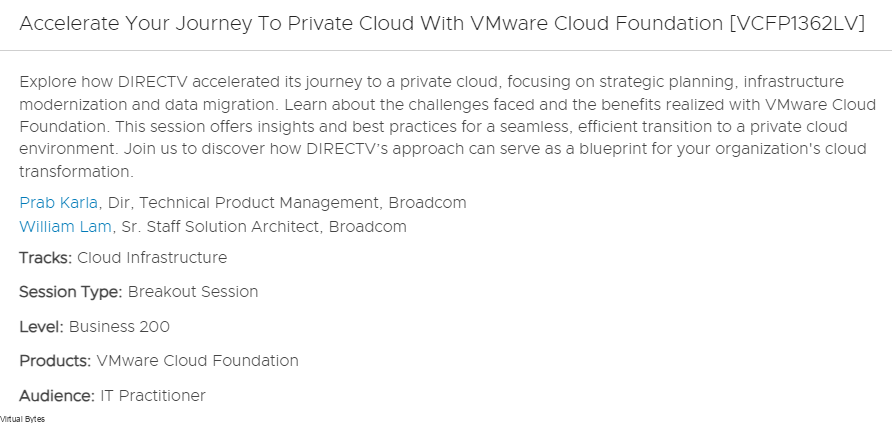
Link to Session Accelerate Your Journey To Private Cloud With VMware Cloud Foundation [VCFP1362LV]

In this breakout session, William Lam and Karia Parb will talk about an exiting journey to being utilizing and modernizing your data center environments using VMware Cloud Foundation. How VCF can improve your business operations and systems! I have attended previous sessions by William Lam and they were outstanding!


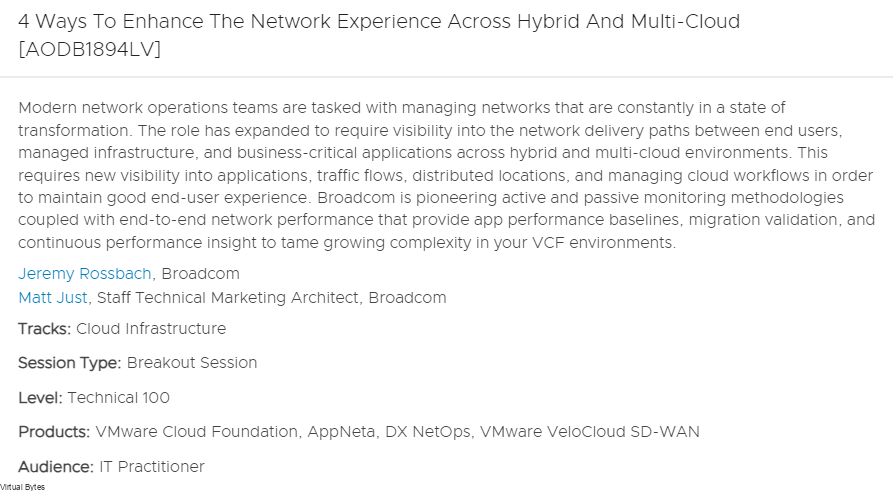
Link to Session 4 Ways to Enhance the Network Experience Across Hybrid and Multi-Cloud [AODB1894LV]

This session will go into deep dive on how to enhance your Networking experience using VCF and NSX, and being able to migrate workloads from hybrid cloud to on prem, this is a great sessions for many organizations to attend due to the complexities that are involved with the unknowns of the Internet, where how things need to be configured properly to seamlessly scale and migrate workloads between the on-prem datacenter and hybrid cloud. So make sure to book this session!


Link to Session Shaping the Future of Cloud and AI Innovation [GEN2495LV]

Are you ready to shape your future of Cloud and Artificial Intelligence? Well this session is going to be a kick! With all the new advancements from Private AI on VCF and how organizations can improve and scale and operate their enterprise workloads by implementing and designing a solid VMware Cloud Foundation environment, this general session will be an awesome outlook on how AI, applications and data center computing will help the industry!


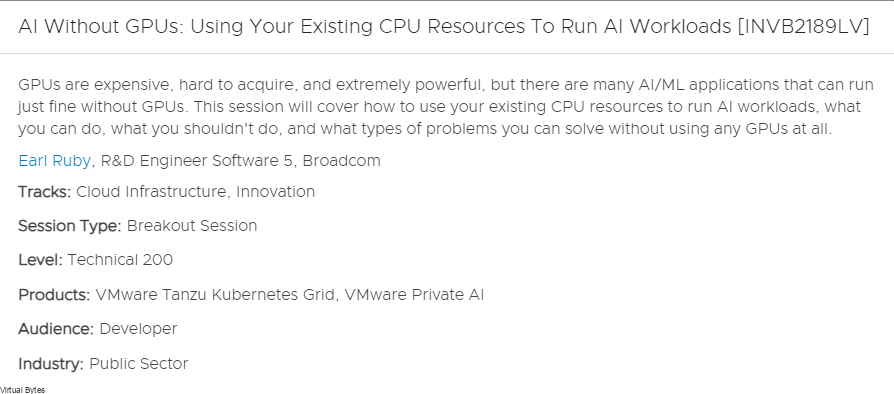
Link to Session AI Without GPUs: Using Your Existing CPU Resources To Run AI Workloads [INVB2189LV]

This is a session I want to attend my self, even for my home lab where I have a large environment to do lots of CPU workloads but when it comes to having GPUs they get very costly, so being able to run AI/ML workloads on CPU resources will be a game changer for many organizations as well, due to cost savings and also ease of use whereas GPUs require more infrastructure and also the cooling. This will be a popular session I can already see it filling up!


Don’t miss the chance to:

  • Network with fellow attendees and industry professionals.
  • Discover new ideas and innovations.
  • Gain practical skills and knowledge to enhance your career.

Here’s what you need to know:

  • Register for sessions soon: Secure your spot for the sessions you’re most interested in and receive notifications when they go live.
  • Bookmark your sessions using the “♡” Icon so when the catalog opens for session registration then you will be notified.

Don’t forget to:

  • Follow VMware Explore on social media for updates, highlights, and exclusive content. ✨
  • Join the #VMwareExplore hashtag conversation to connect with other attendees and share your thoughts. 💬
  • Ready to explore the future of technology? Head over to the VMware Explore 2024 content library and start planning your viewing experience!
June 18, 2024 0 comments 420 views
1 FacebookTwitterLinkedinEmail
AIVMware Cloud Foundation

How To Setup Ollama + OpenWebUI on VCF

by Tommy Grot June 7, 2024
written by Tommy Grot 4 minutes read

In this blog post, we will explore how to host your very own ChatGPT using the powerful combination of Ollama and OpenWebUI, all powered by VMware Cloud Foundation. By leveraging these cutting-edge technologies, you’ll be able to create a seamless and interactive chatbot experience that will impress your users. Get ready to dive into the world of AI and virtualization as we walk you through the steps to set up your own ChatGPT. Exciting times are ahead, so let’s get started on this journey together!

This walkthrough will only guide you through how to setup Ollama and Open WebUI – you will need to provide your own Linux VM, for my deployment I used Ubuntu 22.04.

Next blog post we will go into customizing and adding onto Ollama and OpenWebUI with for example Automatic1111 and Diffusion and Image Generation LLMs.

The Hardware:

  • 2 x Intel Platinum 8158 3.0GHz 12 Cores
  • 1 x Nvidia Tesla P40 24GB DDR5
  • 1 x Dell PERC H740P RAID Card
  • 4 x 32GB Samsung DDR4 2666MHz (128GB)
  • 2 x 50Gb/s Mellanox Connectx-4 Data Traffic
  • 4 x 10Gb/s X710 NDC for NSX Overlay
  • 1 x Boss S1 w/ M.2 SSD for ESXi Boot
  • 2 x 2000 watt PSUs
  • 8 x 800GB SAS SSD – Capacity Storage
  • 2 x 280GB Intel Optane Storage – Fast Storage

The Virtual Machine:

  • Deploy a Ubuntu or any choice of Debian distro if you want to utilize the commands I have apart of this walkthrough.
  • Enabling Hardware Device Passthrough for the GPU also apart of your VMX add the following in:
pciPassthru.use64bitMMIO=”TRUE”
pciPassthru.64bitMMIOSizeGB=”128″

Once the Virtual Machine is deployed, you will want to ensure that your Server or Desktop Hardware is prepared to have a GPU, in my Dell PowerEdge R740XD I have a NVIDIA Tesla P40.

The Specifications:

This will vary, for my initial deployment I setup 8 vCPUs with the Automatic CPU Topology enabled, but this will all depend on your use case, since I have powerful CPUs and lots of memory I can increase the resource allocation later on.

The Software:

Download & Install Ollama:

curl -fsSL https://ollama.com/install.sh | sh

Time to Shutdown The Virtual Machine and Pass Through the NVIDIA Tesla P40

  • With the above requirements satisfied, two entries must be added to the VM’s VMX file, either by modifying the file directly or by using the vSphere client to add these capabilities. The first entry is:
pciPassthru.use64bitMMIO=”TRUE”
  • Specifying the second entry requires a simple calculation. Sum the GPU memory sizes of all GPU devices(*) you intend to pass into the VM and then round up to the next power of two. For example, to use passthrough with 4 16 GB A2 devices, the value would be: 32 + 32 = 64, rounded up to the next power of two to yield 128. Use this value in the second entry:
pciPassthru.64bitMMIOSizeGB=”128″

Add Docker’s official GPG key:

sudo apt-get update
sudo apt-get install ca-certificates curl
sudo install -m 0755 -d /etc/apt/keyrings
sudo curl -fsSL https://download.docker.com/linux/ubuntu/gpg -o /etc/apt/keyrings/docker.asc
sudo chmod a+r /etc/apt/keyrings/docker.asc

Add the repository to Apt sources:

echo \
"deb [arch=$(dpkg --print-architecture) signed-by=/etc/apt/keyrings/docker.asc] https://download.docker.com/linux/ubuntu \
$(. /etc/os-release && echo "$VERSION_CODENAME") stable" | \
sudo tee /etc/apt/sources.list.d/docker.list > /dev/null
sudo apt-get update

Next, we will install docker and all its dependencies:

sudo apt-get install docker-ce docker-ce-cli containerd.io docker-buildx-plugin docker-compose-plugin

Now we will setup the docker container for Open WebUI to run, on port 11434 – Yeah the port number looks like (LLAMA haha)

docker run -d --network=host -v open-webui:/app/backend/data -e OLLAMA_BASE_URL=http://127.0.0.1:11434 --name open-webui --restart always ghcr.io/open-webui/open-webui:main

After you run the command above, then your webserver should start running – Open up your browser and login! You will be directed to setup a username / email. Once that is done, have fun and enjoy your own private AI!

Now, you will be presented the dashboard for your very own ChatGPT Privately Hosted!

Enjoy! 🙂

Depending on what LLMs you want to pull here is a example of how to do it via CLI

ollama pull aya

There we pulled aya LLM!

June 7, 2024 0 comments 886 views
0 FacebookTwitterLinkedinEmail
VMware Cloud Foundation

VMware Cloud Foundation 5.x Posters

by Tommy Grot April 5, 2024
written by Tommy Grot 1 minutes read

Get ready to dive into the world of a private cloud platform, with the new and exciting poster that showcases the intricate topology and architecture of VMware Cloud Foundation 5.x. This comprehensive visual guide will take you on a journey through the innovative features and capabilities of VMware’s cutting-edge cloud platform. Whether you’re a seasoned IT professional looking to enhance your knowledge or a newcomer eager to explore the possibilities of VCF, this poster is sure to spark your curiosity and ignite your passion for cloud technology. Join us as we unravel the complexities of VCF and unlock the potential of cloud computing like never before!

Download your copy today and get it printed at your favorite print shop!

Overview

Two Persona – Cloud Admin & Developer

Management Workload Domain

Workload Domain

Workload Domain with Tanzu

Workload Domain Physical Networking

April 5, 2024 0 comments 1.1K views
1 FacebookTwitterLinkedinEmail
CloudVMware Cloud Foundation

How To Upgrade VMware Cloud Foundation 5.1.x

by Tommy Grot March 26, 2024
written by Tommy Grot 4 minutes read

Have you heard the exciting news about the latest release of VMware Cloud Foundation 5.1.1? This update is packed with tons of new features that are sure to get you pumped up. From AI technologies and Private AI implementations to a slew of other enhancements, there’s something for everyone in this release. Whether you’re a seasoned pro or just dipping your toes into the world of cloud computing, this update has something to offer. So grab your favorite beverage, settle in, and let’s dive into all the new and exciting features that VMware Cloud Foundation 5.1.1 has to offer!

Highlighted Features

As announced at the 2024 GTC AI Conference, Broadcom has announced initial availability of  VMware Private AI Foundation with NVIDIA as an advanced add-on to VMware Cloud Foundation. VMware Private AI Foundation marks the beginning of a new era for infrastructure solutions, powered by VMware Cloud Foundation to support a wide range of Generative AI use cases. Read more about VMware Cloud Foundation AI/ML Solutions here.   

VMware Private AI Foundation with NVIDIA

VMware Cloud Foundation is the core infrastructure platform for VMware Private AI Foundation with NVIDIA, delivering modern private cloud that enables organizations to dynamically scale GenAI workloads on demand.  VMware Cloud Foundation provides an automated, self-service cloud experience that accelerates productivity for developers and data scientists, while delivering comprehensive security and resilience to protect and recover an organization’s most sensitive intellectual property.  

VMware Cloud Foundation 5.1.1 Bill of Materials: 

VMware Cloud Foundation 5.1.1 – Release Notes


Lets start the Upgrade!

Take a snapshot of your SDDC Manager and your vCenter Server, ensure they are offline snapshots.

Login to your SDDC Manager, and you shall see new bundles appear, this is only true if you have a internet connected VCF stack. If you are in a offline deployment follow this other walk through i made on how to download bundles for VCF and other products.

Example of what you shall see when bundles are automatically downloaded into your SDDC Manager

Next before we upgrade – ensure you run a Pre-Check Under the Workload Domains you want to upgrade

The Pre-check will verify connectivity and password authentication with service accounts to all different appliances. Once the pre-check is done we will proceed to the next step which is to plan the upgrade!

My Pre-check had few errors, one of the major errors was related to VM/Host Affinity rules for certain VMs like domain controller, Aria Logs, Aria Operations, so I had to disable the rules for the upgrade to ensure that there is no error during deployment.

Disabled VM/Host Rules

Here you will see the Pre-Check Results, I had 5 errors which one of of them was storage capacity of the vCenter Server and then VM/Host Rules that were enabled that needed to be disabled to continue the upgrade.

Once Pre-Check has been completed, you will see that your workload domain will have Updates Available in the right side of the window as shown below.

Now we plan for the upgrade, this is a new addition which helps out the upgrade path and sees the source and target version along with being able to see what bundles or what products have been upgraded if you have utilized the Async Patch tool like in this blog post here.

Now, you will see that my vCenter Server and NSX have been upgraded that is due to the Async patch tool, I upgraded my VCF out of cycle of the main released to fix few issues and security vulnerabilities. So thus the Green check marks for NSX_T Manager and vCenter and ESXi.

Now, we will wait – this task is running in the background, you will in a moment see that the Download Bundles task(s) will be running.

After the binaries have been downloaded, staged and prepared. You will see that your workload domain that was once with updates available is now ready for upgrade.

Lets Start the upgrade! Ensure you have GOOD BACKUPS and/or SNAPSHOTS of the SDDC Manager and vCenter Server. If you do lets continue!

SDDC Manager is now upgrading itself, it will upgrade the core components as well as the drift update if it is needed.

  • Setup Common Appliance Platform
  • Validate Services Before Upgrade
  • Remove Packages Pre Upgrade
  • Update Necessary RPMs For Photon4 Upgrade
  • VMware Cloud Foundation Services and Platform Upgrades
  • Authenticate Common Appliance Platform
  • Update VCF Service and Platform rpms
  • Reboot SDDC Manager
  • Refresh Custom Certificates
  • Update SDDC Manager Appliance Version
  • SDDC Manager Deployment Drift
  • Run VCF Services and Platform upgrades Post Validation
  • Validate Services
  • Cleanup
  • Stop Common Appliance platform Service

After 16 minutes and 29 seconds, we have an upgraded SDDC Manager! Since my vCenter and NSX have all been upgraded the upgrade would of continued and all the hosts would have upgraded automatically minus few questions being asked during the deployment.

Successfully deployed VMware Cloud Foundation 5.1.1!

March 26, 2024 5 comments 1.7K views
1 FacebookTwitterLinkedinEmail
VMware Cloud FoundationVMware NSX

NSX Manager Repository High Disk Usage

by Tommy Grot March 25, 2024
written by Tommy Grot 1 minutes read

If you’ve recently upgraded your NSX environment and noticed a spike in disk usage for the repository partition, you’re not alone. In this blog post, we’ll dive into the reasons behind this increase and provide some tips on how to manage and optimize your disk space. We’ll discuss common causes for the surge in disk usage post-upgrade, and explore some best practices for keeping your NSX environment running smoothly.

VMware Cloud Foundation (SDDC Manager) Password Lookup Utility

Next, we will need to SSH into the NSX Managers, if you are running NSX within VMware Cloud Foundation, you will need to run the VCF Lookup Password Utility within the SDDC Manager and login via remote console in vSphere to enable SSH services

To Start SSH Service on NSX Manager –

start service ssh

To Enable SSH Service on reboot –

set service start-on-boot

There is the 84% Usage of the repository partition, this partition holds all the previous patches and upgrades of NSX.

Now we delete the old folders, I also had old version of NSX Advanced Load Balancer which I cleaned up as well.

Example –

rm -rf 4.1.2.1.0.22667789/

There we go! No more alarms for high disk usage.

After a upgrade of your VMware NSX environment, it is always good to clean up the bundles and old binaries to prevent high disk usage and prevent and issue with your NSX Managers.

March 25, 2024 0 comments 949 views
0 FacebookTwitterLinkedinEmail
CloudVMware Cloud Foundation

VMware Cloud Foundation 5.x – SDDC Manager Password Operations Not Allowed

by Tommy Grot March 21, 2024
written by Tommy Grot 2 minutes read

Tonight’s topic – I want to share with you a recent headache I encountered while working with my VMware Cloud Foundation SDDC Manager 5.x and NSX Password Rotation for Audit account! I was in the middle of a routine password rotation service when suddenly, my task got stuck, leaving me scratching my head in frustration. I couldn’t believe how one little hiccup could bring my whole operation to a screeching halt. In this blog post, I will walk you through the issue I faced, how I troubleshooted it, and ultimately resolved it. So grab a cup of your favorite drink, sit back, and let’s dive into this tech challenge together!

Lets Begin!

  • Take Snapshot (Uncheck Memory) of SDDC Manager
  • SSH into SDDC Manager Appliance
  • Elevate to Root ( su – )

Now we will start digging in the Postgres Database, we will try to find the culprit of what is holding up the lifecycle management of VCF.

The command below will display any locked tasks that are running or are stuck

psql --host=localhost -U postgres -d platform -c "select * from lock"

My Issue – NSX Audit Password got stuck rotating and caused a halt in all operations, example below

{“serviceIdentifier”:”LCM”,”operationIdentifier”:”NSX_AUDIT”,”description”:”Resource of type NSX locked by service (ID: LCM) and operation (ID: NSX_AUDIT)”,”pollingInterval”:0,”expirationTime”:0}

Now that we have our locks displayed, for mine there was 2 locks I had to delete – eample below

psql --host=localhost -U postgres -d platform -c "delete from lock where id='ba4e6ff4-689a-4905-92ff-635cb7403698'";
psql --host=localhost -U postgres -d platform -c "delete from lock where id='ID_FROM_RESOURCE_NAME'";

Next, we will remove the second lock from the database:

psql --host=localhost -U postgres -d platform -c "delete from lock where id='6bd393ba-ad8f-4e1a-a6c3-0695c4556c29'";
psql --host=localhost -U postgres -d platform -c "delete from lock where id='ID_FROM_RESOURCE_NAME'";

Now we have a healthy and happy SDDC Manager!

As well our password options are no longer blocked out!

Reboot and remove snapshot after you are done, ensure you have all working services before snapshot is removed or a good backup!

March 21, 2024 0 comments 1.9K views
0 FacebookTwitterLinkedinEmail
CloudVMware Cloud Foundation

VMware Cloud Director 10.5.x Certificate Replacement

by Tommy Grot March 15, 2024
written by Tommy Grot 1 minutes read

Today’s topic is about managing certificates for VMware Cloud Director. Well, you’ve come to the right place! In this blog post, we’ll walk you through the step-by-step process of changing certificates for VMware Cloud Director 10.5.x. Whether you’re a seasoned pro or a newbie in the world of virtualization, we’ve got you covered. Say goodbye to the headaches of dealing with expired or invalid certificates, and say hello to a smoother, more secure experience with VMware Cloud Director. Let’s get started!

This process is much easier! Than the days of Postman and API calls and trying to get the certificate loaded into the web store and many other pain points that were noticeable, but not anymore this processes is super easy!

Login to your provider portal of VCD with your administrator account or a system admin account.

Go to – Administration

Click on Certificates Library – >

Click on Import -> Then fill our a friendly name and upload the .pem format of your cert and as well the private.key with the passphrase.

Once your certificate has been imported, also ensure to have your CA Signed Certs Trusted (Root and Subordinate) in your trusted certs library.

Then go back to Resources -> Cloud Cells -> Click on the Cell you want to change the certificate first in.

Then click on Edit

The pop up will come up to select the certificate we just imported earlier in the walk through, select that one.

Now you will “Use Certificate” and it will run the API Calls and certificate tasks behind the scenes.

Select your certificate and then click edit and use certificate, few seconds later you should see a successful message in the recent tasks!

March 15, 2024 8 comments 3.1K views
2 FacebookTwitterLinkedinEmail
VMware Cloud FoundationVMware vCenter

How To Apply Async Patch to VMware Cloud Foundation 5.1+

by Tommy Grot March 2, 2024
written by Tommy Grot 3 minutes read

The VMware SDDC Manager async patch tool allows you to upgrade individual products outside of the standard VMware Cloud Foundation (VCF) baseline. This tool can be used to upgrade products such as vCenter, NSX, and ESXi to newer versions without affecting the overall VCF deployment.

To use the async patch tool, you will need to download the patch or upgrade package for the specific product you want to update. You can then upload the package to the SDDC Manager and initiate the upgrade process. The async patch tool will automatically handle the upgrade process for the individual product, ensuring that it is seamlessly integrated into your VCF environment.

Overall, the async patch tool provides a convenient way to keep your VMware products up to date without disrupting your VCF deployment.

VMware Docs for Async Patch Tool


Async Patch Tool Walkthrough

Lets begin! – Open WinSCP or/ SCP upload the vcf-async-patch-tool-1.1.0.2.tar.gz,

Then, take a snapshot of your vCenter and as well SDDC Manager for safety!

Once snapshots are done and verified then, SSH into your SDDC Manager with vcf user, but ensure to enable the SSH Time out. ( Example Below)

  • 300 Second is five minutes
  • Putty -> Change Settings -> Connection -> Seconds between keepalives (0 to turn off) > set to 300 > Apply

Then we will need to make the directory for async patch tool

mkdir /home/vcf/asyncPatchTool

Copy the vcf-async-patch-tool-1.1.0.2.tar.gz, (or latest version) into /home/vcf/asyncPatchTool

tar -xvf vcf-async-patch-tool-1.1.0.2.tar.gz
Set the permissions for the asyncPatchTool directory
cd /home/vcf/
chmod -R 755 asyncPatchTool
chown -R vcf:vcf asyncPatchTool

Next, you will execute the command below to enable async to pull patches.

./vcf-async-patch-tool --listAsyncPatch --du < Your E-Mail for Customer Connect >

Next the Patch Tool will ask you if your running the latest version ( Y ) or ( N ) and CEIP as well.

  • Enter Y to confirm that you are running the latest version of the Async Patch Tool.
  • Read the information and enter Y to acknowledge the pre-requisites.
  • Enter Y or N to choose whether or not to participate in the VMware Customer Experience Improvement Program (CEIP).
  • Enter the password for the super user (vcf) account.
  • Enter the password for the root user account.
  • Enter the password for the management domain SSO user account.
  • Enter your VMware Customer Connect (Depot) password.

So, for my patch I select the latest vCenter Server 8U2b and I repeated the same setups for gaining my ESXi Patch as well.

./vcf-async-patch-tool -e --patch VCENTER:8.0.2.00200-23319993 --du <E Mail Customer Connect> --sddcSSOUser <SSOuser> --sddcSSHUser vcf --it ONLINE

Status of Async Progress shown in these snips

Now you will see Bundles showing up within Bundle Management!

Snippet Below Shows Running Async patch tool

After the bundles have been uploaded, we may go back to SDDC UI and go to the specific workload domain, for my environment it is the Management Workload domain. Upgrade progress snippet below of vCenter Server

Once all patches are completed, SSH back into VCF SDDC Manager and execute the following command to disable patches.

  • Navigate to /home/vcf/asyncPatchTool/bin.
  • Run the following command:
./vcf-async-patch-tool --disableAllPatches --sddcSSOUser SSOuser --sddcSSHUser vcf
March 2, 2024 2 comments 2.5K views
2 FacebookTwitterLinkedinEmail
VMware TroubleshootingVMware vCenter

vCenter 8.0 U2 Storage Policies Go Missing – Due to Service Account (SPS) VMware vSphere Profile-Driven Storage Service

by Tommy Grot February 29, 2024
written by Tommy Grot 2 minutes read

Tonight’s blog post goes in-depth on Service Accounts especially the SPS account which the VMware vSphere Profile-Driven Storage Service relies on that lives within the Administrators group. Well, imagine the panic when the SPS service account goes missing, leaving your vSAN and storage policies in limbo.

In this blog post, we’ll dive into the nightmare scenario of losing these vital components and explore how to troubleshoot and recover from such a disaster. So grab a cup of coffee and get ready to learn how to tackle this challenging situation head-on. Let’s get started!

So Below – I logged into my vCenter Server 8 today, and I was like why are my policies missing and my vSAN Performance complaining ?? Well I started to dig in and found some evidence of the SPS service account gone.

Storage Providers are missing ?! What is happening?!

vSAN Performance complaining about its policy not being there, and your can see that the Storage Policy drop down is broken / not loading the vSAN policies I have for vSAN Performance

So – First thing is take a snapshot of what your current vCenter is, yeah we know its broken and SPS is missing but safety first!

First, what I did – is, I checked the logs where the VMware vSphere Profile-Driven Storage Service

/var/log/vmware/vmware-sps/sps.log

You will see lots of different spring frame work events and processes, but what you are really looking for is your specific SPS Service Account, for me, mine was

sps-71587023-8efd-4f7e-b094-ede500183201

Once you have your account copied – open your favorite text editor. You will want to structure your command below in the same way. As an example you may copy i provided mine from the screen shot – But replace my SPS account with yours.

/usr/lib/vmware-vmafd/bin/dir-cli group modify --name Administrators --add sps-71587023-8efd-4f7e-b094-ede500183201

After you hit enter, you will see that it will ask you for the [email protected] password, if you are running VCF, you will need to pull your password from the SDDC Manager if you have Auto Rotate passwords enabled.

Once Password has been entered you shall see the same following prompt where the SPS account has been added to the Administrators group.

Enter password for [email protected]:
Account [sps-71587023-8efd-4f7e-b094-ede500183201] added to group [Administrators]
Group member [sps-71587023-8efd-4f7e-b094-ede500183201] added successfully

Woohoo! vSAN and vCenter are all up and running with working VM Storage Policies

And Finally – We see our SPS account back in the Administrators Group!

February 29, 2024 0 comments 2.2K views
1 FacebookTwitterLinkedinEmail
NetworkingVMware vSAN

VMware vSAN and Remote Direct Memory Access

by Tommy Grot January 5, 2024
written by Tommy Grot 3 minutes read

Welcome to the first blog post of 2024! We are thrilled to kick off the year with a topic that is bound to ignite your vSAN Cluster. Get ready to dive into the world of RDMA (Remote Direct Memory Access) and vSAN (Virtual Storage Area Network) implementation. These cutting-edge technologies are revolutionizing the way data is transferred and stored, promising lightning-fast speeds and unparalleled efficiency. Whether you are a tech enthusiast, a system administrator, or simply someone intrigued by the latest advancements in the tech universe, this blog post will unravel the mysteries of RDMA and vSAN, leaving you with a newfound understanding and enthusiasm for these game-changing innovations. So, buckle up and lets get ready!

Lets configured your ESXi Host to be ready for RDMA for vSAN

First thing you will want your Core Networking Switches to have Data Center bridging configured for all interfaces that are connected to your vSAN Cluster. Link to Arista

Example Syntax From my Arista DCS-7050QX-32S-F
   description ESX01-VDS01-1-VMNIC4
   mtu 9214
   dcbx mode ieee
   speed forced 40gfull
   switchport mode trunk
   priority-flow-control on
   priority-flow-control priority 3 no-drop

Sample Config

So, now that the networking is prepared next we will need to SSH into each ESXi Host and you will need configure the settings below:

Example of vSAN Cluster Health regarding RDMA not configured

While in SSH – you will need to configured each host with the parameters’ below in each code block

dcbx int Set DCBX operational mode
Values : 0 – Disabled, 1 – Enabled Hardware Mode, 2 – Enabled Software Mode, 3 – If Hardware Mode is supported Enable Hardware Mode, else Enable Software

esxcli system module parameters set -m nmlx5_core -p dcbx=3

pfctx int 0x08 Priority based Flow Control policy on TX.
Values : 0-255
It’s 8 bits bit mask, each bit indicates priority [0-7]. Bit value:
1 – generate pause frames according to the RX buffer threshold on the specified priority.
0 – never generate pause frames on the specified priority.
Notes: Must be equal to pfcrx.
Default: 0

pfcrx int 0x08 Priority based Flow Control policy on RX.
Values : 0-255
It’s 8 bits bit mask, each bit indicates priority [0-7]. Bit value:
1 – respect incoming pause frames on the specified priority.
0 – ignore incoming pause frames on the specified priority.
Notes: Must be equal to pfctx.
Default: 0

trust_state int Port policy to calculate the switch priority and packet color based on incoming packet
Values : 1 – TRUST_PCP, 2 – TRUST_DSCP
Default: 1

esxcli system module parameters set -m nmlx5_core -p "pfctx=0x08 pfcrx=0x08 trust_state=2 max_vfs=0"

pcp_force int PCP value to force on outgoing RoCE traffic.
Cannot be active when dscp_to_pcp is enabled.
Values : -1 – Disabled, 0-7 – PCP value to force
Default: -1

dscp_force int DSCP value to force on outgoing RoCE traffic.

Values : -1 – Disabled, 0-63 – DSCP value to force
Default: -1

esxcli system module parameters set -m nmlx5_rdma -p "pcp_force=-1 dscp_force=26"

Now, that your have configured all the ESXi hosts, you will need to repeat the syntax above to each host you have. Once updated you will need to put each host in maintenance mode and reboot each host.

Once all ESXi hosts are configured and rebooted, vSAN Health should report back RDMA Configuration Healthy.

Below are some Network Backbone tests over RDMA!

January 5, 2024 2 comments 1.8K views
1 FacebookTwitterLinkedinEmail
Newer Posts
Older Posts


Recent Posts

  • What’s New In VMware Cloud Foundation 9.0
  • Deploying & Configuring the VMware LCM Bundle Utility on Photon OS: A Step-by-Step Guide
  • VMware Cloud Foundation: Don’t Forget About SSO Service Accounts
  • VMware Explore Las Vegas 2025: Illuminating the Path to Cloud Excellence!
  • Securing Software Updates for VMware Cloud Foundation: What You Need to Know

AI AVI Vantage cloud Cloud Computing cloud director computing configure cyber security director dns domain controller ESXi How To las vegas llm llms multi-cloud multicloud NSx NSX-T 3.2.0 private AI servers ssh storage tenant upgrade vcd vcda VCDX vcenter VCF VDC vexpert Virtual Machines VMs vmware vmware.com vmware aria VMware Cloud Foundation VMware cluster VMware Explore VMware NSX vrslcm vsan walkthrough

  • Twitter
  • Instagram
  • Linkedin
  • Youtube

@2023 - All Right Reserved. Designed and Developed by Virtual Bytes

Virtual Bytes
  • Home
  • Home Data Center 2025
  • VMware
    • Cloud
    • Datacenter & Cloud Infrastructure
      • VMware ESXi
      • VMware vCenter
      • VMware vSAN
    • Networking & Security
    • Desktop & App Virtualization
      • Omnissa Horizon
    • Troubleshooting
    • Ansible
  • Education
  • Hardware
    • Hardware Tips & Tricks
  • Events
  • About
    • About Me
    • Home Lab Archives
      • Home Lab 2020-2022
      • Home Lab 2016-2020