Top Posts
Offline VMware Cloud Foundation 9 Depot: Your Path...
VMware Cloud Foundation 9: Simplifying Identity with a...
What’s New In VMware Cloud Foundation 9.0
Deploying & Configuring the VMware LCM Bundle Utility...
VMware Cloud Foundation: Don’t Forget About SSO Service...
VMware Explore Las Vegas 2025: Illuminating the Path...
Securing Software Updates for VMware Cloud Foundation: What...
VMware Cloud Foundation 5.2: A Guide to Simplified...
VMware Cloud Foundation 5.2: Unlocking Secure Hybrid Cloud...
VMware Cloud Foundation – Memory Tiering: Optimizing Memory...
Virtual Bytes
  • Home
  • Home Data Center 2025
  • VMware
    • Cloud
    • Datacenter & Cloud Infrastructure
      • VMware ESXi
      • VMware vCenter
      • VMware vSAN
    • Networking & Security
    • Desktop & App Virtualization
      • Omnissa Horizon
    • Troubleshooting
    • Ansible
  • Education
  • Hardware
    • Hardware Tips & Tricks
  • Events
  • About
    • About Me
    • Home Lab Archives
      • Home Lab 2020-2022
      • Home Lab 2016-2020
Tag:

cyber security

VMware vCenter

vCLS VMs failing to power on vSphere 8.x

by Tommy Grot June 14, 2023
written by Tommy Grot 2 minutes read

Tonight’s troubleshooting tidbit is an important topic that you’ll want to stick around for. We all know that upgrading your system can be a daunting task, especially when something goes wrong. In this blog post, we’ll be discussing an issue that many of you may be facing after upgrading your vSphere 8.0 to 8.0.1.

Are you experiencing problems with DRS not working or vCLS not powering back on? If so, don’t worry, we’ve got you covered! We’ll be diving into the root cause of this issue and providing you with some solutions to get your system back up and running smoothly. So, grab a cup of coffee and let’s get started!

Error Message: vSphere DRS functionality was impacted due to unhealthy state vSphere Cluster services caused by the unavailability of vSphere Cluster Service VMs. vSphere Cluster Service VMs are required to maintain the health of vSphere DRS.

Events Tab will have errors for the following Privilege check failed for user VSPHERE.LOCAL\vpxd-extension-xxxx for missing permission.

Before You Start!

  • Take a Snapshot of your vCSA
  • SSH into vCSA

Change to shell

mkdir /certificate
/usr/lib/vmware-vmafd/bin/vecs-cli entry getcert --store vpxd-extension --alias vpxd-extension --output /certificate/vpxd-extension.crt
/usr/lib/vmware-vmafd/bin/vecs-cli entry getkey --store vpxd-extension --alias vpxd-extension --output /certificate/vpxd-extension.key
python /usr/lib/vmware-vpx/scripts/updateExtensionCertInVC.py -e com.vmware.vim.eam -c /certificate/vpxd-extension.crt -k /certificate/vpxd-extension.key -s <FQDN> -u [email protected]

2023-06-15T02:32:01.586Z Updating certificate for “com.vmware.vim.eam” extension
2023-06-15T02:32:01.645Z Successfully updated certificate for “com.vmware.vim.eam” extension
2023-06-15T02:32:01.669Z Verified login to vCenter Server using certificate=”/certificate/vpxd-extension.crt” is successful

service-control --stop vmware-eam

Operation not cancellable. Please wait for it to finish…
Performing stop operation on service eam…
Successfully stopped service eam

service-control --start vmware-eam

Operation not cancellable. Please wait for it to finish…
Performing start operation on service eam…
Successfully started service eam

Few seconds later in your vSphere UI, you will see vCLS starting to turn back on!

June 14, 2023 0 comments 4.4K views
2 FacebookTwitterLinkedinThreadsBlueskyEmail
Events

Who’s Excited for VMware Explore 2023!?

by Tommy Grot June 13, 2023
written by Tommy Grot 3 minutes read

Are you ready to explore the future of multi cloud technology? If so, you won’t want to miss VMware Explore 2023 in Las Vegas!

This year’s conference promises to be the most exciting yet, showcasing the latest and greatest innovations in the world of virtualization, cloud computing, and digital transformation. From cutting-edge demos to inspiring keynotes and general session, you’ll have the opportunity to learn from the brightest minds in the industry and network with fellow tech enthusiasts. Whether you’re a seasoned IT pro or just getting started in your career, this conference is the perfect opportunity to deepen your knowledge, expand your horizons, and have some fun along the way. So mark your calendars, book your tickets here, and get ready to explore the future of tech!

How VMware Explore has helped my career?

VMware Explore 2022 was a blast, with experiencing and hearing and seeing all the new features and solutions VMware offers it has helped my career path and skillset in many ways:

1. Broadened knowledge of VMware products: VMware explore provides cloud engineers with an opportunity to learn about different VMware product offerings and how they can be implemented for various cloud environments.

2. Certifications: VMware explore offers certifications that help cloud engineers to validate their expertise in different areas. These certifications are highly valued in the IT industry and can open up opportunities for career advancement. At VMware Explore VMware Education is on site, which I have utilized the half off discounts at VMware Explore to take an exam!

3. Network with IT professionals: VMware explore provides a platform for cloud engineers to network with other IT professionals, share experiences, and exchange ideas. This networking can lead to new job opportunities and other professional engagements.

4. Hands-on experience: VMware explore provides cloud engineers with hands-on experience in different VMware products and how they can be used in different cloud environments with the state of the art VMware Hands on Labs! This experience is valuable as it can be applied in real-world scenarios and is highly valued by employers.

5. Professional growth: The knowledge and skills gained from VMware explore can help cloud engineers to grow professionally and take on new challenges in their careers. This growth can lead to higher salaries, promotions, and new job opportunities.

What Sessions am I most exited to attend?

  • Elevate Your Application Modernization Journey with a Developer-Ready Cloud [CEIB2614LV] by Stephen Evanchik
  • VMware Cloud Foundation Architecture Lessons Learned [CSXM1510LV] by
    Jonathan McDonald
  • What Minecraft Has Taught Me About Building VM Templates With Automation [VMTN2813LV] by Sean Massey

What was your best Explore story?

At VMware Explore 2022, the first day started with a keynote session where industry experts shared their insights on emerging technologies, and the future of enterprise IT and multi-cloud. After that, everyone went and explored and attended their own sessions, but I had an awesome opportunity to participate in meetings with different business units, such as Cloud Director/VCPP, vRealize (Aria), AVI Vantage (NSX ALB), Cloud Foundation (VCF) and it was an enriching experience to collaborate with Vice Presidents, R&D Managers/Engineers, Architects and show case what I have deployed and architected.

In conclusion, the VMware Explore event was an enriching experience, and I was excited that I got to participate in different business units meetings. I gained a broader understanding of how the company operates, and the role of each team in delivering value to customers. I left VMware Explore feeling more enlightened and empowered, ready to tackle any challenge in the business world.

VMware Explore – Las Vegas Links

  • Registration : https://www.vmware.com/explore/us.html?src=em_nnqwkc8glpsjf&int_cid=7012H000000wtgaQAA
  • Show Agenda : https://www.vmware.com/explore/us/attend/agenda.html?src=em_nnqwkc8glpsjf&int_cid=7012H000000wtgaQAA
  • Content Catalog: https://event.vmware.com/flow/vmware/explore2023lv/content/page/catalog?src=em_nnqwkc8glpsjf&int_cid=7012H000000wtgaQAA
  • Show Activities : https://www.vmware.com/explore/us/engage/activities.html?src=em_nnqwkc8glpsjf&int_cid=7012H000000wtgaQAA
  • FAQs : https://www.vmware.com/explore/us/attend/faqs.html?src=em_nnqwkc8glpsjf&int_cid=7012H000000wtgaQAA
  • VMware Explore Blog: https://blogs.vmware.com/explore/?src=em_nnqwkc8glpsjf&int_cid=7012H000000wtgaQAA
  • VMware Explore Twitter: https://twitter.com/VMwareExplore (#VMwareExplore)
June 13, 2023 0 comments 543 views
1 FacebookTwitterLinkedinThreadsBlueskyEmail
CloudNetworkingVMware NSX

Deploying VMware NSX Advanced Load Balancer

by Tommy Grot May 3, 2023
written by Tommy Grot 2 minutes read

Today’s topic is on VMware NSX Advanced Load Balancer (AVI). We will walk through the steps of deploying a NSX ALB overlayed on top of your NSX Environment.

Features

  • Multi-Cloud Consistency – Simplify administration with centralized policies and operational consistency
  • Pervasive Analytics – Gain unprecedented insights with application performance monitoring and security
  • Full Lifecycle Automation – Free teams from manual tasks with application delivery automation
  • Future Proof – Extend application services seamlessly to cloud-native and containerized applications

More information at VMware’s site here

What You Will Need:

  • A Configured and running NSX Environment
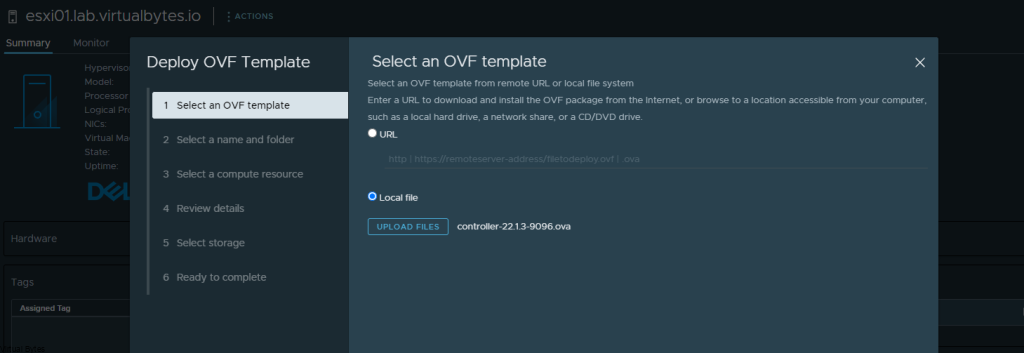
  • NSX ALB Controller OVA (controller-22.1.3-9096.ova)
  • Supported Avi controller versions: 20.1.7, 21.1.2 or later versions
  • Obtain IP addresses needed to install an appliance:
    • Virtual IP of NSX Advanced Load Balancer appliance cluster
    • Management IP address
    • Management gateway IP address
    • DNS server IP address
  • Cluster VIP and all controllers management network must be in same subnet.

Lets start with deploying controller OVF

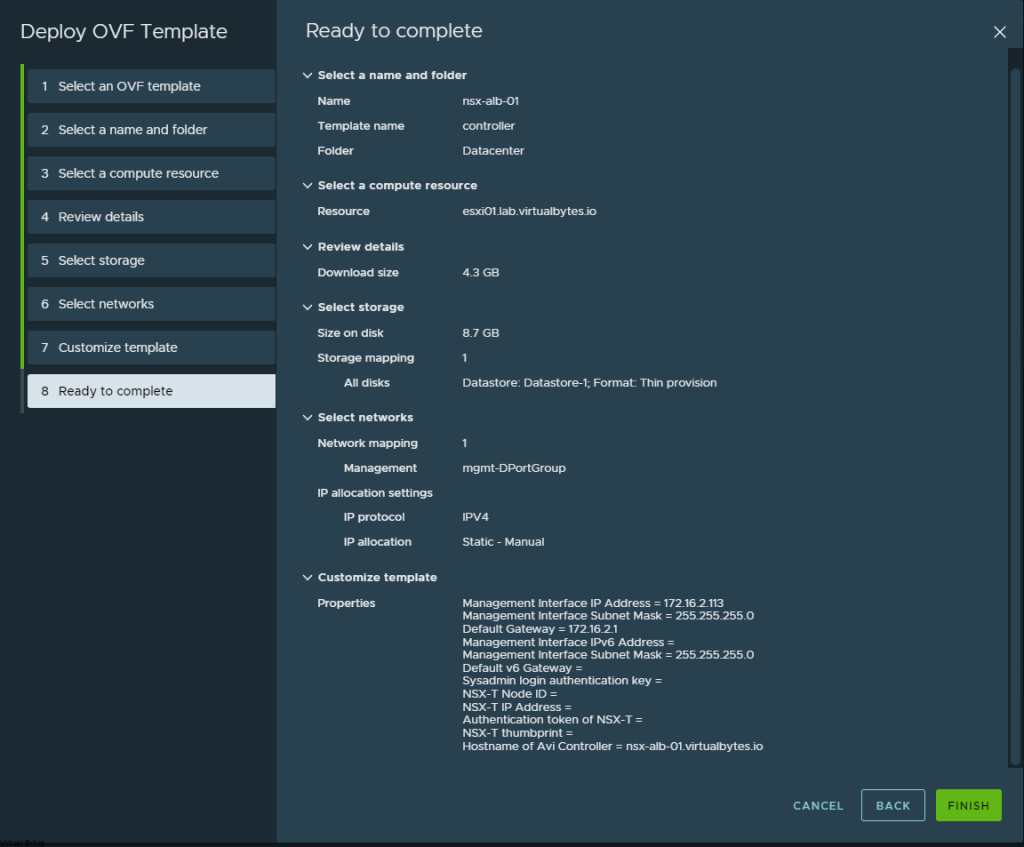
I like to keep neat and consistent names the following names I utilized:

Virtual Machine Names:
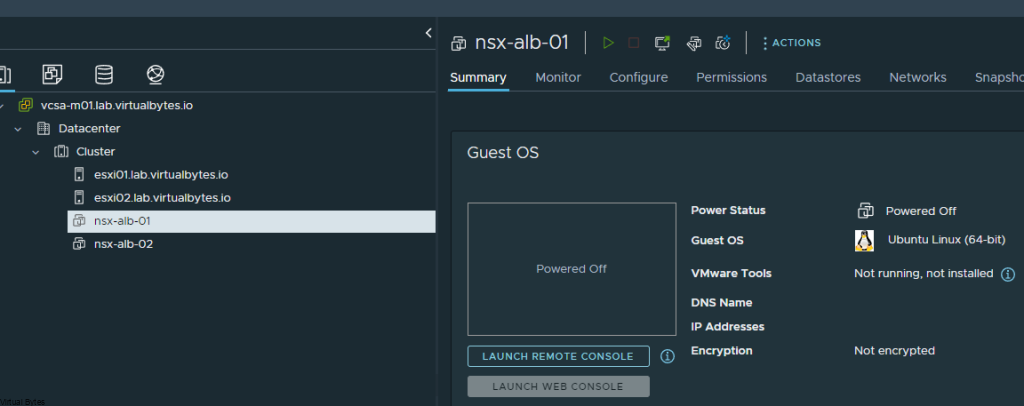
  • nsx-alb-01
  • nsx-alb-02
  • nsx-alb-03

You need total of 3 Controllers deployed to create a High Available NSX ALB.

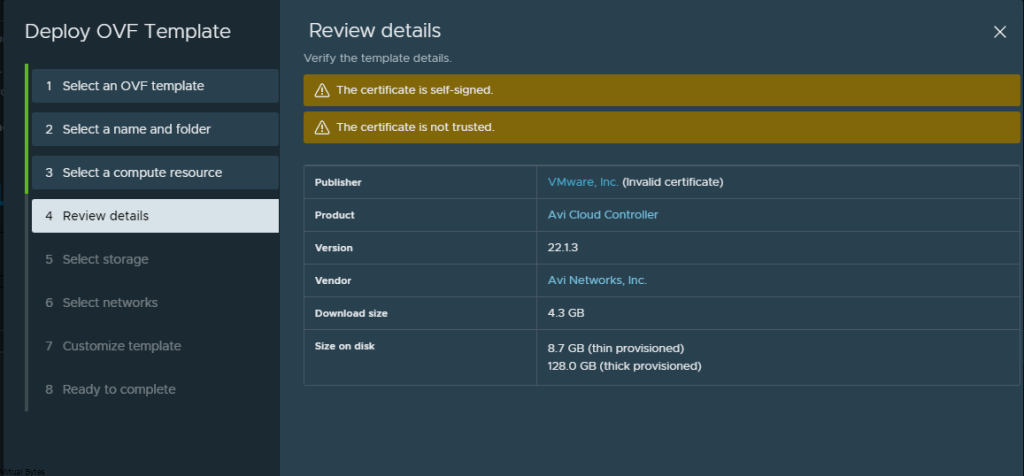
Click the Ignore All, or you will get this error as show below

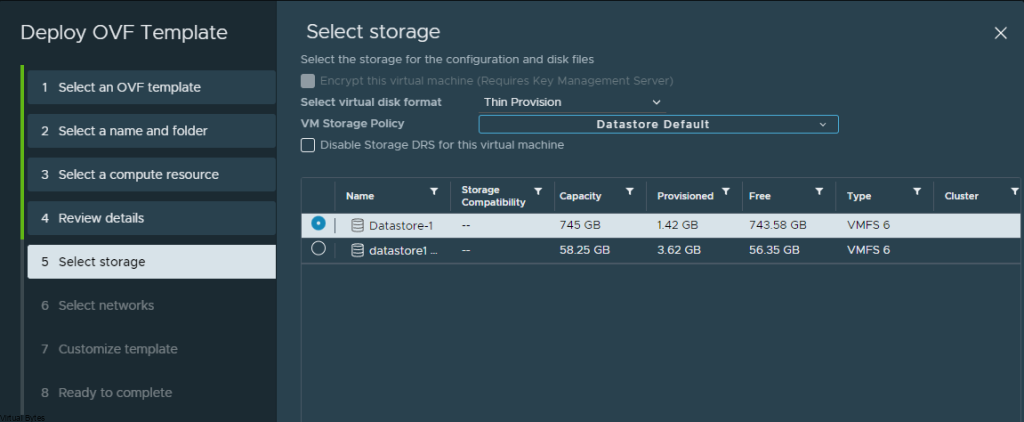
Select your datastore ->

Click Next ->

My DNS Records:

  • nsx-alb-01.virtualbytes.io
  • nsx-alb-02.virtualbytes.io
  • nsx-alb-03.virtualbytes.io

We are deploying!

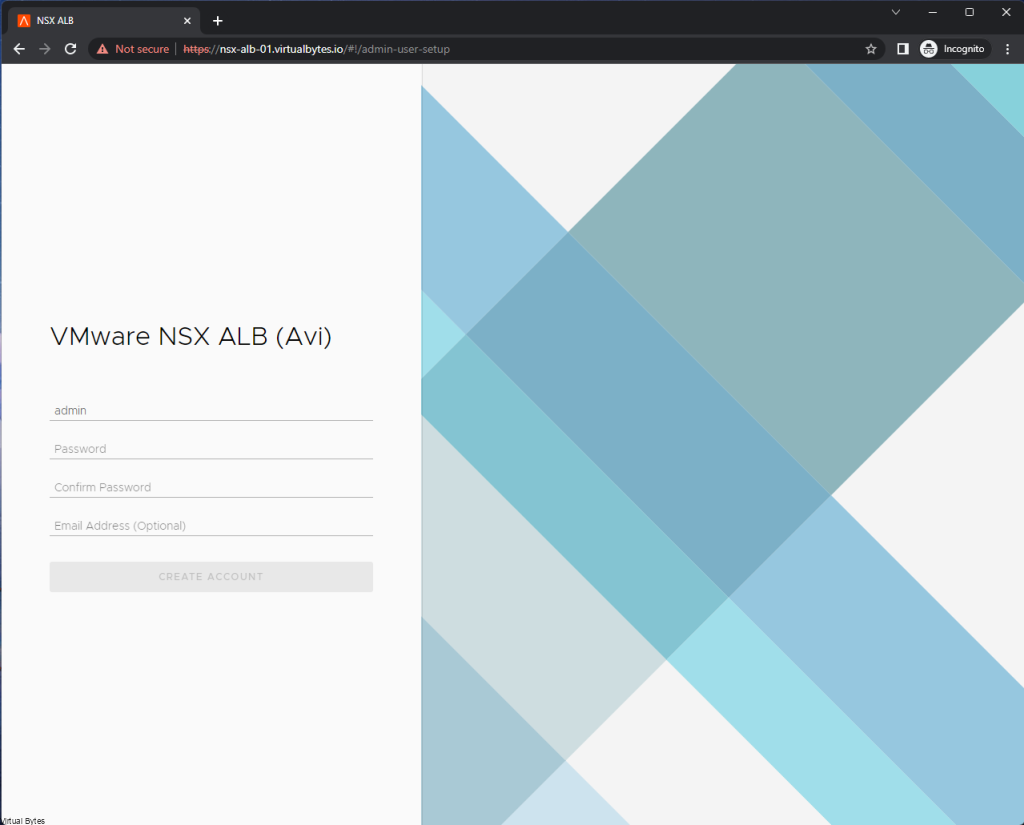
Access your first appliance via its FQDN that you have set in the steps above.

Create your password for local admin account

Create your passphrase, and your DNS resolvers, and DNS Search Domains.

Skip SMTP if not needed, but if you need a mail server please fill out your required SMTP IP and Port

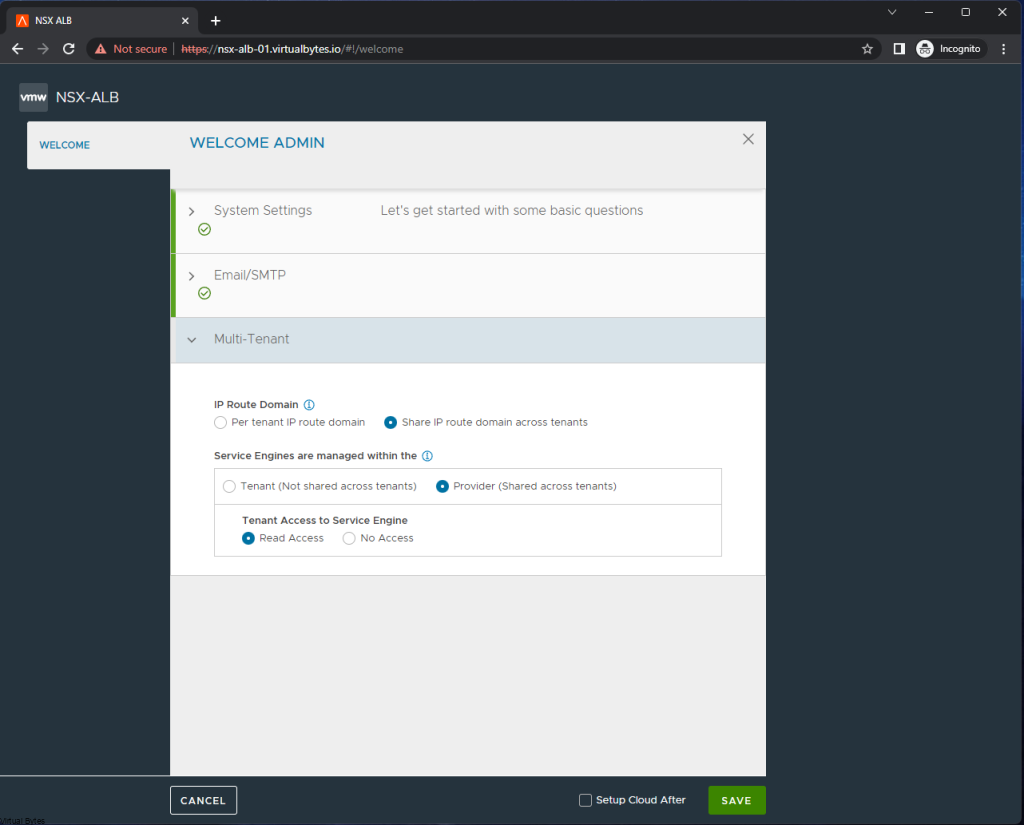
  • Service Engines are managed within the tenant context, not shared across tenants to enable the Tenant Context Mode.
  • Service Engines are managed within the provider context, shared across tenants to enable the Provider Context Mode.

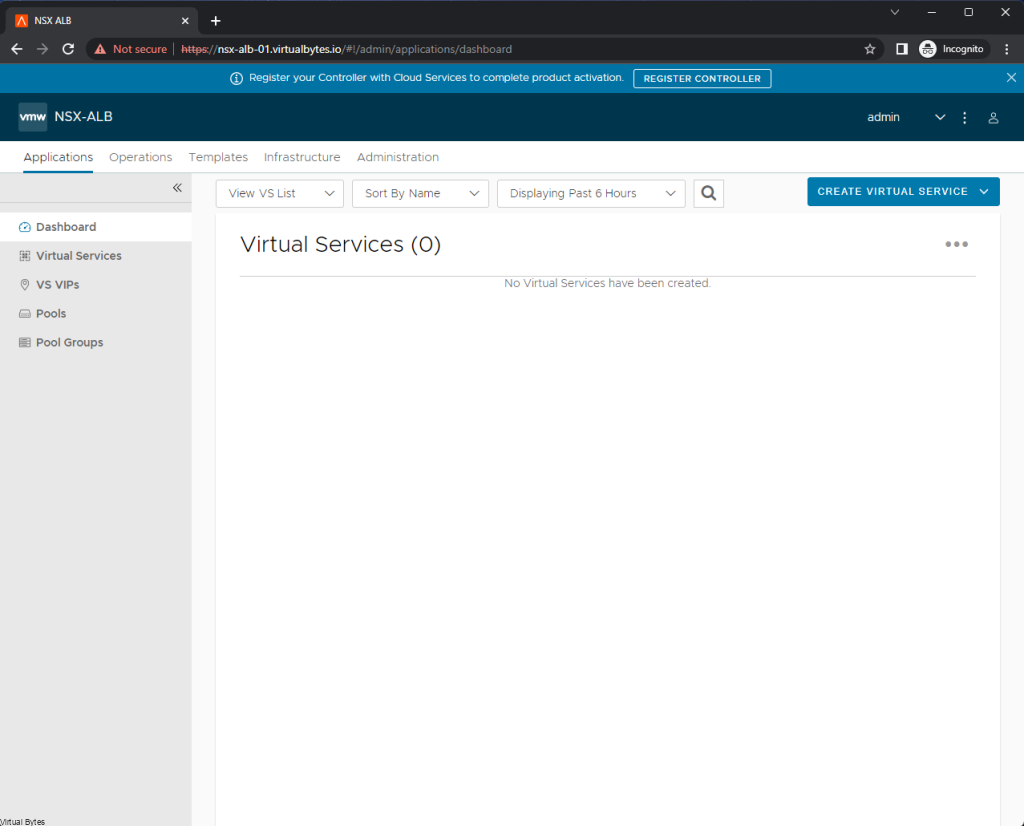
That is it for the initial deployment, next we will add our other 2 additional NSX ALB nodes for HA setup.

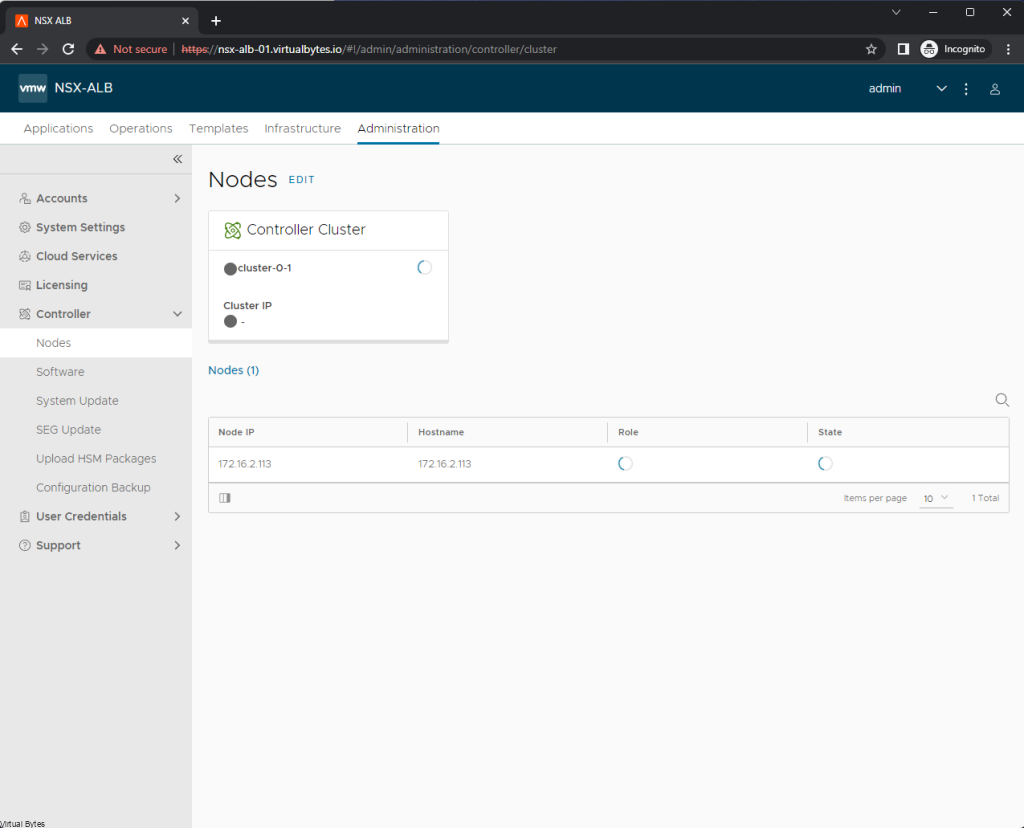
Go to Administration -> Controller -> Nodes

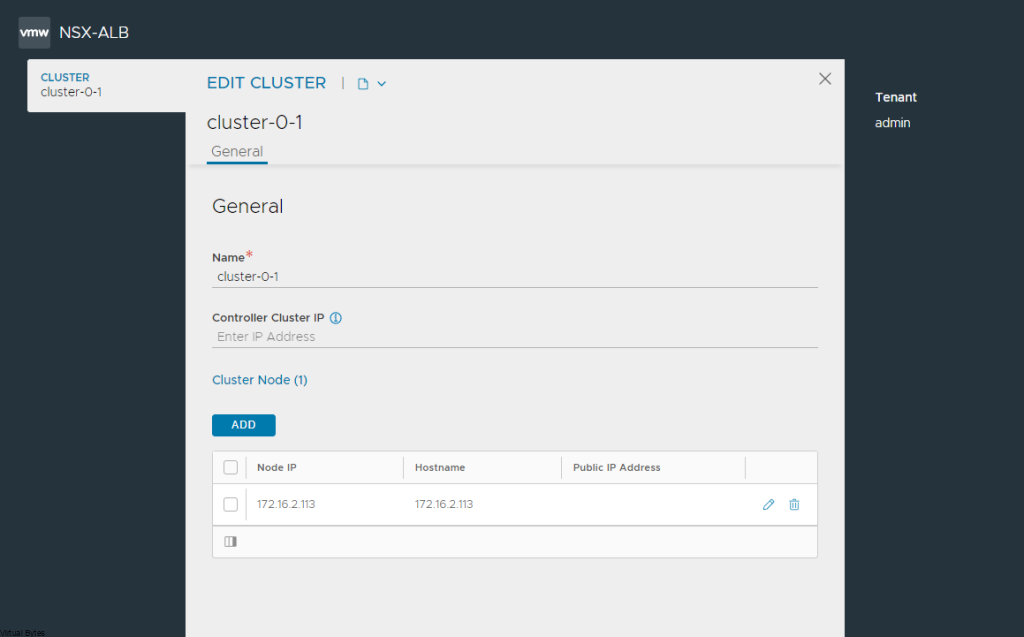
Click Edit ->

For your 2 additional NSX ALB nodes you will need to provide an IP Address and hostname and password.

Sample of what it should look like for all 3 ALB appliances

A simple topology of what we have deployed.

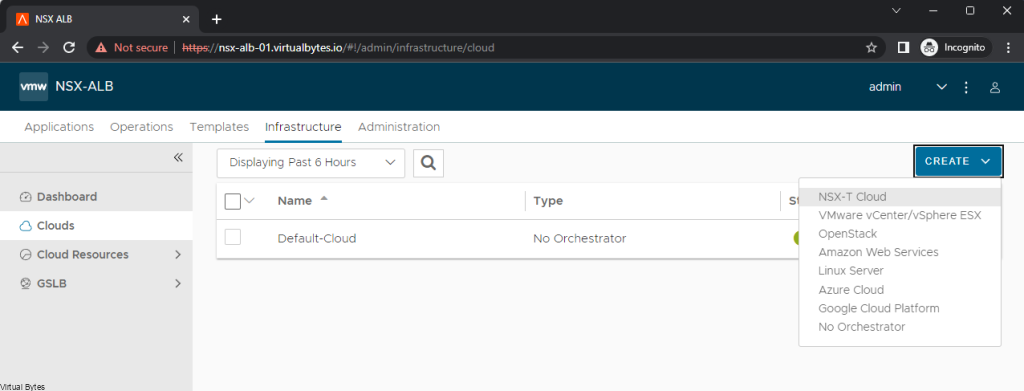
That is it! from now on you can configure for what use case you will NSX-ALB for. A next blog post will go through how to step up a NSX-T Cloud.

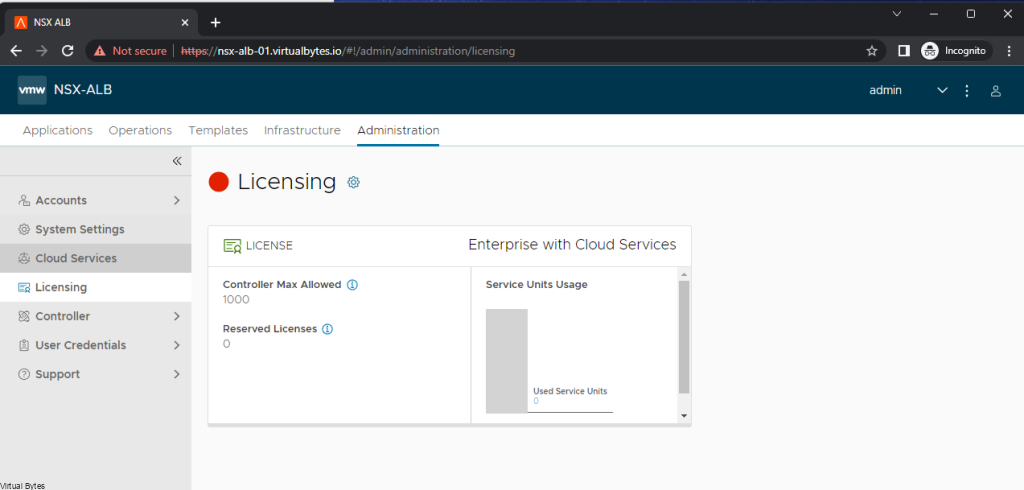
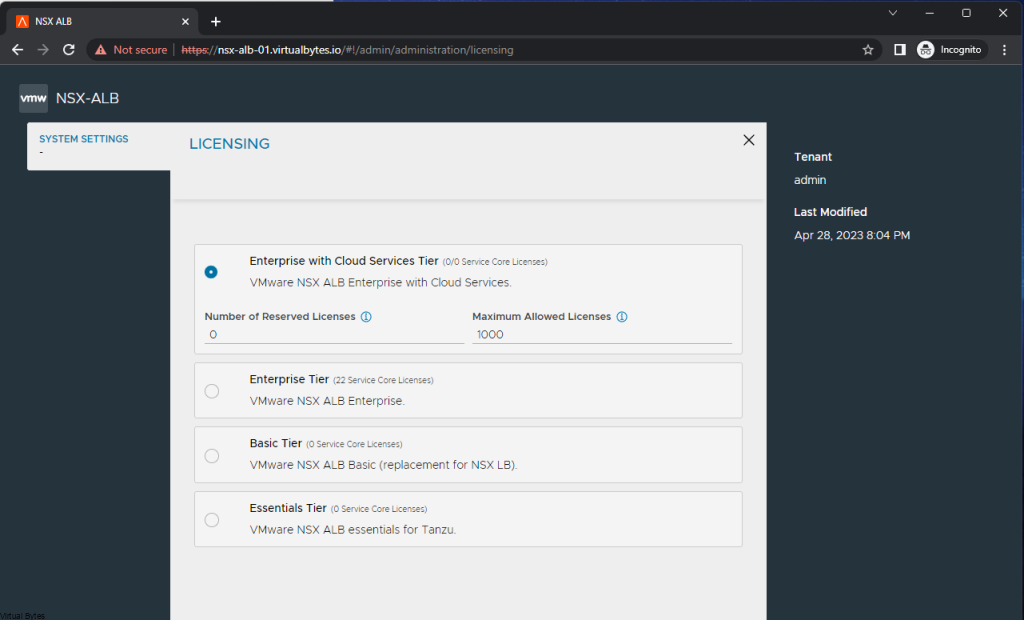
Licensing Flavors – If you click on the little cog icon next to the Licensing. You will see different tiers.

Different License Tiers that are apart of NSX-ALB Licensing model.

May 3, 2023 0 comments 2.7K views
0 FacebookTwitterLinkedinThreadsBlueskyEmail
VMware NSX

VMware NSX – Segment fails to delete from NSX Manager. Status is “Delete in Progress”

by Tommy Grot April 28, 2023
written by Tommy Grot 2 minutes read

Today’s troubleshooting tidbit – If you have issues removing a NSX Segment that got removed from NSX Policy UI but NSX Manager UI still shows that the segment is being used and active and cannot delete, well no problem at all. We will clean it up.

For More Reference VMware has a published KB for this here.

Below you will see that my vmw-vsan-segment that was stuck and said it was dependent on another configuration, but it was not. This segment was created from within VMware Cloud Director.

Confirm that there are no ports in use with the Logical Switch which was not deleted

Lets SSH into one of your NSX Managers, then we will execute the command below Run get logical-switches on the Local Manager CLI and confirm the stale Logical Switch is listed, and note its UUID

get logical-switches

 Elevate to root shell with command below

Engineering Mode

Use st en to enter engineering mode which is root privileged mode

st en

Confirm the Logical Switch info can be polled with API:
curl -k -v -H “Content-Type:application/json” -u admin -X GET “https://{mgr_IP}/api/v1/logical-switches/(LS_UUID)“

Example of my command below:

 curl -k -v -H "Content-Type:application/json" -u admin -X GET "https://172.16.2.201/api/v1/logical-switches/e2f51ece-99fe-417a-b7db-828a6a39234b"

Remove stale Logical Switch objects via API:
curl -k -v -H “Content-Type:application/json”  -H “X-Allow-Overwrite:true” -u admin -X DELETE “https://{mgr_IP}/api/v1/logical-switches/{LS_UUID}?cascade=true&detach=true“

Example of my command below:

curl -k -v -H "Content-Type:application/json"  -H "X-Allow-Overwrite:true" -u admin -X DELETE "https://172.16.2.201/api/v1/logical-switches/e2f51ece-99fe-417a-b7db-828a6a39234b?cascade=true&detach=true"

Now you should see a return ‘200’ response code if deletion is successful

That is all, we successfully cleaned up our NSX Segment that was stuck!

April 28, 2023 0 comments 1.4K views
0 FacebookTwitterLinkedinThreadsBlueskyEmail
VMware ESXiVMware vCenter

Upgrading to VMware vSphere 8 Update 1

by Tommy Grot April 18, 2023
written by Tommy Grot 4 minutes read

Tonight’s topic is upgrading to the new and most anticipated update of: vSphere 8 Update 1 from vSphere 8.0. In this walk through we will do a step by step process of what you will need to do before you upgrade your vSphere environment.

What’s New

Some tidbits of information below from the Release Notes – More Information check out the release notes here

  • vSphere 8.0 IA/GA Release Model: For more information on the Release Model of vSphere Update releases, see The vSphere 8 Release Model Evolves.
  • vSphere Configuration Profiles: vSphere 8.0 Update 1 officially launches vSphere Configuration Profiles, which allow you to manage ESXi cluster configurations by specifying a desired host configuration at the cluster level, automate the scanning of ESXi hosts for compliance to the specified Desired Configuration and remediate any host that is not compliant. vSphere Configuration Profiles require that you use vSphere Lifecycle Manager images to manage your cluster lifecycle, a vSphere 8.0 Update 1 environment, and Enterprise Plus or vSphere+ license. For more information, see Using vSphere Configuration Profiles to Manage Host Configuration at a Cluster Level.
  • With vSphere 8.0 Update 1, vSphere Distributed Services Engine adds support for:
    • NVIDIA BlueField-2 DPUs to server designs from Lenovo (Lenovo ThinkSystem SR650 V2).
    • 100G NVIDIA BlueField-2 DPUs to server designs from Dell.
    • UPTv2 for NVIDIA BlueField-2 DPUs.
    • AMD Genoa CPU based server designs from Dell.
  • Support for heterogenous virtual graphics processing unit (vGPU) profiles on the same GPU hardware: vSphere 8.0 Update 1 removes the requirement that all vGPUs on a physical GPU must be of the same type and you can set different vGPU profiles, such as compute, graphics, or Virtual Desktop Infrastructure workload, on one GPU to save cost by higher GPU utilization and reduced workload fragmentation.
  • Integration of VMware Skylineâ„¢ Health Diagnosticsâ„¢ with vCenter: Starting with vSphere 8.0 Update 1, you can detect and remediate issues in your vSphere environment by using the VMware Skyline Health Diagnostics self-service diagnostics platform, which is integrated with the vSphere Client. For more information, see VMware Skyline Health Diagnostics for vSphere Documentation.
  • VM-level power consumption metrics: Starting with vSphere 8.0 Update 1, you as a vSphere admin can track power consumption at a VM level to support the environmental, social, and governance goals of your organization.

What you need:

  • SFTP Server to back up your VCSA
  • ESXi 8.0.1 Image via Customer Connect – (VMware-VMvisor-Installer-8.0U1-21495797.x86_64.iso)
  • Few minutes of preparation

First thing you want to get your vCenter Server Appliance on the newest version, before you upgrade your VMware ESXi hosts to 8.0.1.

Below we will walk through the process to get your VCSA backed up before upgrading!

(Side Note – Make sure you have SFTP or any other means of backing up your VCSA, for this walk through we will not go through setting up a SFTP server)

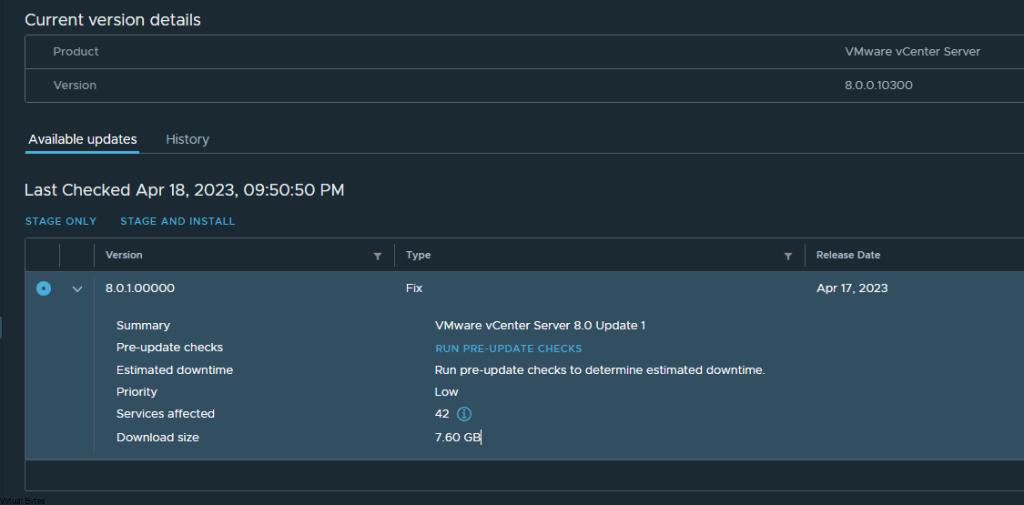
Once the VCSA is backed up successfully – > Then click Stage and Install

Accept that lovely EULA 🙂 If you don’t then no upgrade for you.

Click Next – it will be running pre-checks, and the upgrade process will start, the whole process took roughly less than 15 minutes, this depends on your environment and how large the db and how many objects maintained within VCSA.

Install in progress….

During this process it will convert your data from the previous installation over to your new one, so if there is lots of metrics and logs and historical information it may take a bit.

I went and took a look at how the vSphere Client status is, and there is a new UI addon where it is different from previous deployments of vSphere 8.0

Lets log back into your vCenter!

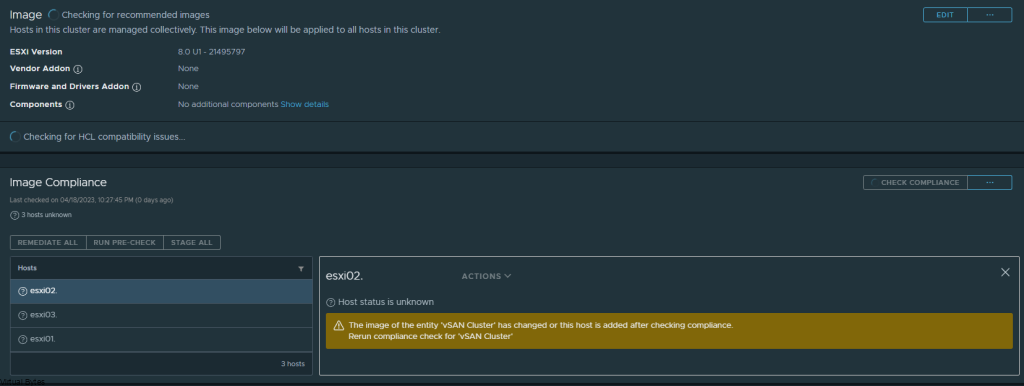
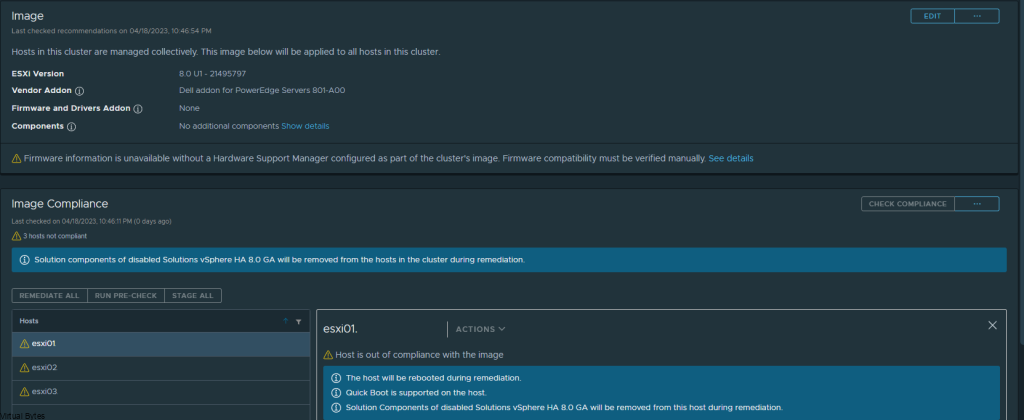
We will prep the cluster image and since I have Dell PowerEdge R740s (14th Gen) hardware I make sure I have the correct Vendor addon selected and validated.

After few minutes of validating, your Image for your cluster will be ready to be applied

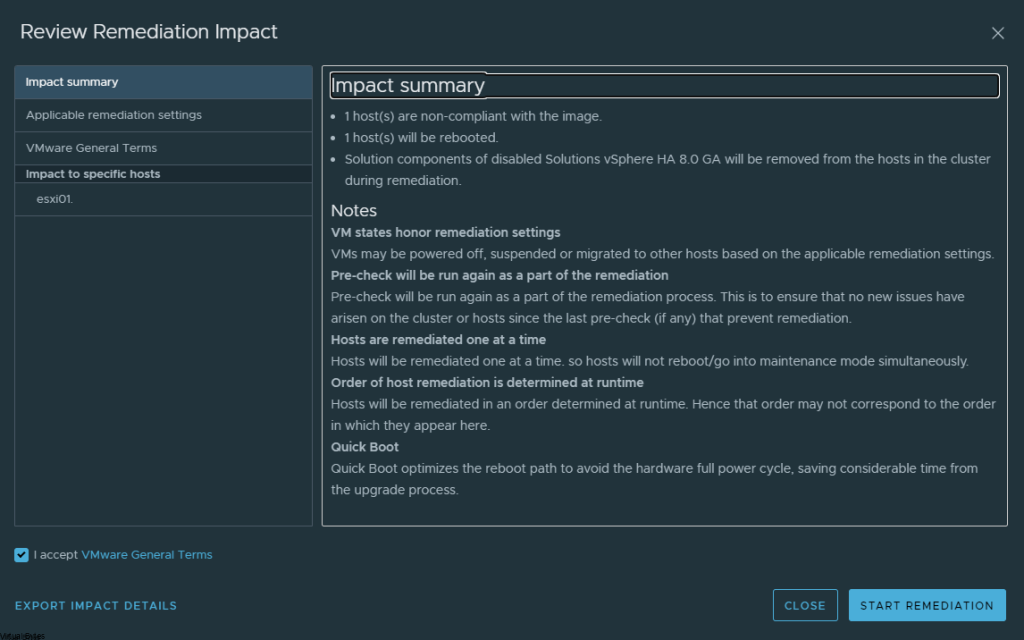
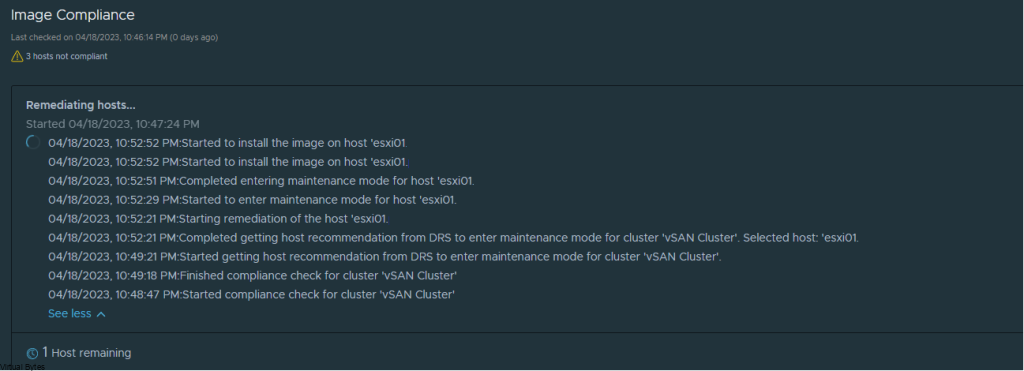
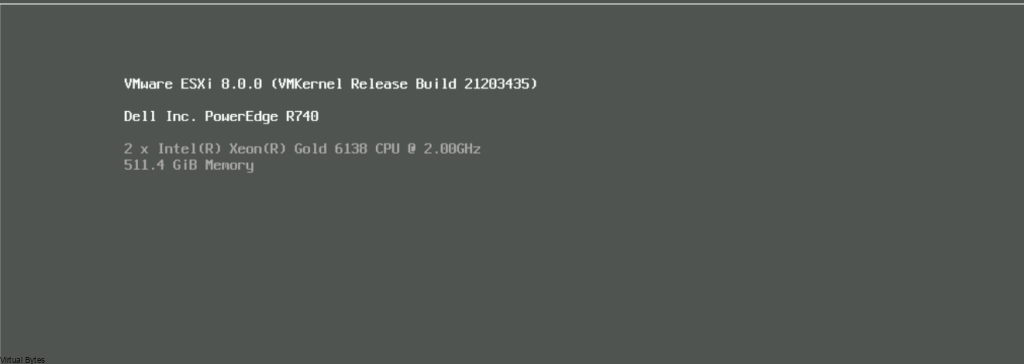
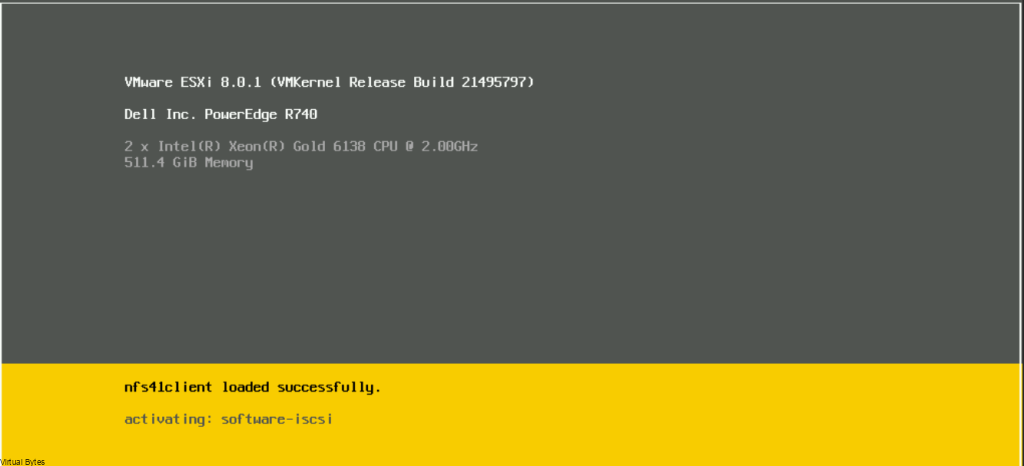
Lets start remediating some servers, one by one. As I have Dell PowerEdge R740s, I have quick boot enabled so the whole upgrade process for each ESXi host was less than 10 minutes for each host.

Upgrade In Process…

While we are waiting, I like to login to the servers iDRAC and watch the upgrade process.

Few minutes later we are on VMware ESXi 8.0.1

After all ESXi hosts are upgrade to 8.0.1, next we will go to Configure -> vSAN – > Disk Management -> Upgrade Disks format version to version 18.0 from 17.0

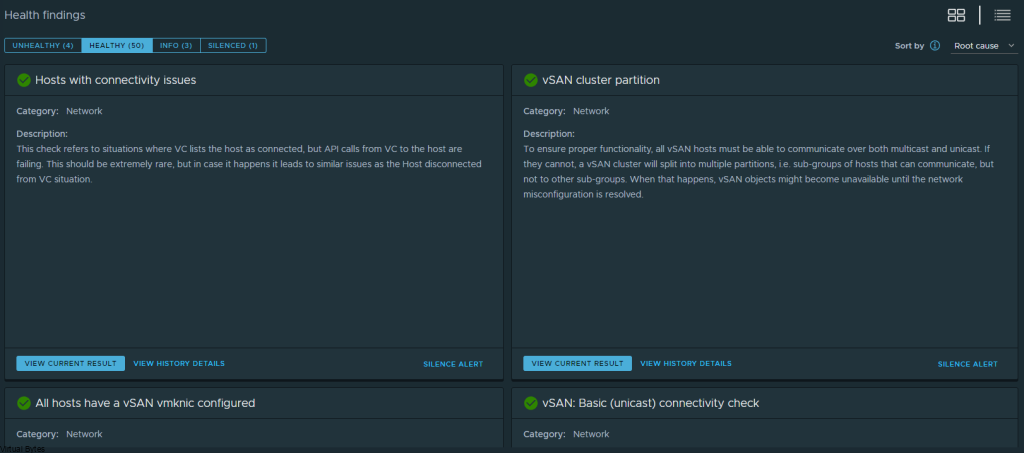
Some neat additions to vSphere 8 Update 1 – I do like how there are tiles now with more detailed information, but also you can toggle the hamburger menu to collapse all these tiles into a easier to see all Health Findings.

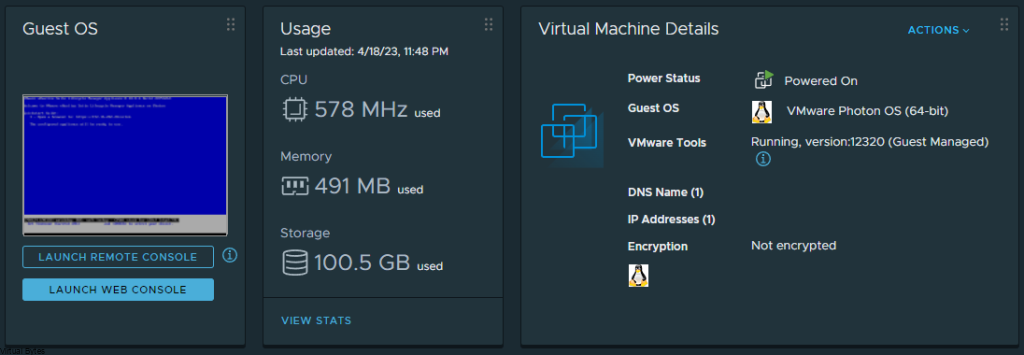
Also, I am glad that the usage is back into its tile on the vSphere User Interface, it is a much needed and appreciated addon back into vSphere 8.0.1

That is all! After following through the walkthrough you should of been able to upgrade your vSphere 8 to vSphere 8.0.1.

April 18, 2023 0 comments 4.5K views
0 FacebookTwitterLinkedinThreadsBlueskyEmail
VMware Troubleshooting

How PCIe NVMe Disks affect VMware ESXi vmnic order assignment

by Tommy Grot April 18, 2023
written by Tommy Grot 3 minutes read

Today’s topic is about VMware Cloud Foundation and homogenous network mapping with additional PCIe interfaces within a server.

Physical PortDevice Alias
Onboard port 1vmnic0
Onboard port 2vmnic1
Onboard port 3vmnic2
Onboard port 4vmnic3
Slot #2 port 1vmnic4
Slot #2 port 2vmnic5
Slot #4 port 1vmnic6
Slot #4 port 2vmnic7

VMware KB – How VMware ESXi determines the order in which names are assigned to devices (2091560) this KB talks about vmnic ordering and assignment, but the post below will explain when a NVMe PCIe disk is apart of a host.

What kind of environment? – VMware Cloud Foundation 4.x

If a system has:

  • Four onboard network ports
  • One dual-port NIC in slot #2
  • One dual-port NIC in slot#4

Then devices names should be assigned as:

The problem:

If a physical server has additional PCIe interfaces that are greater in quantity over another server that you want to bring into an existing or new cluster.

An example – Dell PowerEdge R740, with 24 NVMe PCIe SSD Drives, and 2 – QSFP Mellanox 40Gig PCIe, and 1 – NDC LOM Intel X710 Quad 10Gb SFP+, and Boss Card, but another server that has few drives less than 24 as example above but the same network cards as following (2 – QSFP Mellanox 40Gig PCIe, 1 – NDC LOM Intel X710 Quad 10Gb SFP+, and Boss Card)

This will cause the physical server to have its PCIe Hardware IDs shift by (N) and cause the vmnic mapping to be out of order where certain vmnics will show up out of order, which causes the homogeneous network misconfiguration layout for VMware Cloud Foundation ESXi Hosts that are apart of a workload domain. It is important to have identical hardware for a VCF implementation to have successful VCF deployment of a workload domain.

This type of issue would cause problems for any future deployments of VMware Cloud Foundation 4.x. If they have an existing cluster with either type of configurations: high density compute node, or a vGPU node, or a high-density storage node it would throw off the PCIe mapping to and prevent all esxi hosts to have a homogeneous vmnic mapping to the physical nic.

The Fix:

Before you start doing any configurations with your ESXi host within VCF, please make sure to Decommission that host from your cluster within that workload domain.

Once the host is removed from that cluster within the workload domain:

Go to – > Workload Domains -> (Your Domain) ->

Clusters -> Hosts (Tab) -> Select the host you want to remove

Then Go back to Main SDDC Page – > Hosts -> and Decommission that select ESXi Host

Once, host is decommissioned, wipe all your NVMe Disks first, and then make sure to shutdown the ESXi host and unplug the NVMe disks just slightly to ensure that they do not get powered on, so then the next re-image of your ESXi host there will only be 1 disk which should be your boot drive or a Boss SSD M.2.

After server is up login back into your ESXi host and it should match to your liking where all the vmnics are aligned and correctly showing up in a homogenous layout

The Results:

Before

After

April 18, 2023 0 comments 670 views
0 FacebookTwitterLinkedinThreadsBlueskyEmail
Cloud

VMware Cloud Director 10.4.X & Terraform Automation Part 2

by Tommy Grot April 13, 2023
written by Tommy Grot 6 minutes read

Tonight’s multi-post is about VMware Cloud Director 10.4.x and Terraform!

With Terraform there are endless possibilities, creating a virtual data center and being able to tailor to your liking and keeping it in an automated deployment. In this multi-part blog post we will get into VCD and Terraform Infrastructure as Code automation. If you would like to see what we did in Part 1, here is the previous post – VMware Cloud Director 10.4.X & Terraform Automation Part 1

What You will Need:

  • A Linux VM to execute Terraform from
  • Latest Terraform Provider (I am using beta 3.9.0-beta.2 )
  • Gitlab / Code Repo (Optional to store your code)
  • VMware Cloud Director with NSX-T Integrated already
  • Local Account with Provider Permissions on VCD (mine is terraform)

Lets Begin!

First part we will add on to our existing Terraform automation which we have continued in Part 1 of this multi-part blog. Below is the provider information for reference.

terraform {
  required_providers {
    vcd = {
      source  = "vmware/vcd"
      version = "3.9.0-beta.2"
    }
  }
}

provider "vcd" {
  url                  = "https://cloud.virtualbytes.io/api"
  org                  = "system"
  user                 = "terraform"
  password             = "VMware1!"
  auth_type            = "integrated"
  max_retry_timeout    = 60
  allow_unverified_ssl = true
}

Next, we will add Data Center Groups to our terraform template, what we are doing here is Creating the virtual data center group to span multiple organizations, if need be, but for this demonstration – I am using a DCG for Distributed Firewall purposes.

#### Create VDC Org Group 

resource "vcd_vdc_group" "demo-vdc-group" {
  depends_on = [vcd_org_vdc.demo-org-10]
  org                   = "demo-org-10"
  name                  = "demo-vdc-group"
  description           = "Demo Data Center Group"
  starting_vdc_id       = vcd_org_vdc.demo-org-10.id
  participating_vdc_ids = [vcd_org_vdc.demo-org-10.id]
  dfw_enabled           = true
  default_policy_status = true
}

The next code snippet – here we will set and configure the Data Center Group firewall from an Internal to Internal and Drop to Any to Any and Allow. Configuration where by default it keeps Internal DFW rule.

##### DFW VDC Group to Any-Any-Allow
resource "vcd_nsxt_distributed_firewall" "lab-03-pro-dfw" {
  depends_on = [vcd_org_vdc.demo-org-10]
  org = "demo-org-10"
  vdc_group_id = vcd_vdc_group.demo-vdc-group.id
  rule {
    name        = "Default_VdcGroup_demo-vdc-group"
    direction   = "IN_OUT"
    ip_protocol = "IPV4"
    source_ids = [vcd_nsxt_security_group.static_group_1.id]
    destination_ids = []
    action      = "ALLOW"
  }
}

If you are wanting to create multiple rules within a Distributed Firewall, here below I will show some examples – This will not be a part of the code implementation.

##### Sample DFW Rule Creation
resource "vcd_nsxt_distributed_firewall" "lab-03-pro-dfw-1" {
  depends_on = [vcd_org_vdc.demo-org-10]
  org = "demo-org-10"
  vdc_group_id = vcd_vdc_group.demo-vdc-group.id
  rule {
    name        = "rule-1" # Here you will create your name for the specific firewall rule
    direction   = "IN_OUT" # One of IN, OUT, or IN_OUT. (default IN_OUT)
    ip_protocol = "IPV4"
    source_ids = []
    destination_ids = []
    action      = "ALLOW"
  }
}

Some more detailed information from Terraform site –

Each Firewall Rule contains following attributes:

  • name – (Required) Explanatory name for firewall rule (uniqueness not enforced)
  • comment – (Optional; VCD 10.3.2+) Comment field shown in UI
  • description – (Optional) Description of firewall rule (not shown in UI)
  • direction – (Optional) One of IN, OUT, or IN_OUT. (default IN_OUT)
  • ip_protocol – (Optional) One of IPV4, IPV6, or IPV4_IPV6 (default IPV4_IPV6)
  • action – (Required) Defines if it should ALLOW, DROP, REJECT traffic. REJECT is only supported in VCD 10.2.2+
  • enabled – (Optional) Defines if the rule is enabled (default true)
  • logging – (Optional) Defines if logging for this rule is enabled (default false)
  • source_ids – (Optional) A set of source object Firewall Groups (IP Sets or Security groups). Leaving it empty matches Any (all)
  • destination_ids – (Optional) A set of source object Firewall Groups (IP Sets or Security groups). Leaving it empty matches Any (all)
  • app_port_profile_ids – (Optional) An optional set of Application Port Profiles.
  • network_context_profile_ids – (Optional) An optional set of Network Context Profiles. Can be looked up using vcd_nsxt_network_context_profile data source.
  • source_groups_excluded – (Optional; VCD 10.3.2+) – reverses value of source_ids for the rule to match everything except specified IDs.
  • destination_groups_excluded – (Optional; VCD 10.3.2+) – reverses value of destination_ids for the rule to match everything except specified IDs.

Now that we have established firewall rules within our template, next you can IP Sets which are kind of a Group that you can use for ACL’s and integrate them into a firewall and static groups etc!

#### Demo Org 10 IP sets
resource "vcd_nsxt_ip_set" "ipset-server-1" {
  org = "demo-org-10" # Optional

  edge_gateway_id = vcd_nsxt_edgegateway.lab-03-pro-gw-01.id

  name        = "first-ip-set"
  description = "IP Set containing IPv4 address for a server"

  ip_addresses = [
    "10.10.10.50",
  ]
}

Static Groups are another great way to assign networks and members. For this example, my Static Group consists of my domain network segment and with this I can utilize the group into firewall rules.

#### Create Static Group
resource "vcd_nsxt_security_group" "static_group_1" {
  org = "demo-org-10"
  edge_gateway_id = vcd_nsxt_edgegateway.lab-03-pro-gw-01.id

  name        = "domain-network"
  description = "Security Group containing domain network"

  member_org_network_ids = [vcd_network_routed_v2.nsxt-backed-2.id]
}

###########################################################
An example of how to use a Static Group within a firewall rule.
  rule {
    name        = "domain-network" ## firewall rule name
    action      = "ALLOW" 
    direction   = "IN_OUT"
    ip_protocol = "IPV4"
    source_ids = [vcd_nsxt_security_group.sg-domain-network.id]
    destination_ids = [vcd_nsxt_security_group.sg-domain-network.id]
    logging   = true
  }

That is it for the automation for Part 2 of VMware Cloud Director! Stay Tuned for more automation!
April 13, 2023 0 comments 1.3K views
0 FacebookTwitterLinkedinThreadsBlueskyEmail
Commvault Disaster Recovery

Deploying Commvault & Integrating with VMware vSphere 8

by Tommy Grot April 3, 2023
written by Tommy Grot 1 minutes read

Today’s Topic! Deploying Commvault, – Commvault is my most favorite Disaster Recovery Solution, it has so many features and many awesome features that are just simple to use and secure!

Simple, comprehensive backup and archiving

  • Comprehensive workload coverage (files, apps, databases, virtual, containers, cloud) from a single extensible platform and user interface
  • High-performance backups via storage integrations
  • Automated tiering for long-term retention and archiving

Trusted recovery, ransomware protection, and security

  • Rapid, granular recovery of data and applications, including instant recovery of virtual machines
  • Built-in ransomware protection including anomaly detection and reporting
  • End-to-end encryption, including data-at-rest and data-in-flight encryption, to ensure your data is secure

More information Visit Commvault’s Website here!

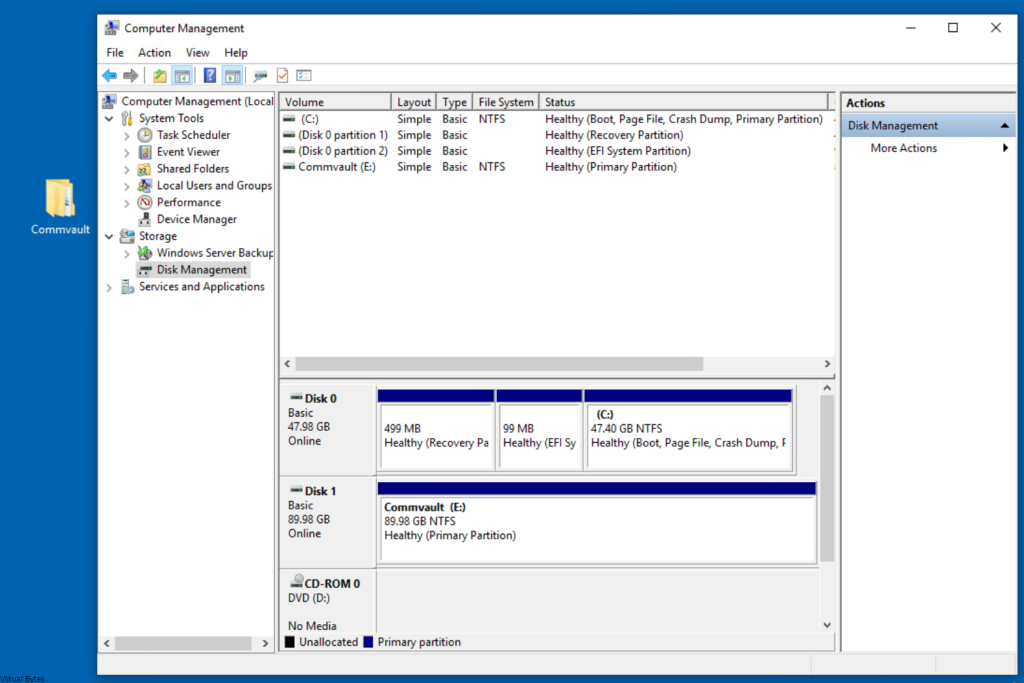
First we will setup a dedicated VLAN for our Commvault CommCell. This will be a multi-part post where first we install and deploy a virtual machine and deploy Commvault,

Prepare a dedicated network for backups

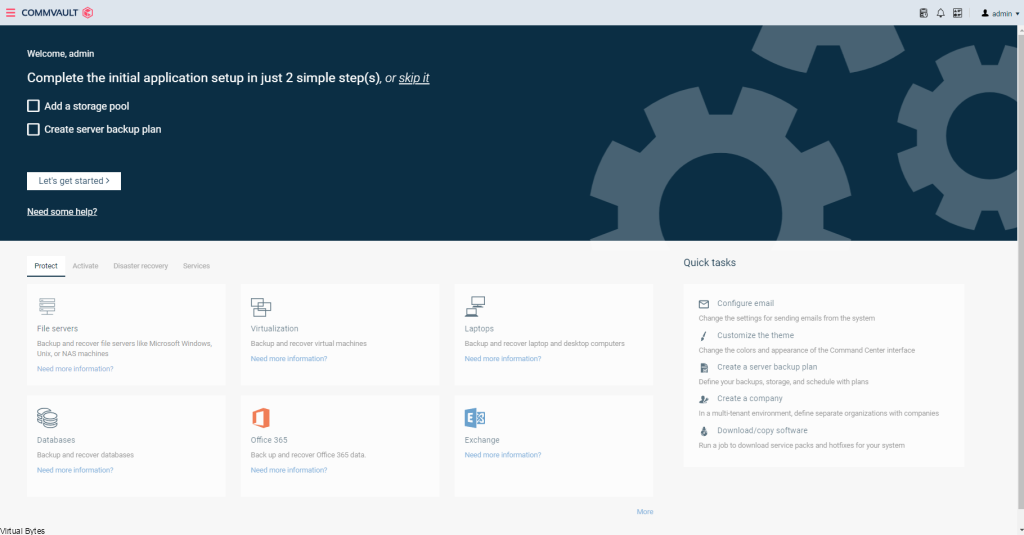
Once, installation is complete you will be able to login to your Comm Cell via web UI.

April 3, 2023 0 comments 714 views
0 FacebookTwitterLinkedinThreadsBlueskyEmail
Cloud

VMware Cloud Director 10.4.x & Terraform Automation Part 1

by Tommy Grot April 3, 2023
written by Tommy Grot 5 minutes read

Today’s post is about VMware Cloud Director 10.4.x and Terraform!

With Terraform there are endless possibilities, creating a virtual data center and being able to tailor to your liking and keeping it in an automated deployment. In this multi-part blog post we will get into VCD and Terraform Infrastructure as Code automation. This will be a multi-part post, for now we are starting off at Part 1!

What You will Need:

  • A Linux VM to execute Terraform from
  • Latest Terraform Provider (I am using beta 3.9.0-beta.2 )
  • Gitlab / Code Repo (Optional to store your code)
  • VMware Cloud Director with NSX-T Integrated already
  • Local Account with Provider Permissions on VCD (mine is terraform)

Lets Begin!
To begin our terraform main.tf, we will specify the terraform provider VCD version which I am using 3.9.0-beta.2

 terraform {
  required_providers {
    vcd = {
      source  = "vmware/vcd"
      version = "3.9.0-beta.2"
    }
  }
}

provider "vcd" {
  url                  = "https://cloud.virtualbytes.io/api"
  org                  = "system"
  user                 = "terraform"
  password             = "VMware1!"
  auth_type            = "integrated"
  max_retry_timeout    = 60
  allow_unverified_ssl = true

Once you have your Terraform Provider configured and administrative privilege account next, we will start creating an Organization within VCD.

# Creating VMware Cloud Director Organization#
resource "vcd_org" "demo-org-10" {
  name             = "demo-org-10"
  full_name        = "demo-org-10"
  description      = ""
  is_enabled       = true
  delete_recursive = true
  delete_force     = true
  

  vapp_lease {
    maximum_runtime_lease_in_sec          = 3600 # 1 hour
    power_off_on_runtime_lease_expiration = true
    maximum_storage_lease_in_sec          = 0 # never expires
    delete_on_storage_lease_expiration    = false
  }
  vapp_template_lease {
    maximum_storage_lease_in_sec       = 604800 # 1 week
    delete_on_storage_lease_expiration = true
  }
}

Next the code below will create a Virtual Data Center within that Organization you have created above.

resource "vcd_org_vdc" "demo-org-10" {
  depends_on  = [vcd_org.demo-org-10]
  name        = "demo-org-10"
  description = ""
  org         = "demo-org-10"
  allocation_model  = "Flex"
  network_pool_name = "VB-POOL-01"
  provider_vdc_name = "Provider-VDC"
  elasticity = true
  include_vm_memory_overhead = true
  compute_capacity {
    cpu {
      allocated = 2048
    }

    memory {
      allocated = 2048
    }
  }

  storage_profile {
    name    = "vCloud"
    limit   = 10240
    default = true
  }
  network_quota            = 100
  enabled                  = true
  enable_thin_provisioning = true
  enable_fast_provisioning = true
  delete_force             = true
  delete_recursive         = true
}

Next, we will specify the automation to create a template library within that Virtual Data Center.

#Creating Virtual Data Center Catalog#
resource "vcd_catalog" "NewCatalog" {
  depends_on = [vcd_org_vdc.demo-org-10]
  org = "demo-org-10"

  name             = "Templates"
  description      = "Template Library"
  delete_recursive = true
  delete_force     = true
}

The next step will depend on if you have NSX already configured and ready to consume a Tier-0 VRF into this Provider Gateway we are about to ingest into this Virtual Data Center. My Tier-0 VRF is labeled = vrf-tier-0-edge-03-gw-lab, as I tell Terraform the existing data where to pull from NSX and to assign it to this VDC.

# Add NSX Edge Gateway Tier 0 to VDC
data "vcd_nsxt_manager" "main" {
  name = "nsx-m01"
}

data "vcd_nsxt_tier0_router" "vrf-tier-0-edge-03-gw-lab" {
  name            = "vrf-tier-0-edge-03-gw-lab"
  nsxt_manager_id = data.vcd_nsxt_manager.main.id
}

resource "vcd_external_network_v2" "ext-net-nsxt-t0" {
  depends_on = [vcd_org_vdc.demo-org-10]
  name        = "lab-03-pro-gw-01"
  description = "vrf-tier-0-edge-03-gw-lab"

  nsxt_network {
    nsxt_manager_id      = data.vcd_nsxt_manager.main.id
    nsxt_tier0_router_id = data.vcd_nsxt_tier0_router.vrf-tier-0-edge-03-gw-lab.id
  }

  ip_scope {
    enabled        = true
    gateway        = "192.168.249.145"
    prefix_length = "29"

    static_ip_pool {
      start_address  = "192.168.249.146"
      end_address   = "192.168.249.149"
    }
  }
}

Now, that we have created a Provider Gateway by consuming a VRF Tier-0 from NSX, next we will create a Tier-1 Gateway and attach it into the Virtual Data Center so we can add segments!
resource "vcd_nsxt_edgegateway" "lab-03-pro-gw-01" {
  depends_on = [vcd_org_vdc.demo-org-10]
  org         = "demo-org-10"
  owner_id    = vcd_vdc_group.demo-vdc-group.id
  name        = "lab-03-pro-gw-01"
  description = "lab-03-pro-gw-01"

  external_network_id = vcd_external_network_v2.ext-net-nsxt-t0.id

    subnet {
    gateway       = "192.168.249.145"
    prefix_length = "29"
    # primary_ip should fall into defined "allocated_ips" 
    # range as otherwise next apply will report additional
    # range of "allocated_ips" with the range containing 
    # single "primary_ip" and will cause non-empty plan.
    primary_ip = "192.168.249.146"
    allocated_ips {
      start_address  = "192.168.249.147"
      end_address   = "192.168.249.149"
    }
  }
}

Now we can create a segment and attach it to our Tier-1 Gateway within the Virtual Data Center!

#### Create VMware Managment Network /24 
resource "vcd_network_routed_v2" "nsxt-backed-1" {
  depends_on = [vcd_org_vdc.demo-org-10]
  org         = "demo-org-10"
  name        = "vmw-nw-routed-01"
  edge_gateway_id = vcd_nsxt_edgegateway.lab-03-pro-gw-01.id
  gateway       = "10.10.10.1"
  prefix_length = 24
  static_ip_pool {
    start_address = "10.10.10.5"
    end_address   = "10.10.10.10"
  }
}

This is it for Part 1! Stay tuned for Part 2 where we will customize this VDC we created with Terraform!

April 3, 2023 0 comments 1.2K views
0 FacebookTwitterLinkedinThreadsBlueskyEmail
Cloud

Upgrading VMware Cloud Director to 10.x Versions

by Tommy Grot March 3, 2023
written by Tommy Grot 4 minutes read

This walkthrough is valid for VMware Cloud Director 10.6.x Upgrade!


What’s New

VMware Cloud Director version 10.4.1.1 release provides bug fixes, updates the VMware Cloud Director appliance base OS and the VMware Cloud Director open-source components.

Resolved Issues

  • VMware Cloud Director operations, such as powering a VM on and off takes longer time to complete after upgrading to VMware Cloud Director 10.4.1After upgrading to VMware Cloud Director 10.4.1, VMware Cloud Director operations, such as powering a VM on or off takes longer time to complete. The task displays a Starting virtual machine status and nothing happens.The jms-expired-messages.logs log file displays an error.RELIABLE:LargeServerMessage & expiration=
  • During an upgrade from VMware Cloud Director 10.4 to version 10.4.1, upgrading the standby cell fails with a Failure: Error while running post-install scripts error messageWhen upgrading the VMware Cloud Director appliance by using an update package from version 10.4 to version 10.4.1, the upgrade of the standby cell fails with an error message.Failure: Error while running post-install scriptsThe update-postgres-db.log log file displays an error.> INFO: connecting to source node> DETAIL: connection string is: host=primary node ip user=repmgr> ERROR: connection to database failed> DETAIL:> connection to server at “primary node ip”, port 5432 failed: could not initiate GSSAPI security context: Unspecified GSS failure. Minor >> code may provide more information: No Kerberos credentials available (default cache: FILE:/tmp/krb5cc_1002)> connection to server at “primary node ip”, port 5432 failed: timeout expired
More Fixes and Known Issues here

More Information about VMware Cloud Director 10.4.1

VMware Cloud Director 10.4.1 introduces several new concepts that facilitate creating, deploying, running, and managing extensions. Solution Add-Ons are an evolution of VMware Cloud Director extensions that are built, implemented, packaged, deployed, instantiated, and managed following a new extensibility framework. Solution Add-Ons contain custom functionality or services and can be built and packaged by a cloud provider or by an independent software vendor. VMware also develops and publishes its own VMware Cloud Director Solution Add-Ons.

My Versions

  • VMware NSX 4.1.0.0.0.21332672
  • VMware vCSA 8.0.0 21216066
  • VMware Cloud Director 10.4.1

First. properly shutdown your VCD Cells if you have multiple cells. Once they are turned off take a snapshot of all of the appliances

Next we will want to upload the tar.gz file via WINSCP to the primary VCD Cell if you have a multi cell deployment you will need to upgrade the first cell, then second and third.

I have logged into the VCD appliance with root account

Then open up a Putty session to the VCD appliance login as root,

Then change directory to /tmp/ Once in the directory:

cd /tmp

Create a Directory within /tmp directory, with the command below:

mkdir local-update-package

Start to upload the VMware_Cloud_Director_10.4.1.9360-21373231_update.tar.gz file for the upgrade into /tmp/local-update-package via winscp

File has been successfully uploaded to the VCD appliance.

Next steps we will need to prepare the appliance for the upgrade:

We will need to move the VMware_Cloud_Director_10.4.1.9360-21373231_update.tar.gz from the /tmp directory to /tmp/local-update-package/

mv VMware_Cloud_Director_10.4.1.9360-21373231_update.tar.gz /tmp/local-update-package

Once in the local-update-package director, and you have your VMware_Cloud_Director_10.4.1.9360-21373231_update.tar.gz run the command below to extract the update package in the new directory we created in /tmp/local-update-package

tar -zxf VMware_Cloud_Director_10.4.1.9360-21373231_update.tar.gz

You can run the “ls” command and you shall see the VMware_Cloud_Director_10.4.1.9360-21373231_update.tar.gz file along with manifest and package-pool

After you have verified the local update directory then we will need to set the update repository.

vamicli update --repo file:///tmp/local-update-package

Check for update with this command after you have set the update package into the repository address

vamicli update --check

Now, we see that we have a upgrade that is staged and almost ready to be ran! But, we will need to shutdown the cell(s) with this command

/opt/vmware/vcloud-director/bin/cell-management-tool -u administrator cell --shutdown

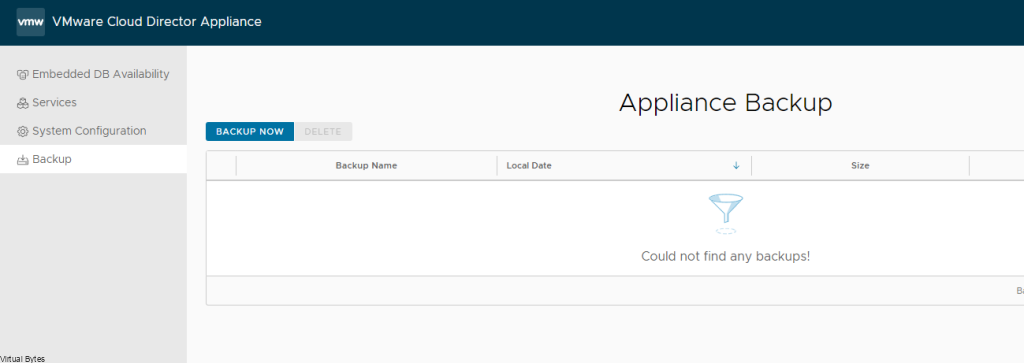
Next is to take a backup of the database, log into VMware Cloud Director Appliance, https://<your-ip>:5480 , same port as vCSA VAMI.

Backup was successful! Now, time for the install

Apply the upgrade for VCD, the command below will run will install the update

vamicli update --install latest

Now, the next step is important, if you have any more VCD Cell appliances you will want to repeat first few steps and then just run the command below to upgrade the other appliances:

/opt/vmware/vcloud-director/bin/upgrade 

Select Y to Proceed with the upgrade

After successful upgrade, you may reboot VCD appliance and test, and after successful tests remove your snapshot.

March 3, 2023 0 comments 3.5K views
3 FacebookTwitterLinkedinThreadsBlueskyEmail
Newer Posts
Older Posts


Recent Posts

  • Offline VMware Cloud Foundation 9 Depot: Your Path to Air-Gapped Deployments
  • VMware Cloud Foundation 9: Simplifying Identity with a Unified SSO Experience
  • What’s New In VMware Cloud Foundation 9.0
  • Deploying & Configuring the VMware LCM Bundle Utility on Photon OS: A Step-by-Step Guide
  • VMware Cloud Foundation: Don’t Forget About SSO Service Accounts

AI cloud Cloud Computing cloud director configure cyber security director dns domain controller ESXi How To las vegas llm llms multicloud NSx NSX-T 3.2.0 NVMe sddc security servers ssh storage tenant upgrade vcd vcda VCDX vcenter VCF vcf 9 VDC vexpert Virtual Machines VMs vmware vmware.com vmware aria VMware Cloud Foundation VMware cluster VMware Explore VMware NSX vrslcm vsan walkthrough

  • Twitter
  • Instagram
  • Linkedin
  • Youtube

@2023 - All Right Reserved. Designed and Developed by Virtual Bytes

Virtual Bytes
  • Home
  • Home Data Center 2025
  • VMware
    • Cloud
    • Datacenter & Cloud Infrastructure
      • VMware ESXi
      • VMware vCenter
      • VMware vSAN
    • Networking & Security
    • Desktop & App Virtualization
      • Omnissa Horizon
    • Troubleshooting
    • Ansible
  • Education
  • Hardware
    • Hardware Tips & Tricks
  • Events
  • About
    • About Me
    • Home Lab Archives
      • Home Lab 2020-2022
      • Home Lab 2016-2020