Top Posts
Deploying & Configuring the VMware LCM Bundle Utility...
VMware Cloud Foundation: Don’t Forget About SSO Service...
VMware Explore Las Vegas 2025: Illuminating the Path...
Securing Software Updates for VMware Cloud Foundation: What...
VMware Cloud Foundation 5.2: A Guide to Simplified...
VMware Cloud Foundation 5.2: Unlocking Secure Hybrid Cloud...
VMware Cloud Foundation – Memory Tiering: Optimizing Memory...
Decoding VMware Cloud Foundation: Unveiling the numerous amount...
VMware Cloud Director 10.6.1: Taking Cloud Management to...
Omnissa Horizon Upgrade 2406 to 2412
Virtual Bytes
  • Home
  • Home Data Center 2025
  • VMware
    • Cloud
    • Datacenter & Cloud Infrastructure
      • VMware ESXi
      • VMware vCenter
      • VMware vSAN
    • Networking & Security
    • Desktop & App Virtualization
      • Omnissa Horizon
    • Troubleshooting
    • Ansible
  • Education
  • Hardware
    • Hardware Tips & Tricks
  • Events
  • About
    • About Me
    • Home Lab Archives
      • Home Lab 2020-2022
      • Home Lab 2016-2020
Category:

VMware ESXi

VMware ESXiVMware vCenter

Upgrading to VMware vSphere 8 Update 1

by Tommy Grot April 18, 2023
written by Tommy Grot 4 minutes read

Tonight’s topic is upgrading to the new and most anticipated update of: vSphere 8 Update 1 from vSphere 8.0. In this walk through we will do a step by step process of what you will need to do before you upgrade your vSphere environment.

What’s New

Some tidbits of information below from the Release Notes – More Information check out the release notes here

  • vSphere 8.0 IA/GA Release Model: For more information on the Release Model of vSphere Update releases, see The vSphere 8 Release Model Evolves.
  • vSphere Configuration Profiles: vSphere 8.0 Update 1 officially launches vSphere Configuration Profiles, which allow you to manage ESXi cluster configurations by specifying a desired host configuration at the cluster level, automate the scanning of ESXi hosts for compliance to the specified Desired Configuration and remediate any host that is not compliant. vSphere Configuration Profiles require that you use vSphere Lifecycle Manager images to manage your cluster lifecycle, a vSphere 8.0 Update 1 environment, and Enterprise Plus or vSphere+ license. For more information, see Using vSphere Configuration Profiles to Manage Host Configuration at a Cluster Level.
  • With vSphere 8.0 Update 1, vSphere Distributed Services Engine adds support for:
    • NVIDIA BlueField-2 DPUs to server designs from Lenovo (Lenovo ThinkSystem SR650 V2).
    • 100G NVIDIA BlueField-2 DPUs to server designs from Dell.
    • UPTv2 for NVIDIA BlueField-2 DPUs.
    • AMD Genoa CPU based server designs from Dell.
  • Support for heterogenous virtual graphics processing unit (vGPU) profiles on the same GPU hardware: vSphere 8.0 Update 1 removes the requirement that all vGPUs on a physical GPU must be of the same type and you can set different vGPU profiles, such as compute, graphics, or Virtual Desktop Infrastructure workload, on one GPU to save cost by higher GPU utilization and reduced workload fragmentation.
  • Integration of VMware Skyline™ Health Diagnostics™ with vCenter: Starting with vSphere 8.0 Update 1, you can detect and remediate issues in your vSphere environment by using the VMware Skyline Health Diagnostics self-service diagnostics platform, which is integrated with the vSphere Client. For more information, see VMware Skyline Health Diagnostics for vSphere Documentation.
  • VM-level power consumption metrics: Starting with vSphere 8.0 Update 1, you as a vSphere admin can track power consumption at a VM level to support the environmental, social, and governance goals of your organization.

What you need:

  • SFTP Server to back up your VCSA
  • ESXi 8.0.1 Image via Customer Connect – (VMware-VMvisor-Installer-8.0U1-21495797.x86_64.iso)
  • Few minutes of preparation

First thing you want to get your vCenter Server Appliance on the newest version, before you upgrade your VMware ESXi hosts to 8.0.1.

Below we will walk through the process to get your VCSA backed up before upgrading!

(Side Note – Make sure you have SFTP or any other means of backing up your VCSA, for this walk through we will not go through setting up a SFTP server)

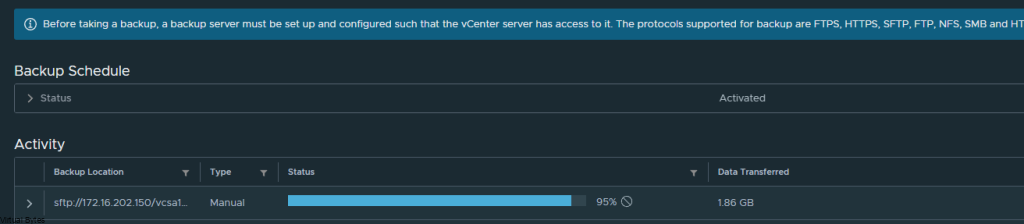
Once the VCSA is backed up successfully – > Then click Stage and Install

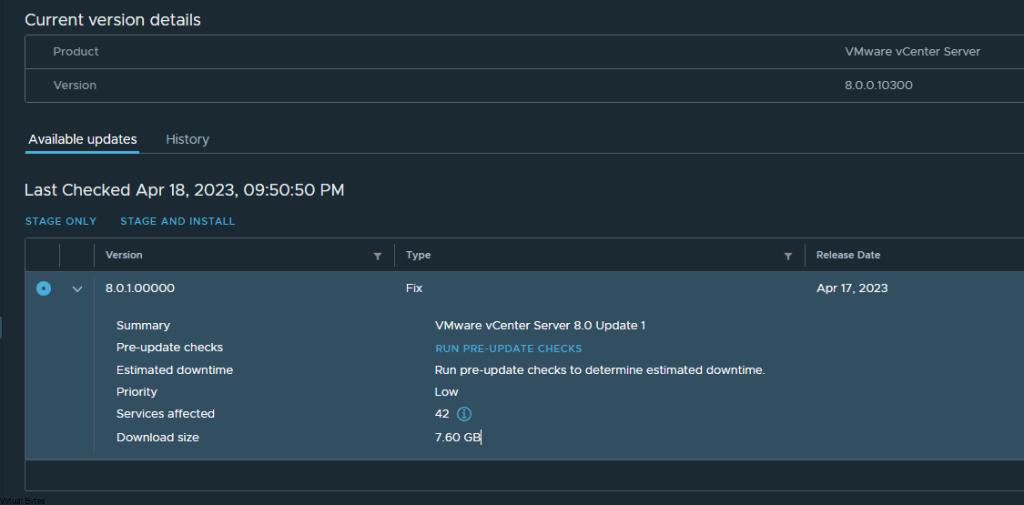
Accept that lovely EULA 🙂 If you don’t then no upgrade for you.

Click Next – it will be running pre-checks, and the upgrade process will start, the whole process took roughly less than 15 minutes, this depends on your environment and how large the db and how many objects maintained within VCSA.

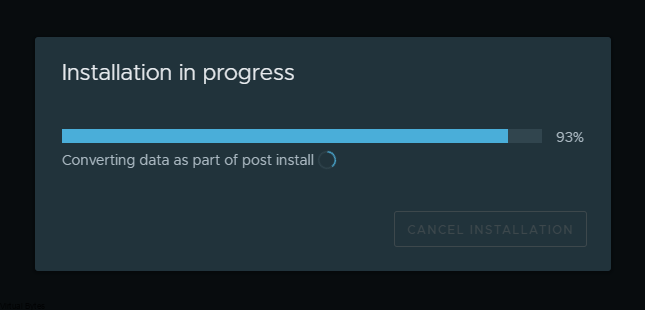
Install in progress….

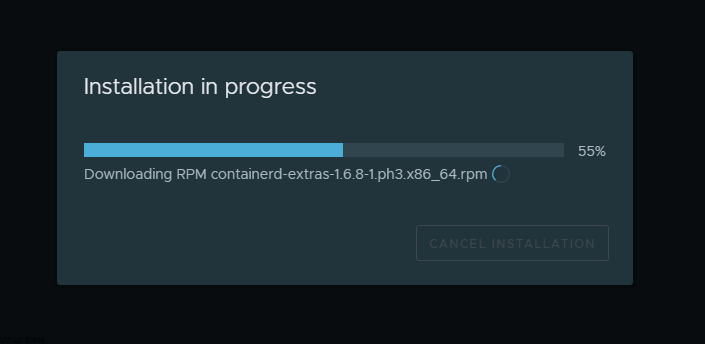
During this process it will convert your data from the previous installation over to your new one, so if there is lots of metrics and logs and historical information it may take a bit.

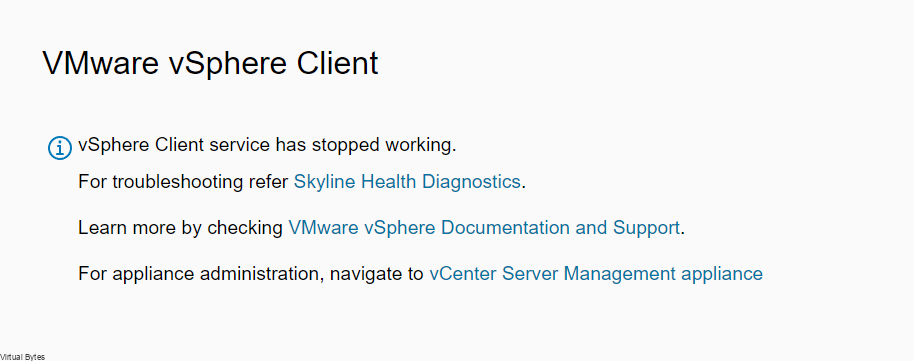
I went and took a look at how the vSphere Client status is, and there is a new UI addon where it is different from previous deployments of vSphere 8.0

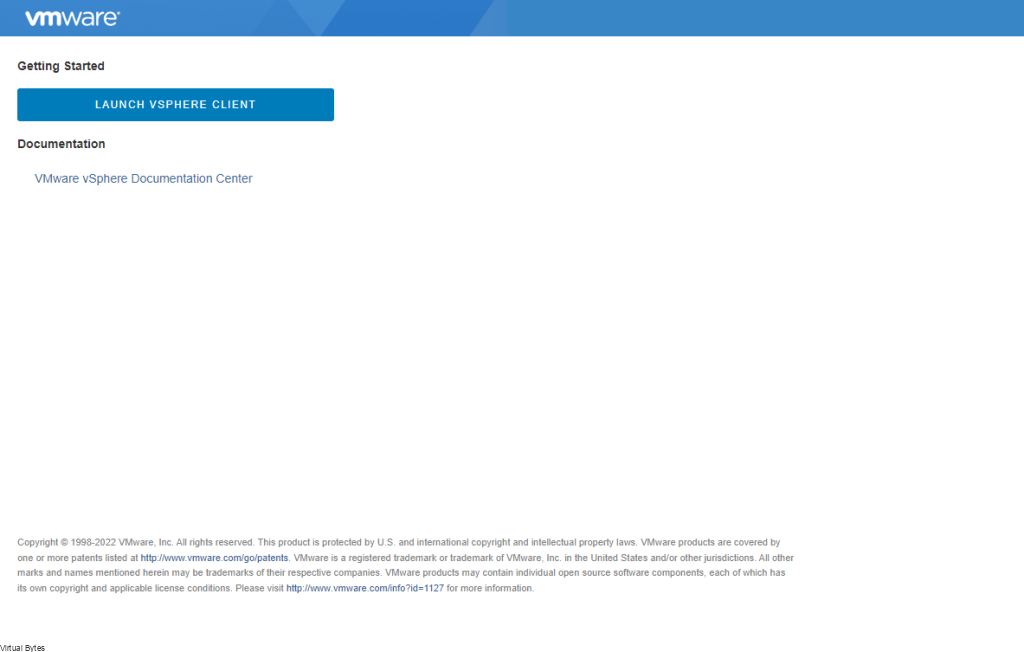
Lets log back into your vCenter!

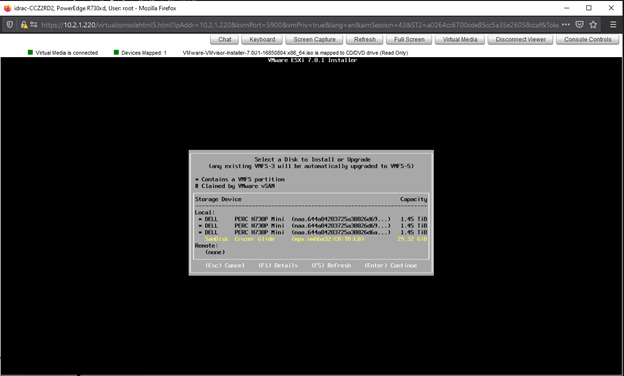
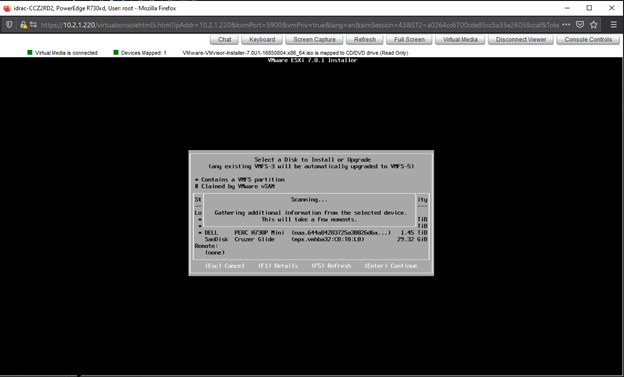
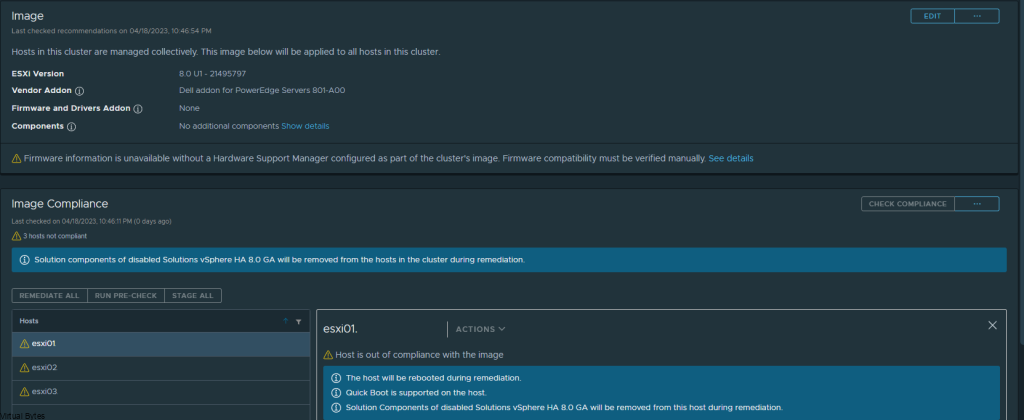
We will prep the cluster image and since I have Dell PowerEdge R740s (14th Gen) hardware I make sure I have the correct Vendor addon selected and validated.

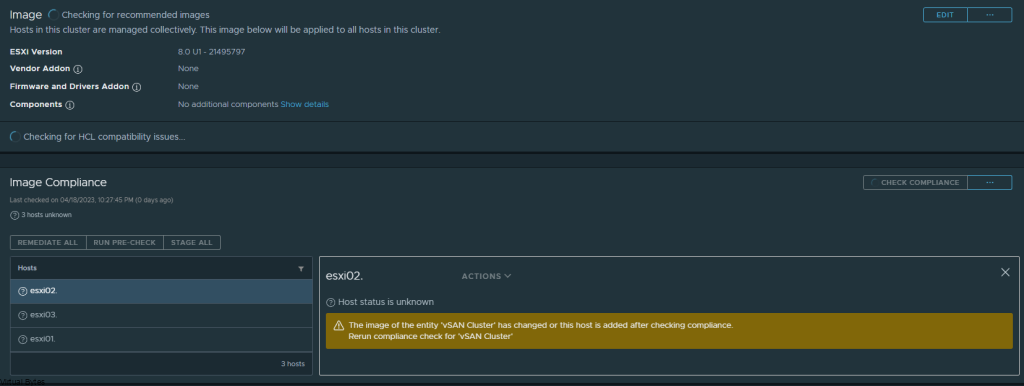
After few minutes of validating, your Image for your cluster will be ready to be applied

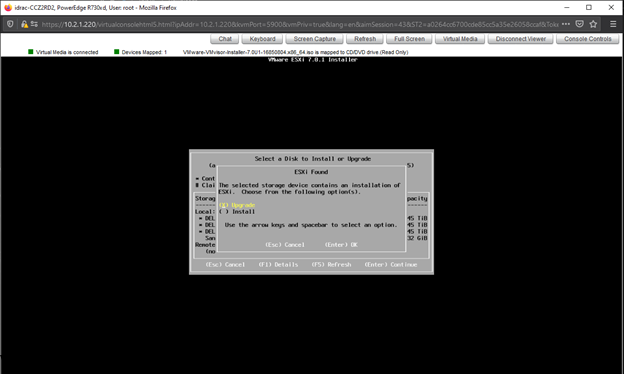
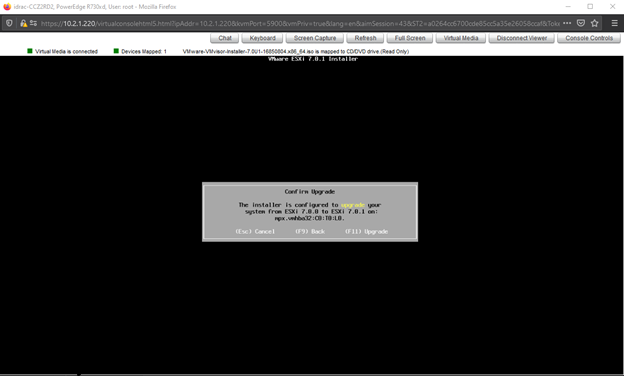
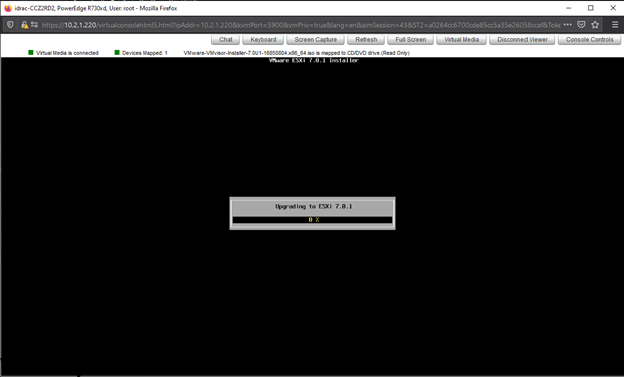
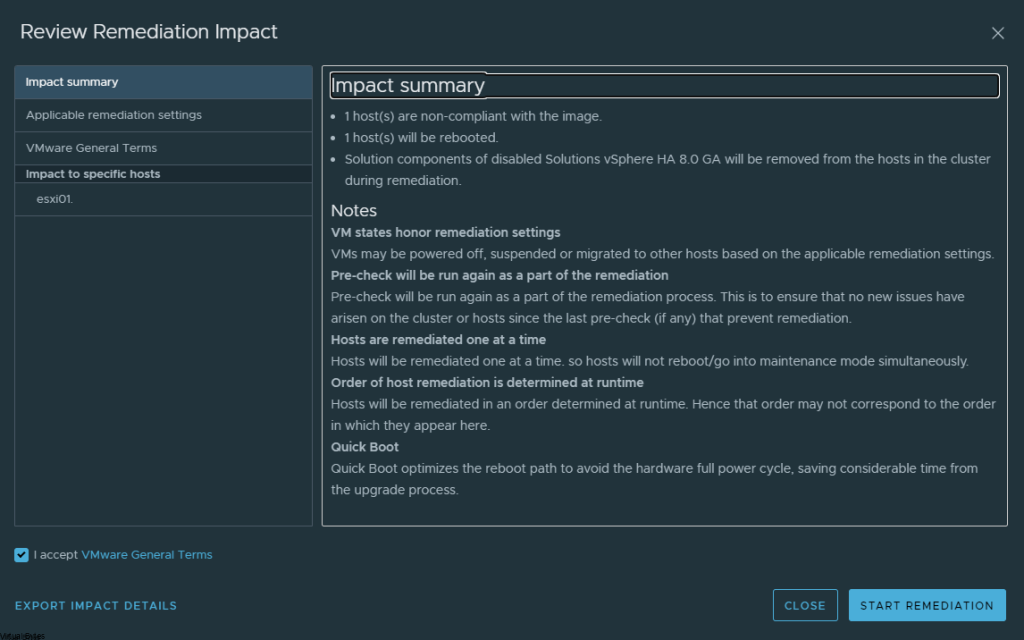
Lets start remediating some servers, one by one. As I have Dell PowerEdge R740s, I have quick boot enabled so the whole upgrade process for each ESXi host was less than 10 minutes for each host.
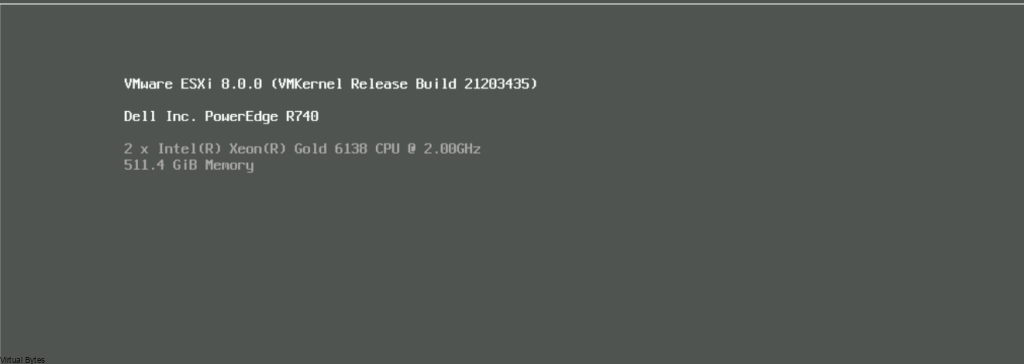
Upgrade In Process…

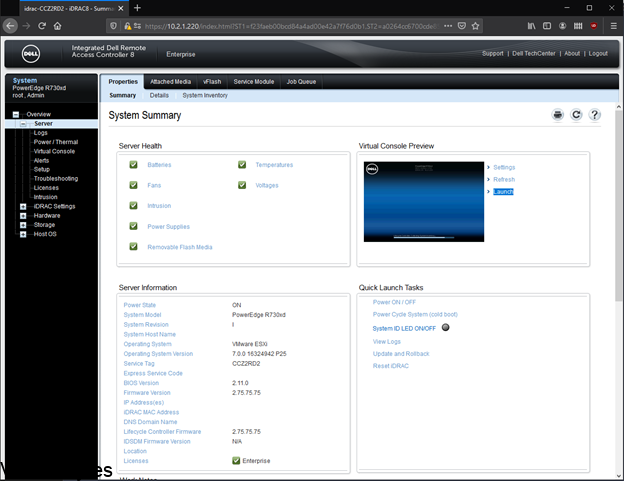
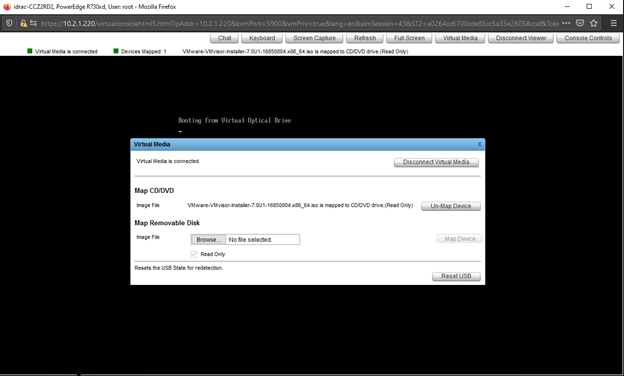
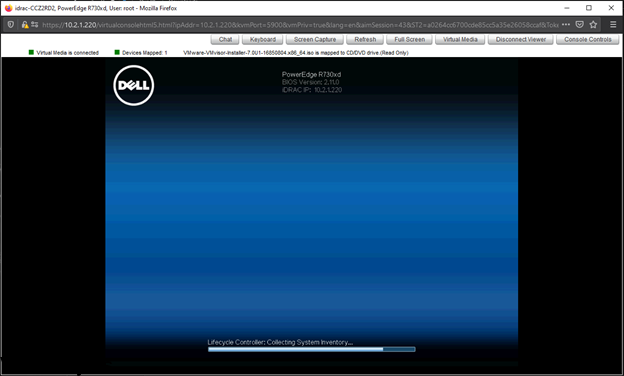
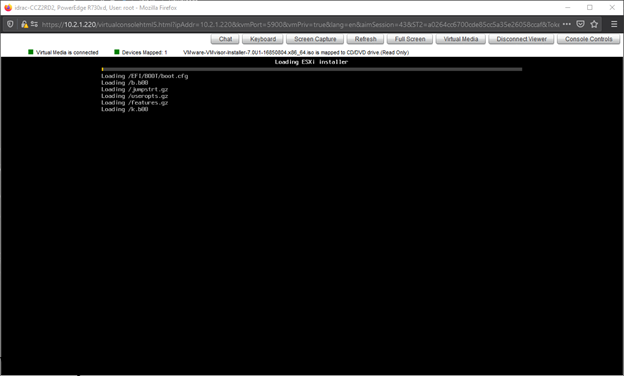
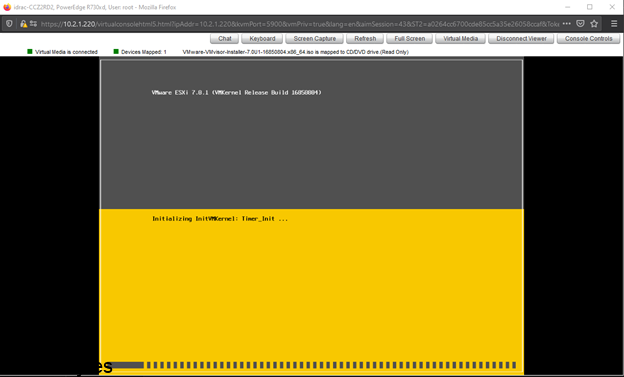
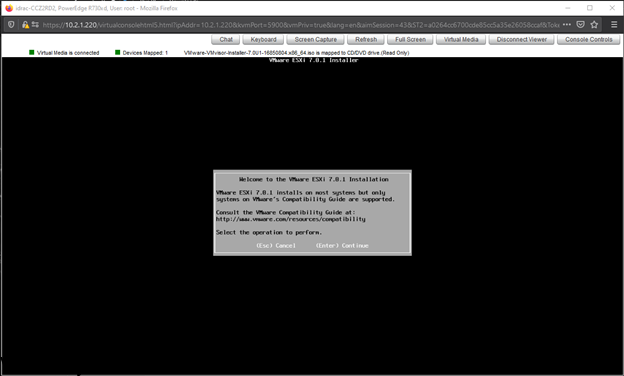
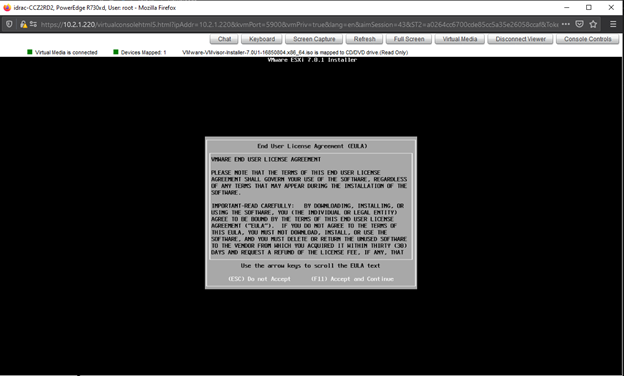
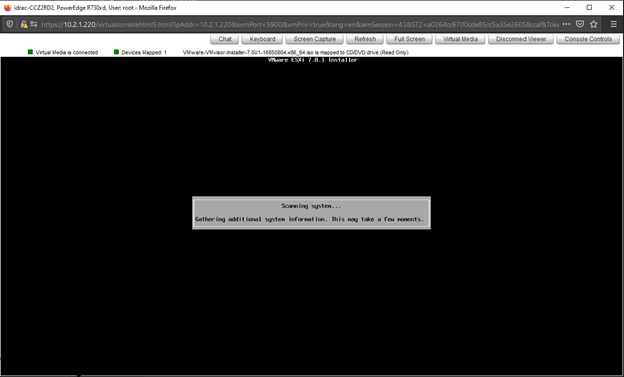
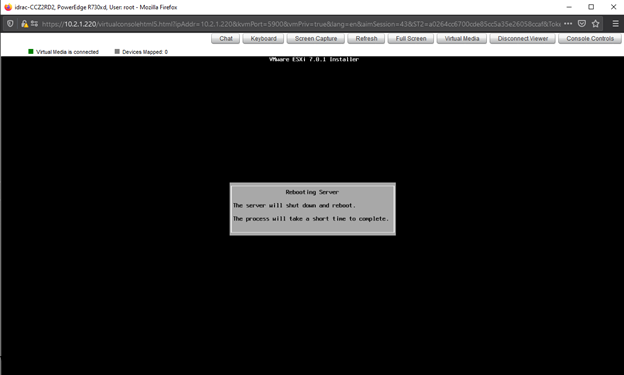
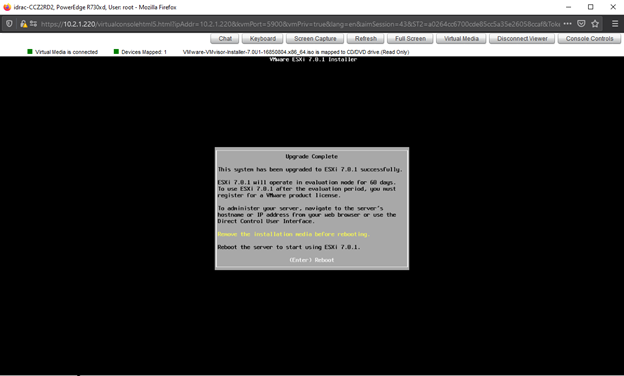
While we are waiting, I like to login to the servers iDRAC and watch the upgrade process.

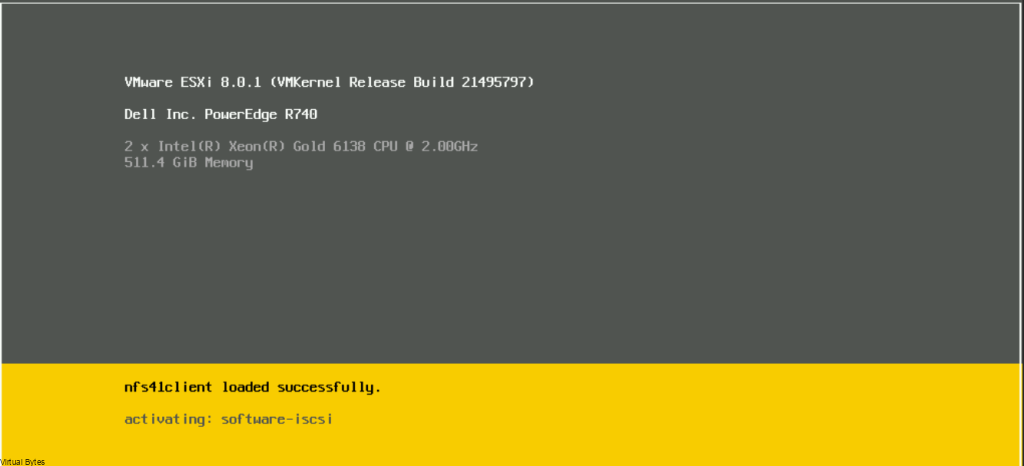
Few minutes later we are on VMware ESXi 8.0.1

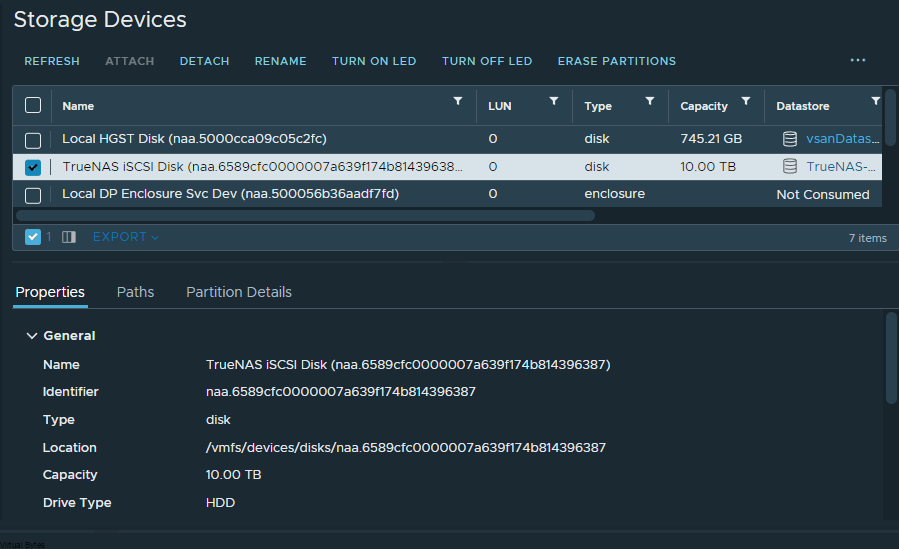
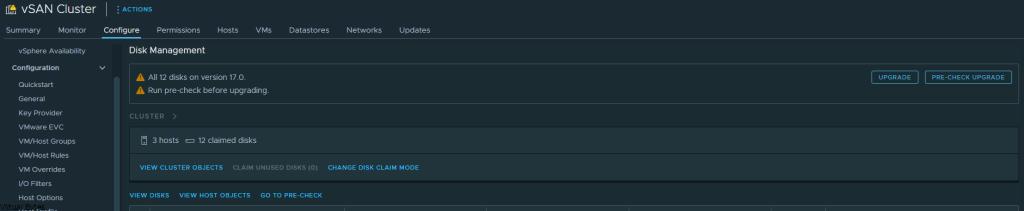
After all ESXi hosts are upgrade to 8.0.1, next we will go to Configure -> vSAN – > Disk Management -> Upgrade Disks format version to version 18.0 from 17.0

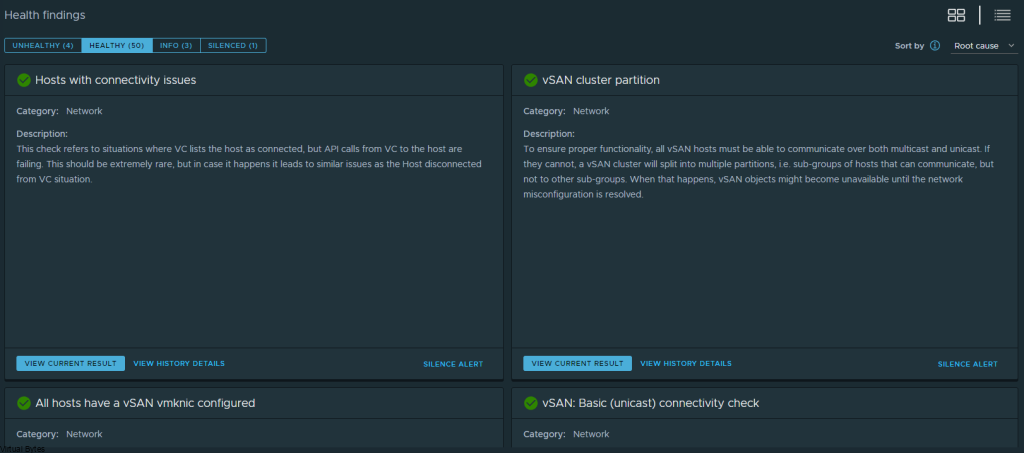
Some neat additions to vSphere 8 Update 1 – I do like how there are tiles now with more detailed information, but also you can toggle the hamburger menu to collapse all these tiles into a easier to see all Health Findings.

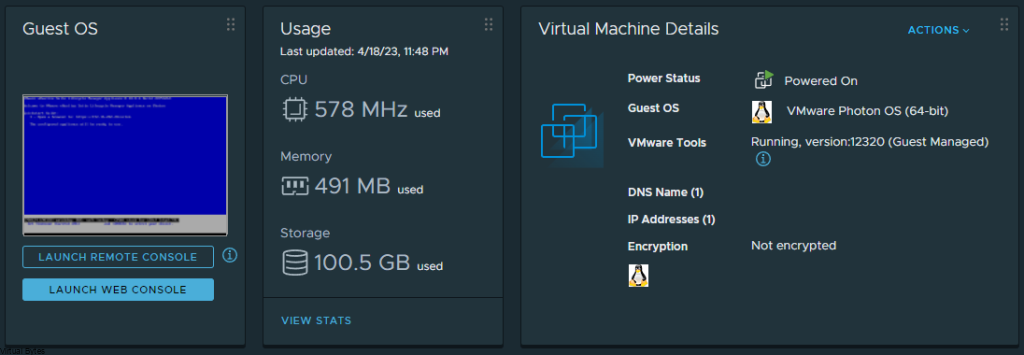
Also, I am glad that the usage is back into its tile on the vSphere User Interface, it is a much needed and appreciated addon back into vSphere 8.0.1

That is all! After following through the walkthrough you should of been able to upgrade your vSphere 8 to vSphere 8.0.1.

April 18, 2023 0 comments 4.5K views
0 FacebookTwitterLinkedinEmail
VMware ESXiVMware vCenter

vSphere 8 vMotion Unified Data Transport

by Tommy Grot November 29, 2022
written by Tommy Grot 2 minutes read

Tonight’s topic is about vMotion! But not just any kind of vMotion, we are going to enable blazing fast speeds to migrate your workloads. Before we get into the topic, I want to bring up information on VMware vSphere 8! I have been using the GA version of vSphere 8 on my new home lab (datacenter) and it’s been great so far!

vSphere vMotion migrates a(n) running state of a virtual machine from one ESXI host to another ESXI host in minutes or now even seconds! This allows you to vMotion workloads much faster now with vMotion protocol in vSphere 8 and all its huge performance improvements cause before standard vMotion utilized Network File Copy (NFC) which this was much slower and took longer but now with Unified Data Transport we will now enable Provisioning on the same vMotion VMkernel to speed up migration of workloads!

Here is more information from VMware:

To solve this problem, we introduce a new protocol called Unified Data Transport (UDT). In a nutshell, UDT combines the best of the NFC and vSphere vMotion protocols. Unified Data Transport (UDT) uses NFC as a control channel but offloads the data transfer to the vSphere vMotion protocol to benefit from the substantially greater performance and throughput.

How to Configure? Well Lets start!

Login into your vCSA

Go to your first ESXi hosts -> VMkernel Adapters

Click Edit on vMotion VMkernel, for mine it is vmk2

Select Provisioning along make sure your vMotion Enabled Service stays selected.

Click OK -> You will see a +1 Under Enabled Services and now I have vMotion and Provisioning Enabled on my single vmk2.

Repeat the steps on your next following ESXi Hosts.

That is it! Start enjoying the blazing speeds of migrating your workloads from ESXi host to another ESXi host!

November 29, 2022 0 comments 1.7K views
0 FacebookTwitterLinkedinEmail
VMware ESXi

TrueNAS Scale – iSCSI & VMware vSphere 7.x

by Tommy Grot September 27, 2022
written by Tommy Grot 3 minutes read

Tonight’s topic is about TrueNAS Scale and VMware vSphere 7.x integration and setup for iSCSI. I have been reading lots of topics and support forums where not many posts have the correct tuning / settings.

The issue: When you try to mount a iSCSI LUN to vSphere 7, it will try to format that new iSCSI LUN and it will error out – ATP, error – check VMkernel logs, the interesting thing is that VMFS 5 was able to format the new LUN i created, so i did that as a test to know that I have network connectivtity along with being able to ping the iSCSI Server on the dedicated network. After that I started doing troubleshooting to pin point the issue, after some trial and error I found the issue! Below I will walk you through configuration from TrueNAS Scale side.

Disclaimer! – All tweaks and steps here I have done on a fresh TrueNAS Unit, do not try if you don’t have anything backed up. This is solely under your own risk!

So, first things first! Let’s create our zVol and create an allocated space for your iSCSI LUN.

Versions

  • TrueNAS-SCALE-22.02.3
  • VMware ESXi, 7.0.3, 20036589

Then change the Record Size to 16K, under the whole pool. This is required for VMFS 6!

Then we will go to Sharing page – Click Add for Block (iSCSI) Shares Target

Setup the settings for Base Name (usually this come by default, buti if you need to change you can)

I have dedicated 2 x 40Gb Bonded (LACP) Mellanox Connect X3 and my backbone is a Arista DCS-7050QX-32S-F, so for the iSCSI Portal I have a dedicated isolated subnet that is Layer 2 only no routing and Jumbo Frames (9214)

Add your multiple hosts and their IQNs from your software iSCSI adapter or hardware iSCSI adapter if you have one.

Since I have an isolated subnet I skipped Authorized Access.

Now, we will setup the iSCSI Target, you will need to add name and the iSCSI group make sure you have your Portal setup and all the IQNs populated in a group

Next we will add an extent and map the device after you have created the previous pre-reqs

Name: (your Extent Name)

Extent Type: Device

Device: (zvol/yournasname)

Logical Block Size 512 – this is important your VMFS 6 wont like it along with the other sector and record sizes

Check Disable Physical Block Size Reporting

Then associate your target to your LUN ID, by default it will use the next available one. Then map that to your extent name

After you finshed, your creation of the iSCSI portion on TrueNAS, then go back to you vCenter Server or ESXi and re-scan HBA and Storage and you should see TrueNAS iSCSI pop up!

Then right click on the Data Center object- Storage – New Datastore

VMFS

Select the Storage Pool that is presented in the window, once you do, click next and select all storage capacity for the next window and then hit finish! Below you should see your new iSCSI LUN! 🙂

September 27, 2022 4 comments 6.2K views
2 FacebookTwitterLinkedinEmail
VMware ESXi

Installing / Upgrading VMware vSphere ESXi 7 Update 1 via iDRAC 8

by Tommy Grot October 7, 2020
written by Tommy Grot 2 minutes read

This post is guiding you on how to install or upgrade VMware ESXi 7 Update 1. This walk through will be the same for installing or upgrading ESXi, the only difference would be during the install you would specify a root password along with installing it.

Disclaimer: This also works for iDRAC 8 and below. On Dell PowerEdge 13th, 12th Generation servers.

Information Regarding the VMware vSphere Update via VMware’s Website – Click Here to Download, You will need to login with your VMware credentials.

Name:VMware-VMvisor-Installer-7.0U1-16850804.x86_64
Release Date:2020-10-06
Build Number:16850804

First Step: Log into iDRAC via root. Once logged in, click on Launch virtual console as below in the screenshot.

Once the Virtual Console window has opened. You will need to mount your VMware-VMvisor-Installer-7.0U1-16850804.x86_64.iso to the Virtual Optical Drive. Then click Map Device.

During the reboot of the server you may have to press F11 to get into the Boot Menu and select the One Time Boot Menu and go down to Virtual Optical Drive.

Once you select Virtual Optical Drive you will see the Dell BIOS loading and running through its boot up processes.

Now loading the VMware-VMvisor-Installer-7.0U1-16850804.x86_64.iso and it loads into memory.

Once the VMware ESXi 7.0.1 installer has loaded you will be greeted with a menu to follow through which is pretty straightforward.

Accept EULA.

Install or Upgrade VMware ESXi 7.0.1 on the correct corresponding datastore. If it is on a SD Card or Flash it will show up. Ensure to not install it on a VMFS datastore!

During this step. You have the ability to install a fresh or upgrade an existing environment. This will depend on your scenario. Please follow through carefully and ensure you have all backups of your DATA!

This will be the Final Screen prior to proceeding with the Installation or Upgrade! Press F11 to upgrade or accept if it is a fresh install.

Please be patient and let install finish 🙂

Install / Upgrade is complete! Now you may un map the virtual optical drive and reboot the host! And Enjoy the new VMware vSphere Update 7.0.1

October 7, 2020 1 comment 8.9K views
1 FacebookTwitterLinkedinEmail


Recent Posts

  • Deploying & Configuring the VMware LCM Bundle Utility on Photon OS: A Step-by-Step Guide
  • VMware Cloud Foundation: Don’t Forget About SSO Service Accounts
  • VMware Explore Las Vegas 2025: Illuminating the Path to Cloud Excellence!
  • Securing Software Updates for VMware Cloud Foundation: What You Need to Know
  • VMware Cloud Foundation 5.2: A Guide to Simplified Upgrade with Flexible BOM

AI AVI Vantage cloud Cloud Computing cloud director computing configure cyber security director dns domain controller ESXi las vegas llm llms multi-cloud multicloud NSx NSX-T 3.2.0 NVMe private AI servers ssh storage tenant upgrade vcd vcda VCDX vcenter VCF VDC vexpert Virtual Machines VMs vmware vmware.com vmware aria VMware Cloud Foundation VMware cluster VMware Explore VMware NSX vrslcm vsan walkthrough

  • Twitter
  • Instagram
  • Linkedin
  • Youtube

@2023 - All Right Reserved. Designed and Developed by Virtual Bytes

Virtual Bytes
  • Home
  • Home Data Center 2025
  • VMware
    • Cloud
    • Datacenter & Cloud Infrastructure
      • VMware ESXi
      • VMware vCenter
      • VMware vSAN
    • Networking & Security
    • Desktop & App Virtualization
      • Omnissa Horizon
    • Troubleshooting
    • Ansible
  • Education
  • Hardware
    • Hardware Tips & Tricks
  • Events
  • About
    • About Me
    • Home Lab Archives
      • Home Lab 2020-2022
      • Home Lab 2016-2020