Welcome, tech enthusiasts, to another thrilling dive into the depths of VMware’s cloud management platform, Cloud Director. Today, we find ourselves confronted by an issue that has left many a cloud administrator scratching their heads: the mysterious failure of Cloud Director to initiate its services due to a missing public address in the AllowedOrigins configuration. This blog is your lifeline, offering a comprehensive roadmap to navigate through this technical maze and restore the harmony of your Cloud Director environment!
“Failed to Start: An error occurred during the initialization” error when trying to access vCloud Director after updating public addresses

Additional Informatoin avaiabled from VMware’s Support Site – Failed to Start: An error occurred during the initialization
Procedure:
- Take a Powered off snapshot of your VMware Cloud Director Cells, (ensure to turn them off properly).
- Power on the VCD Appliances
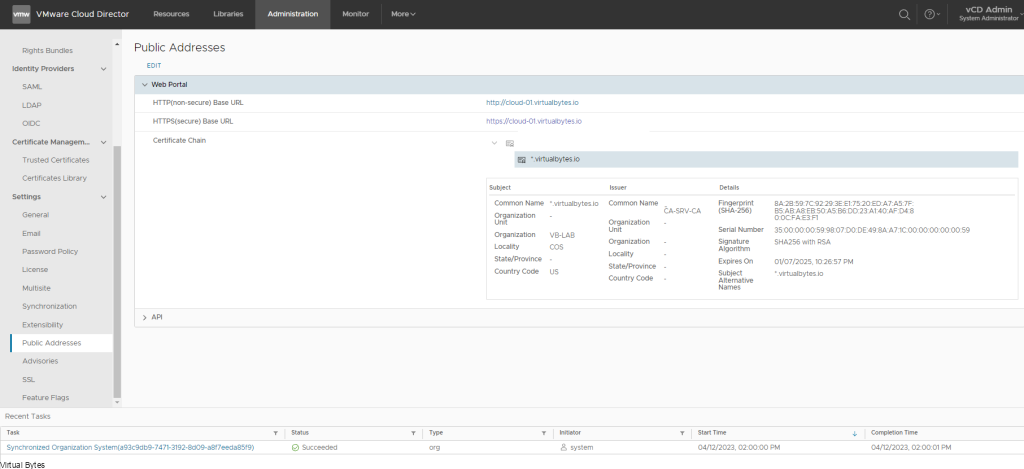
Login into VCD Administration Provider Portal
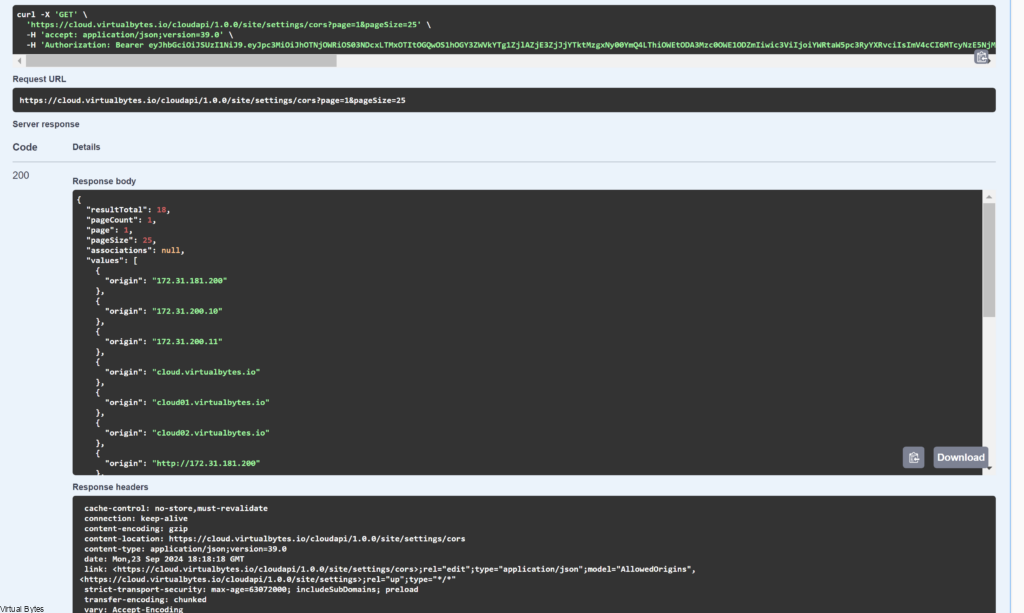
Go to Swagger API

Expand the GET /1.0.0/site/settings/cors
Click ” Try it out “

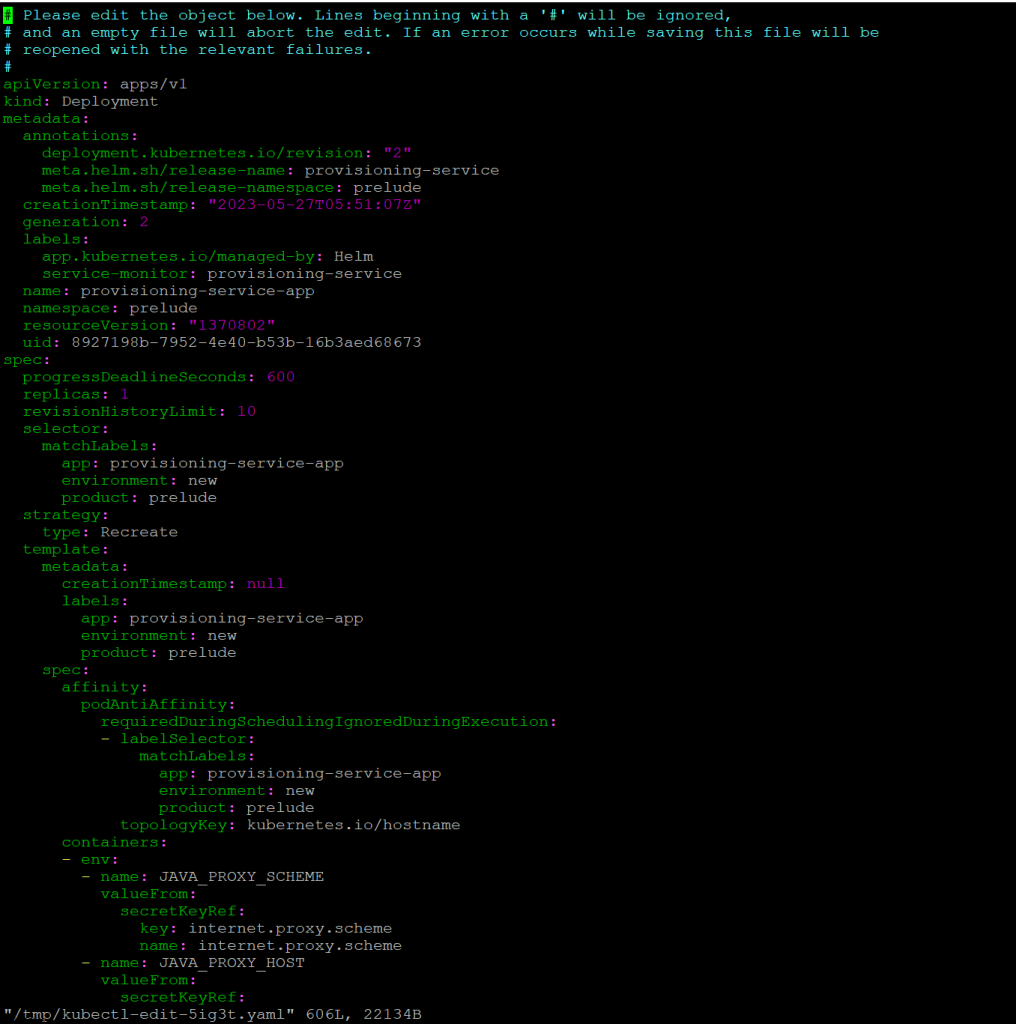
When you hit ” Execute” Below as in the screenshot provided you should see a similar output. Once you see your output, and you see missing entries for any additional VCD Cells, you will need to input them into the following order as provided.
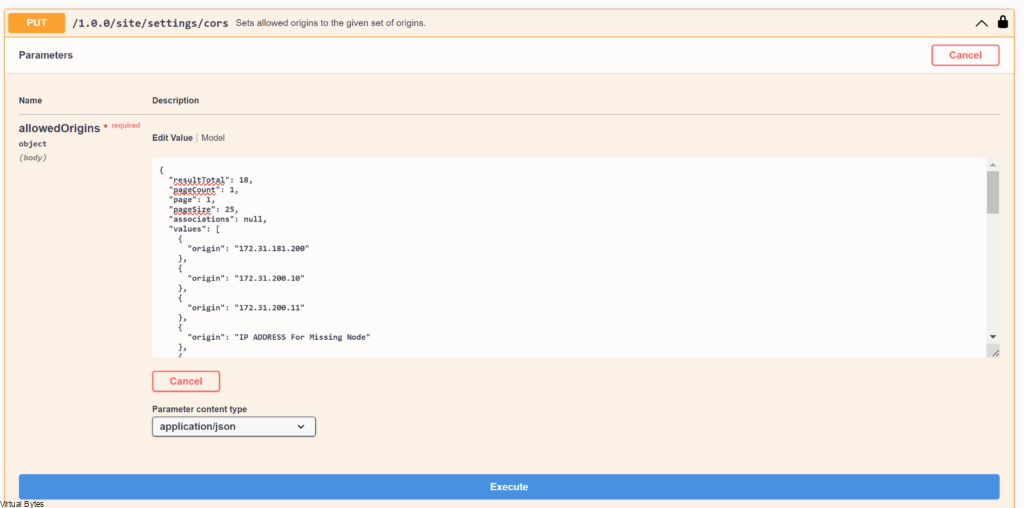
Once you have staged and prepared your JSON for the AllowedOrigins, using Notepad ++ or VS Code then you will go to the PUT section of Swagger API Explorer as in screenshot below.

An Example of JSON: As provided ensure to replicate the missing FQDN or IP for each section as the sample JSON below.
{
"resultTotal": 18,
"pageCount": 1,
"page": 1,
"pageSize": 25,
"associations": null,
"values": [
{
"origin": "172.31.181.200"
},
{
"origin": "172.31.200.10"
},
{
"origin": "172.31.200.11"
},
{
"origin": "IP ADDRESS For Missing Node"
},
{
"origin": "cloud.virtualbytes.io"
},
{
"origin": "cloud01.virtualbytes.io"
},
{
"origin": "cloud02.virtualbytes.io"
},
{
"origin": "FQDN for Missing Node"
},
{
"origin": "http://172.31.181.200"
},
{
"origin": "http://172.31.200.10"
},
{
"origin": "http://172.31.200.11"
},
{
"origin": "IP ADDRESS For Missing Node"
},
{
"origin": "http://cloud.virtualbytes.io"
},
{
"origin": "http://cloud01.virtualbytes.io"
},
{
"origin": "http://cloud02.virtualbytes.io"
},
{
"origin": "FQDN for Missing Node"
},
{
"origin": "https://172.31.181.200"
},
{
"origin": "https://172.31.200.10"
},
{
"origin": "https://172.31.200.11"
},
{
"origin": "FQDN for Missing Node"
},
{
"origin": "https://cloud.virtualbytes.io"
},
{
"origin": "https://cloud01.virtualbytes.io"
},
{
"origin": "https://cloud02.virtualbytes.io"
},
{
"origin": "FQDN for Missing Node"
}
]
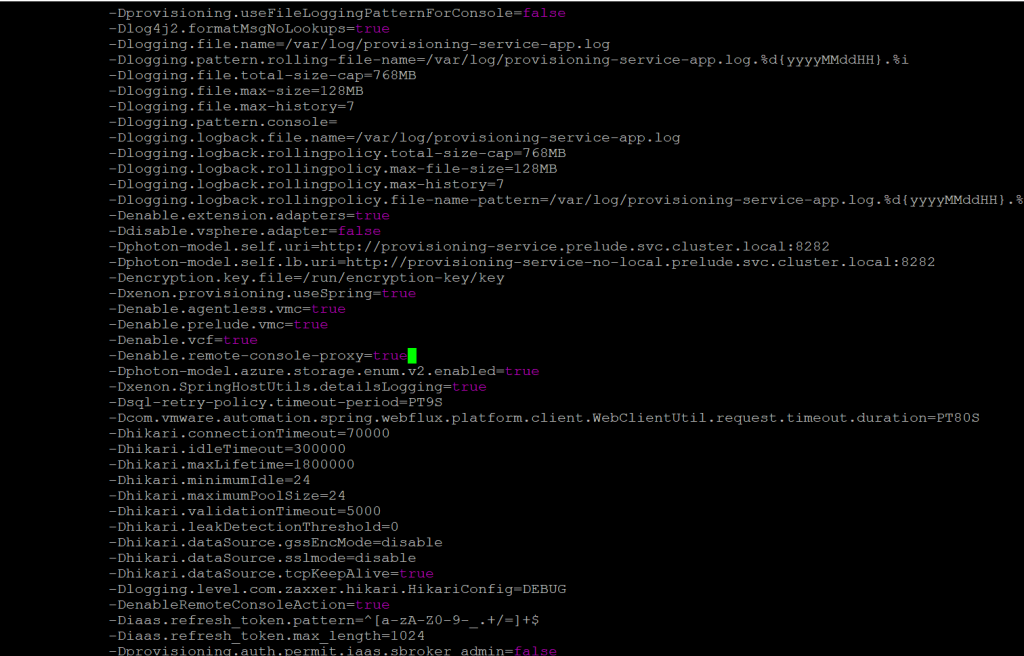
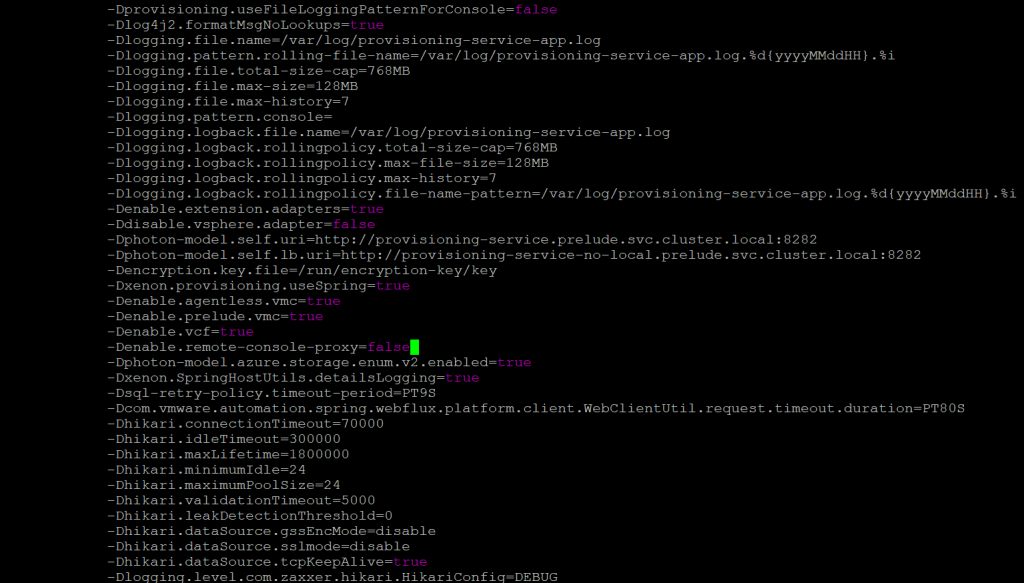
}After your JSON is ready, you will want to paste it into the white body of the PUT request and hit execute.
Toward the bottom of the CORS PUT Section you should see a 200 OK Status, after you see that you should see VCD cells that were missing start up and also if you re-run the GET command you should see your missing nodes.