This walkthrough is valid for VMware Cloud Director 10.6.x Upgrade!
What’s New
VMware Cloud Director version 10.4.1.1 release provides bug fixes, updates the VMware Cloud Director appliance base OS and the VMware Cloud Director open-source components.
Resolved Issues
- VMware Cloud Director operations, such as powering a VM on and off takes longer time to complete after upgrading to VMware Cloud Director 10.4.1After upgrading to VMware Cloud Director 10.4.1, VMware Cloud Director operations, such as powering a VM on or off takes longer time to complete. The task displays a
Starting virtual machinestatus and nothing happens.Thejms-expired-messages.logslog file displays an error.RELIABLE:LargeServerMessage & expiration= - During an upgrade from VMware Cloud Director 10.4 to version 10.4.1, upgrading the standby cell fails with a
Failure: Error while running post-install scriptserror messageWhen upgrading the VMware Cloud Director appliance by using an update package from version 10.4 to version 10.4.1, the upgrade of the standby cell fails with an error message.Failure: Error while running post-install scriptsTheupdate-postgres-db.loglog file displays an error.> INFO: connecting to source node> DETAIL: connection string is: host=primary node ip user=repmgr> ERROR: connection to database failed> DETAIL:> connection to server at “primary node ip”, port 5432 failed: could not initiate GSSAPI security context: Unspecified GSS failure. Minor >> code may provide more information: No Kerberos credentials available (default cache: FILE:/tmp/krb5cc_1002)> connection to server at “primary node ip”, port 5432 failed: timeout expired
More Fixes and Known Issues here
More Information about VMware Cloud Director 10.4.1
VMware Cloud Director 10.4.1 introduces several new concepts that facilitate creating, deploying, running, and managing extensions. Solution Add-Ons are an evolution of VMware Cloud Director extensions that are built, implemented, packaged, deployed, instantiated, and managed following a new extensibility framework. Solution Add-Ons contain custom functionality or services and can be built and packaged by a cloud provider or by an independent software vendor. VMware also develops and publishes its own VMware Cloud Director Solution Add-Ons.
My Versions
- VMware NSX 4.1.0.0.0.21332672
- VMware vCSA 8.0.0 21216066
- VMware Cloud Director 10.4.1
First. properly shutdown your VCD Cells if you have multiple cells. Once they are turned off take a snapshot of all of the appliances
Next we will want to upload the tar.gz file via WINSCP to the primary VCD Cell if you have a multi cell deployment you will need to upgrade the first cell, then second and third.
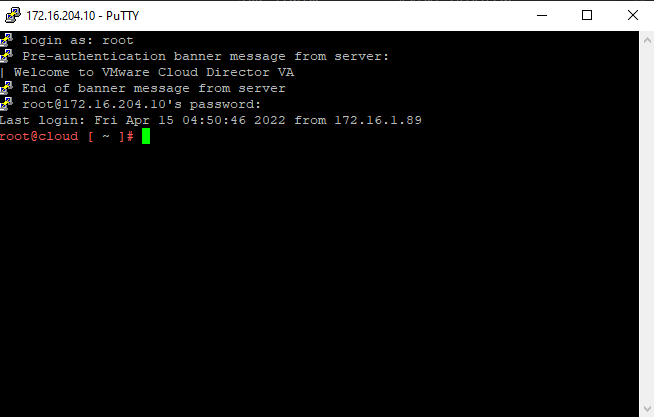
I have logged into the VCD appliance with root account

Then open up a Putty session to the VCD appliance login as root,

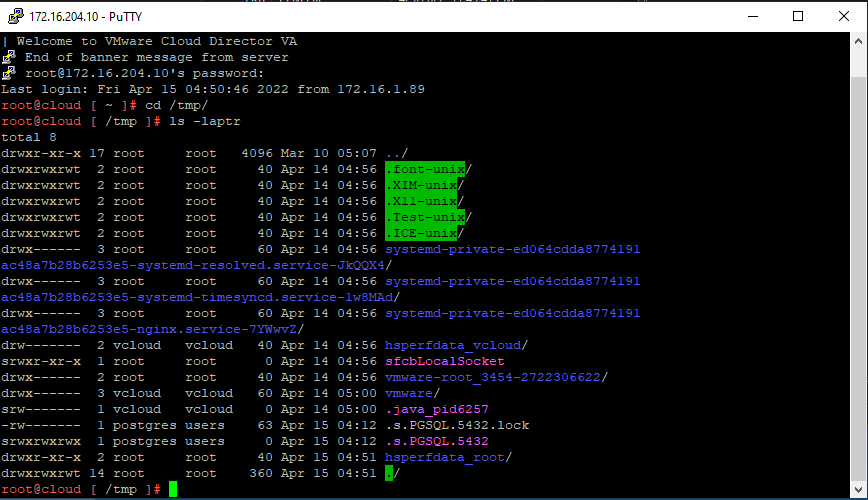
Then change directory to /tmp/ Once in the directory:
cd /tmp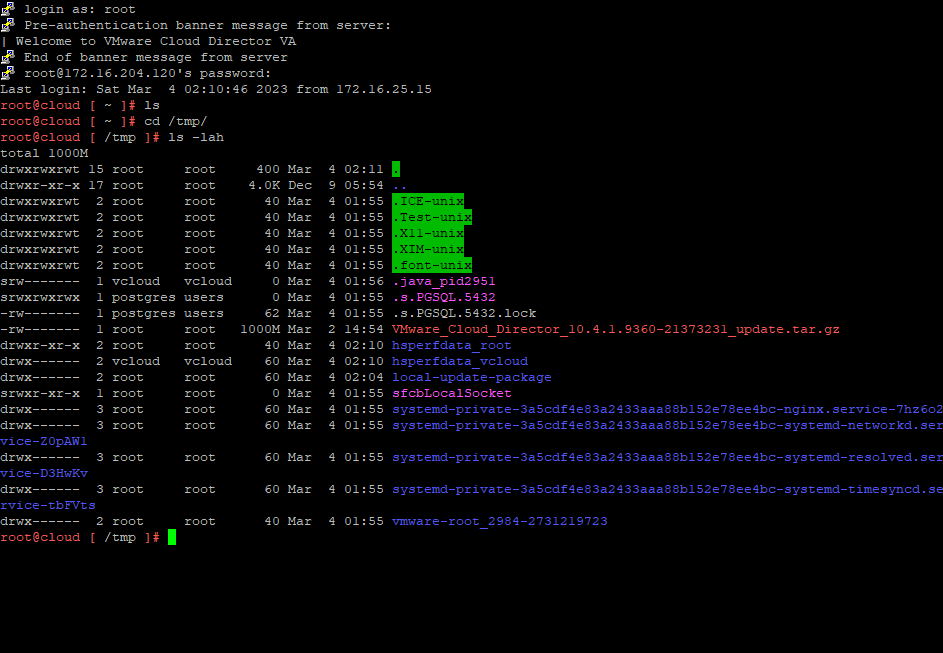
Create a Directory within /tmp directory, with the command below:
mkdir local-update-package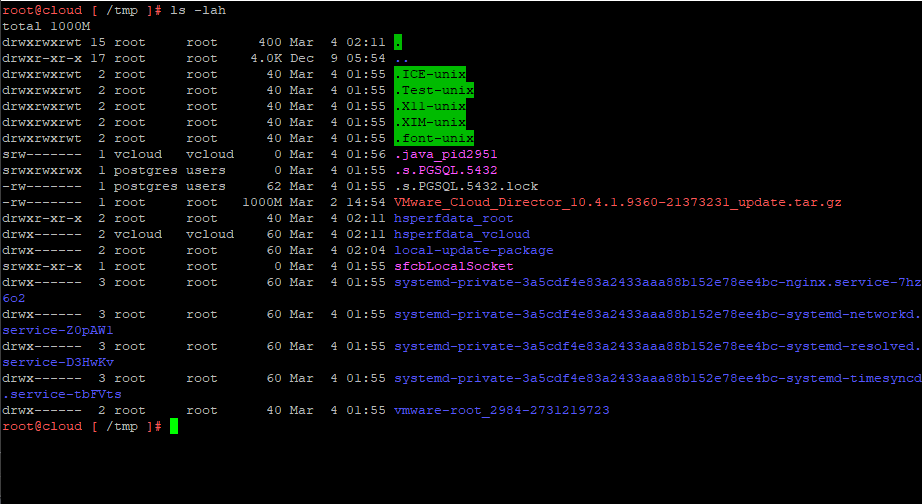
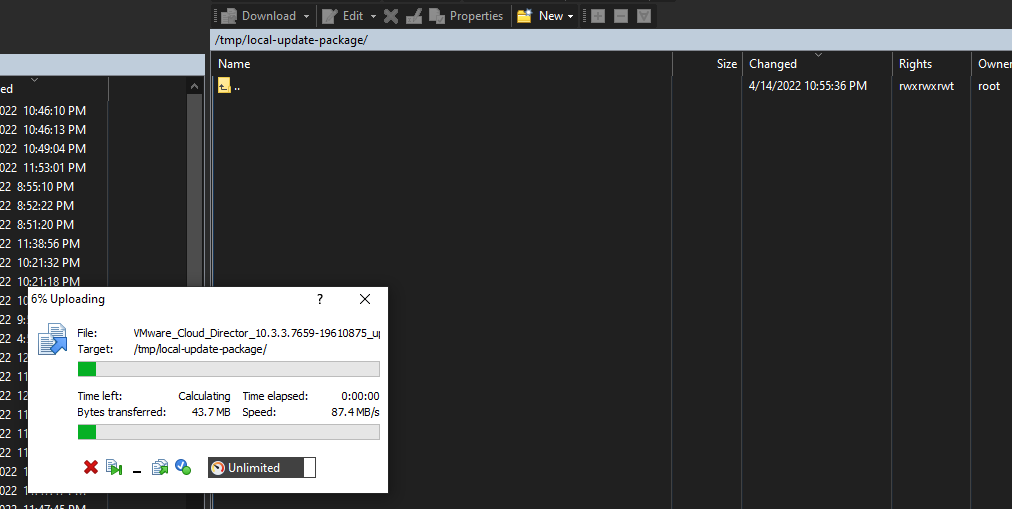
Start to upload the VMware_Cloud_Director_10.4.1.9360-21373231_update.tar.gz file for the upgrade into /tmp/local-update-package via winscp
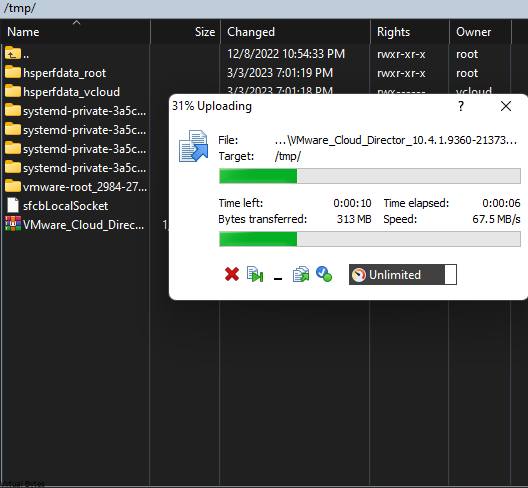
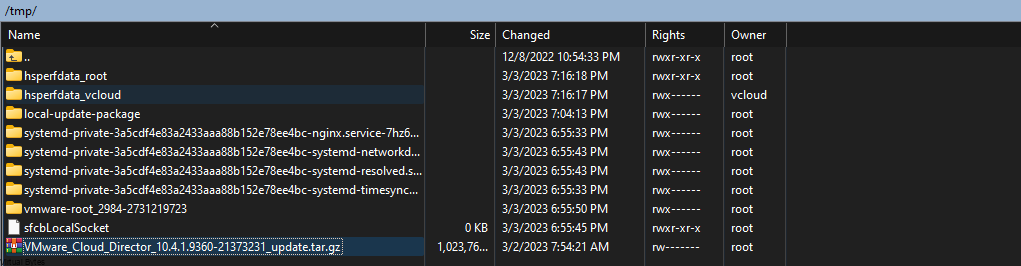
File has been successfully uploaded to the VCD appliance.
Next steps we will need to prepare the appliance for the upgrade:
We will need to move the VMware_Cloud_Director_10.4.1.9360-21373231_update.tar.gz from the /tmp directory to /tmp/local-update-package/
mv VMware_Cloud_Director_10.4.1.9360-21373231_update.tar.gz /tmp/local-update-packageOnce in the local-update-package director, and you have your VMware_Cloud_Director_10.4.1.9360-21373231_update.tar.gz run the command below to extract the update package in the new directory we created in /tmp/local-update-package
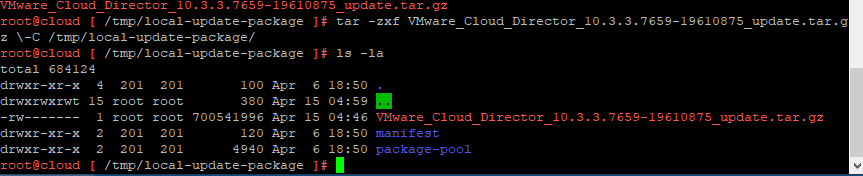
tar -zxf VMware_Cloud_Director_10.4.1.9360-21373231_update.tar.gz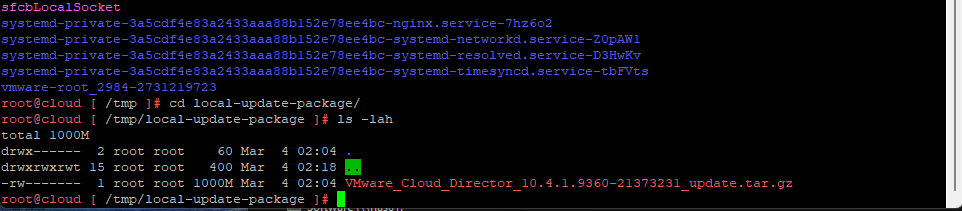
You can run the “ls” command and you shall see the VMware_Cloud_Director_10.4.1.9360-21373231_update.tar.gz file along with manifest and package-pool

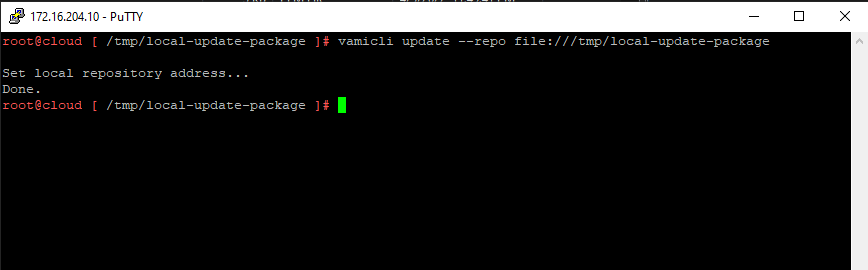
After you have verified the local update directory then we will need to set the update repository.
vamicli update --repo file:///tmp/local-update-package
Check for update with this command after you have set the update package into the repository address
vamicli update --check
Now, we see that we have a upgrade that is staged and almost ready to be ran! But, we will need to shutdown the cell(s) with this command
/opt/vmware/vcloud-director/bin/cell-management-tool -u administrator cell --shutdown
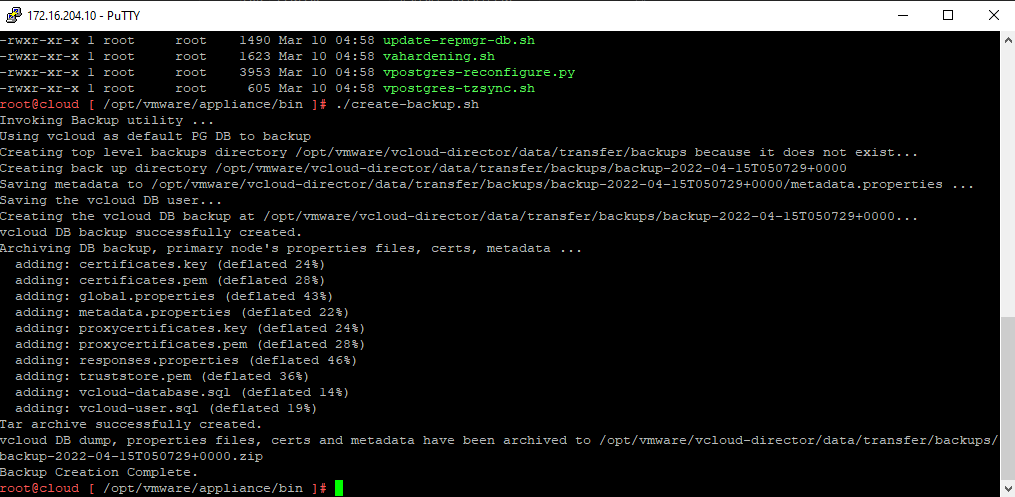
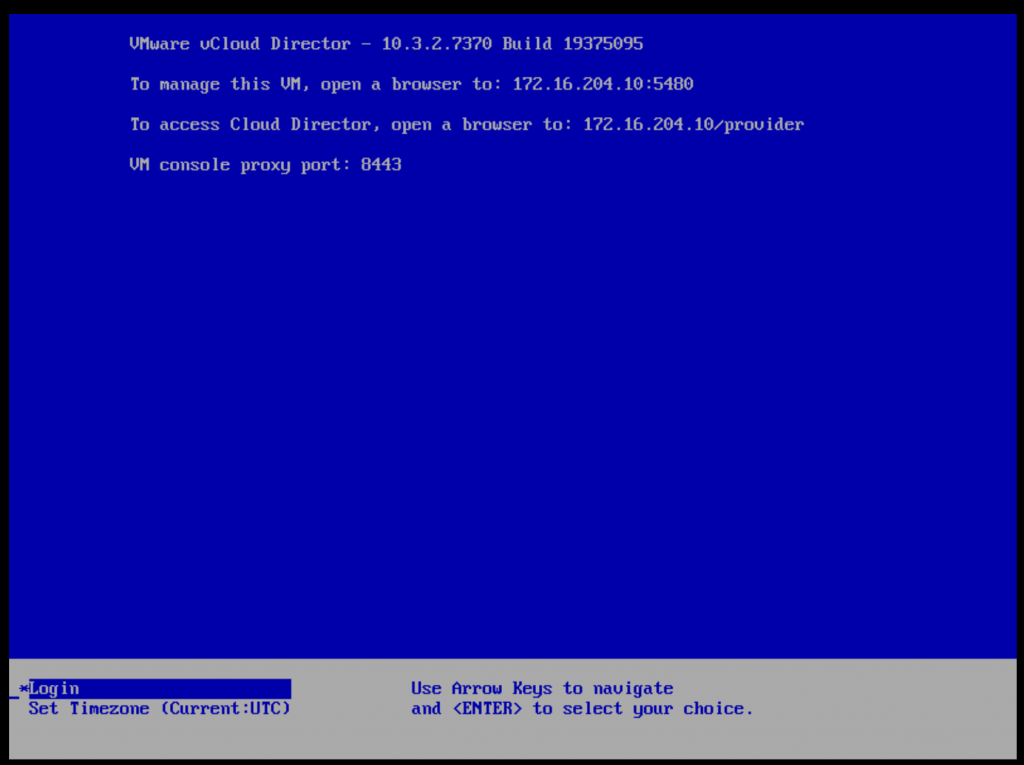
Next is to take a backup of the database, log into VMware Cloud Director Appliance, https://<your-ip>:5480 , same port as vCSA VAMI.
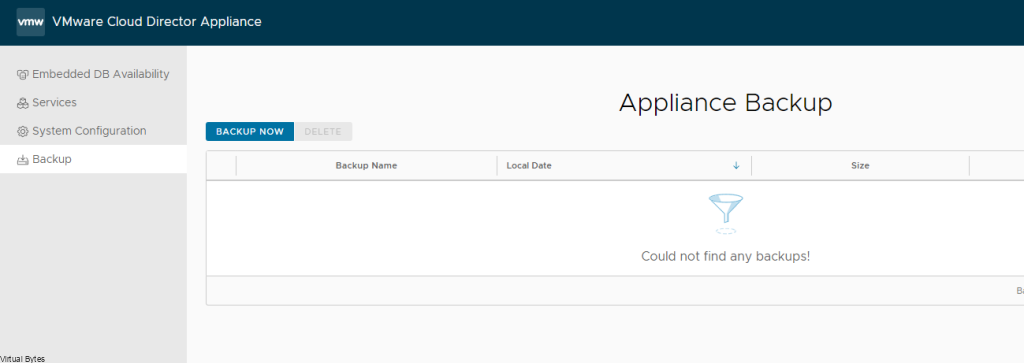
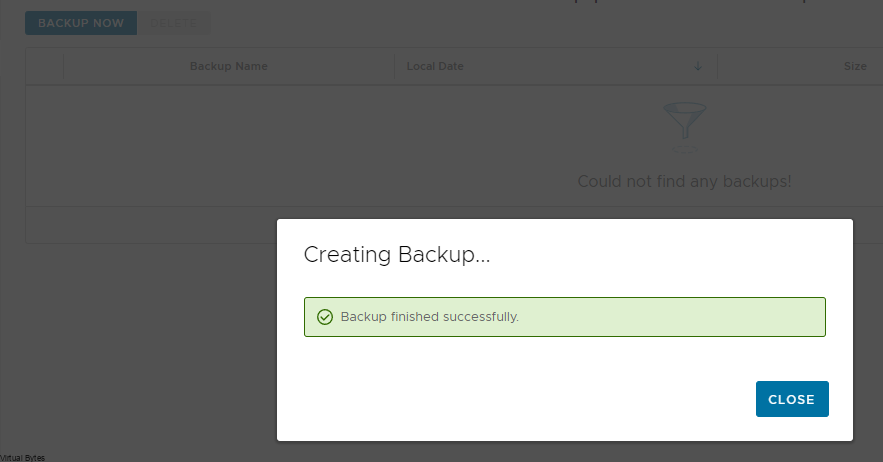
Backup was successful! Now, time for the install
Apply the upgrade for VCD, the command below will run will install the update
vamicli update --install latest
Now, the next step is important, if you have any more VCD Cell appliances you will want to repeat first few steps and then just run the command below to upgrade the other appliances:
/opt/vmware/vcloud-director/bin/upgrade Select Y to Proceed with the upgrade
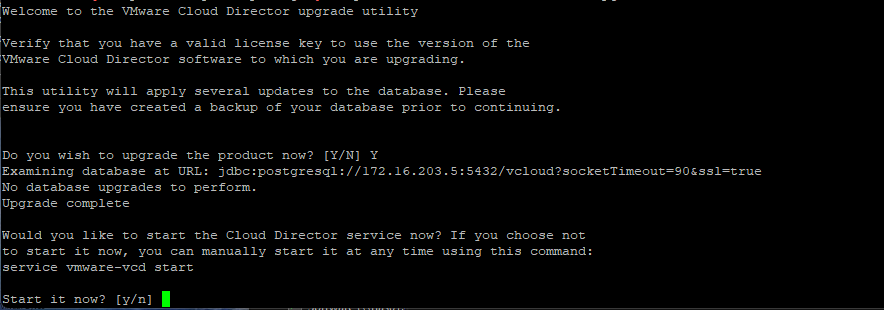
After successful upgrade, you may reboot VCD appliance and test, and after successful tests remove your snapshot.