Top Posts
Deploying & Configuring the VMware LCM Bundle Utility...
VMware Cloud Foundation: Don’t Forget About SSO Service...
VMware Explore Las Vegas 2025: Illuminating the Path...
Securing Software Updates for VMware Cloud Foundation: What...
VMware Cloud Foundation 5.2: A Guide to Simplified...
VMware Cloud Foundation 5.2: Unlocking Secure Hybrid Cloud...
VMware Cloud Foundation – Memory Tiering: Optimizing Memory...
Decoding VMware Cloud Foundation: Unveiling the numerous amount...
VMware Cloud Director 10.6.1: Taking Cloud Management to...
Omnissa Horizon Upgrade 2406 to 2412
Virtual Bytes
  • Home
  • Home Data Center 2025
  • VMware
    • Cloud
    • Datacenter & Cloud Infrastructure
      • VMware ESXi
      • VMware vCenter
      • VMware vSAN
    • Networking & Security
    • Desktop & App Virtualization
      • Omnissa Horizon
    • Troubleshooting
    • Ansible
  • Education
  • Hardware
    • Hardware Tips & Tricks
  • Events
  • About
    • About Me
    • Home Lab Archives
      • Home Lab 2020-2022
      • Home Lab 2016-2020
Tag:

vcd

VMware Cloud Foundation

VMware Cloud Director 10.6.1: Taking Cloud Management to New Heights

by Tommy Grot February 5, 2025
written by Tommy Grot 7 minutes read

VMware has just released an exciting update Cloud Director 10.6.1—to revolutionize how we manage our cloud infrastructure. This new version is packed with powerful features designed to make IT professionals’ lives easier and their cloud services more efficient.

Cloud Director 10.6.1 offers a range of improvements, from simplifying complex tasks to providing advanced analytics. It’s all about making cloud management more accessible and effective. With this release, VMware aims to help organizations handle their hybrid cloud environments like never before.

In the following blog post, we’ll break down the exciting new features and explain how they can benefit you. Get ready to discover a streamlined approach to cloud infrastructure management!


Information from VMware’s Site Below:

Cloud computing is constantly evolving, and VMware Cloud Director (VCD) keeps advancing with new updates that strengthen security, streamline resource management, and give users greater control. VMware by Broadcom is thrilled to announce that VMware Cloud Director 10.6.1 is now available as part of the VCF (VMware Cloud Foundation) offering, starting January 31st, 2025. 

Smarter VM Placement with Guest OS Awareness

Now, you can easily place virtual machines (VMs) on specific hosts or clusters based on their guest operating system. With this feature, system administrators can define VM Groups for specific OS types ensuring proper placement and compliance across all tenants. This also helps organizations stay aligned with Microsoft and other vendor licensing requirements, simplifying compliance while optimizing resource management.

Use case:

  • Automatic enforcement ensures that VMs are always placed in their designated groups.
  • Seamless reconfiguration means existing VMs will adopt this placement rule the next time they undergo a reconfiguration, such as a power cycle or VM edit.

This feature enhances workload distribution and simplifies multi-tenant management, giving you greater control over VM performance and security.

Take Control of API Token Security

Security is crucial and VCD now includes the ability to force API token expiration. If a token needs to be revoked immediately—whether due to security concerns or administrative changes—administrators can now invalidate it instantly. This provides a proactive approach to managing API access and securing cloud environments.

Use case:

  • Instant access revocation for better security governance.
  • More control for administrators over authentication and access management.

Flexible IP Retention for Sub-Providers & Managed Organizations

Managing IP addresses has never been easier! VMware Cloud Director now allows custom IP retention periods at both the sub-provider and managed organization levels. This means IP addresses can be retained even when VMs are deleted or NICs are removed—regardless of whether they were assigned via Static Pool, Static Manual, or DHCP.

Use case:

  • Customizable IP retention ensures continuity and minimizes reallocation efforts.
  • Metadata-based configuration allows admins to define retention periods tailored to organizational needs.
  • Leverages the Manual Reservation API to preserve IPs for seamless redeployment.

No more lost IPs or unnecessary reconfigurations—just streamlined network management.

Gateway Firewall Enforcement

This update introduces the ability to explicitly activate or deactivate gateway firewall enforcement which is natively integrated within the VCF stack, with full visibility of enforcement status across T1 and T0 firewalls. Tenant and Sub-Tenant administrators both can view and override default settings, ensuring security configurations align with organizational policies.

Use case:

  • Full transparency into firewall enforcement status.
  • Administrative control to enable or disable enforcement as needed.

Stateful Firewall Access & Edge Cluster Configuration

Provider administrators now have improved control over the stateful firewall service, which is natively integrated within the VCF stack. With this update, they can restrict tenants from adding stateful firewall rules on T1, T0, and vApps unless the ANS security stack is entitled. Additionally, a new configuration option on edge clusters allows providers to enable or disable stateful firewalls as needed.

Use case:

  • Granular control over firewall rules ensures security compliance.
  • Edge cluster configuration adds another layer of flexibility in managing network security.

Custom Segment Profiles – Now Shareable!

Service providers can now share custom segment profiles with tenant organizations, making it easier to standardize networking policies across multiple tenants.

Use case:

  • Improved collaboration between providers and tenants.
  • Consistent networking configurations across multiple organizations.

IPv6 Transparent Load Balancing – It’s Back!

Support for IPv6 and VMware Avi Load Balancer Transparent Load Balancing is back! Pool members can now view the client’s source IP, enhancing visibility and network efficiency. To enable this feature, VMware Avi Load Balancer must be integrated with VMware Cloud Director.

Use case:

  • Seamless IPv6 support for modern networking needs.
  • Enhanced load balancing with transparent traffic routing.

This VMware Cloud Director update is all about greater control, improved security, and enhanced networking capabilities. Whether you’re optimizing VM placement, tightening API security, or refining firewall enforcement, these changes empower cloud providers and tenants alike.

Other Enhancements

  • Fixed Update Custom Task API â€“ No more double execution issues. The API now works correctly on the first attempt.
  • Resolved All Virtual Data Centers View Issues â€“ Admins can now seamlessly navigate the view without encountering errors.
  • Removed NSX MP API References â€“ Say goodbye to outdated NSX MP API references for a more streamlined experience.

This VMware Cloud Director update is all about better control, improved security, and enhanced networking capabilities. Whether you’re optimizing VM placement, tightening API security, or refining firewall enforcement, these changes give more control to both cloud providers and tenants.

Reference for info above: https://blogs.vmware.com/cloudprovider/2025/02/vmware-cloud-director-10-6-1-is-here-whats-new.html

Upgrade Procedure

Before we start the upgrade, lets ensure we have the following:

  • Take Disk Level Snapshots of all VCD Appliances
  • Take Backup of VCD via VAMI
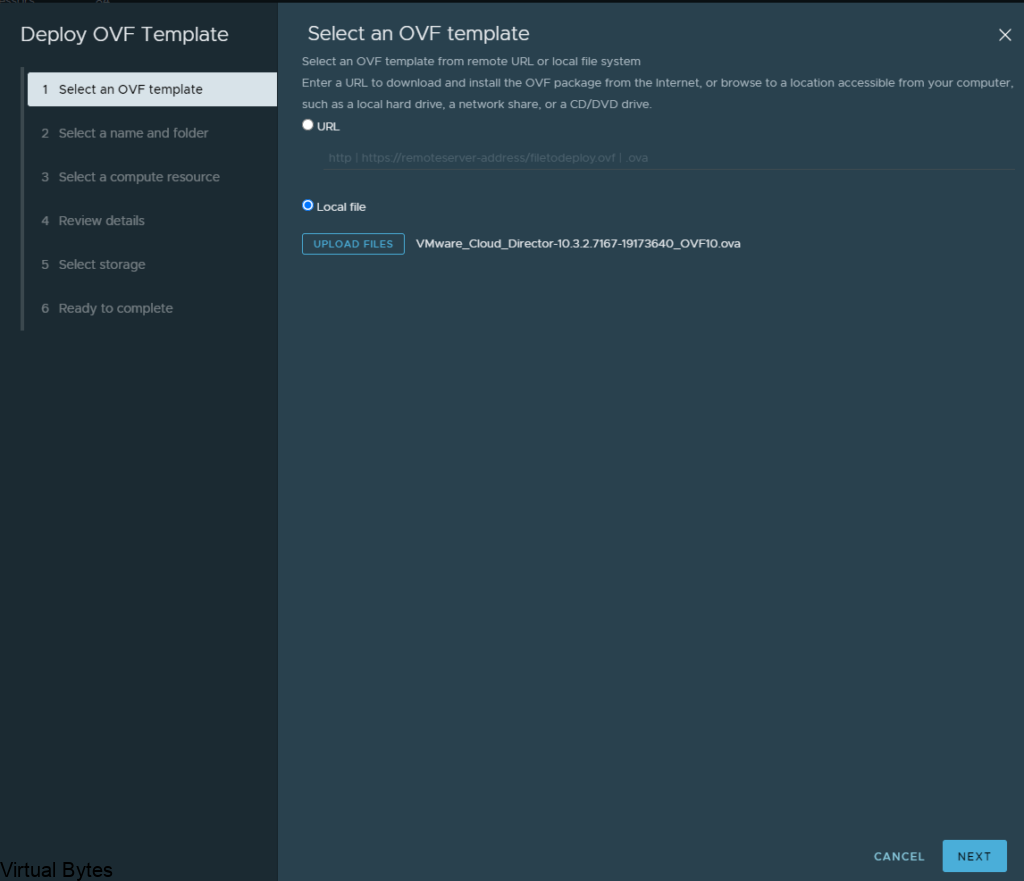
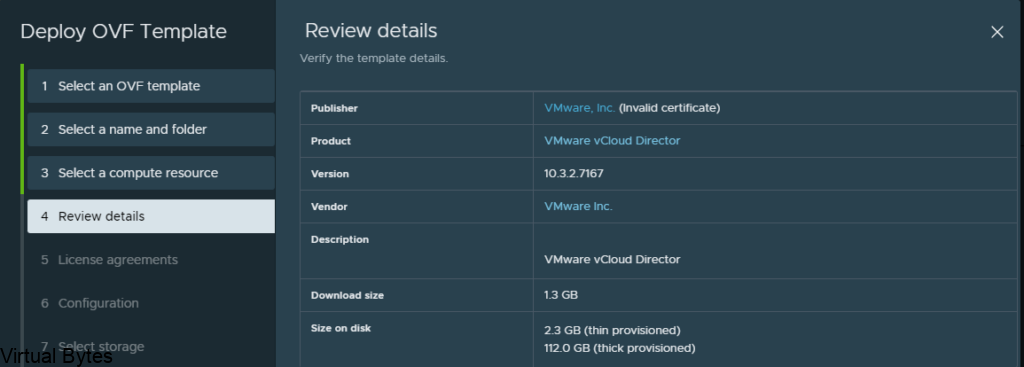
  • Downloaded Bits from Broadcom’s Support Portal
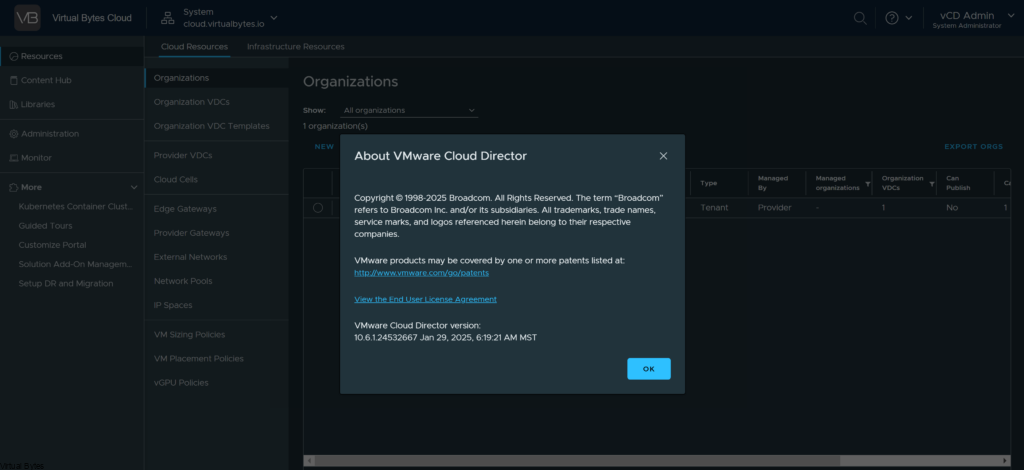
My Current Version:

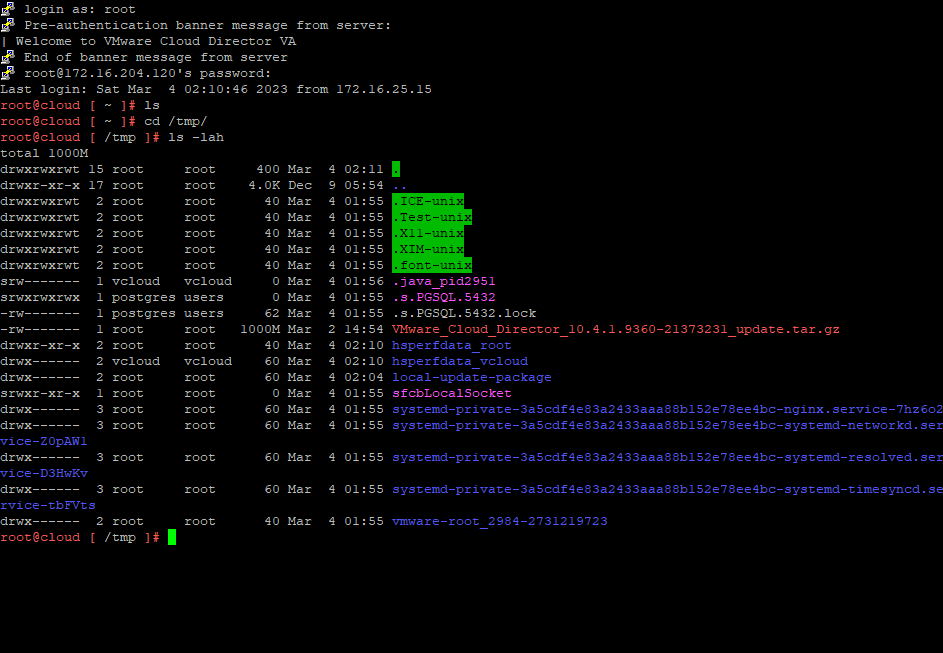
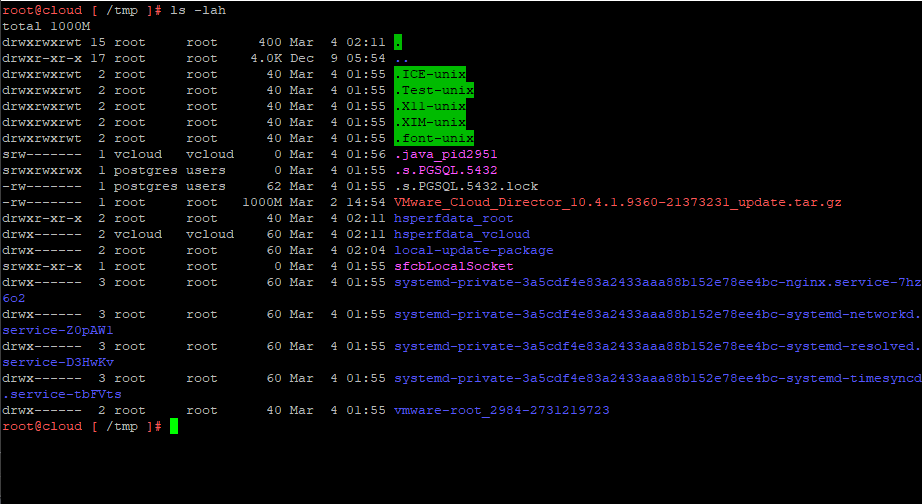
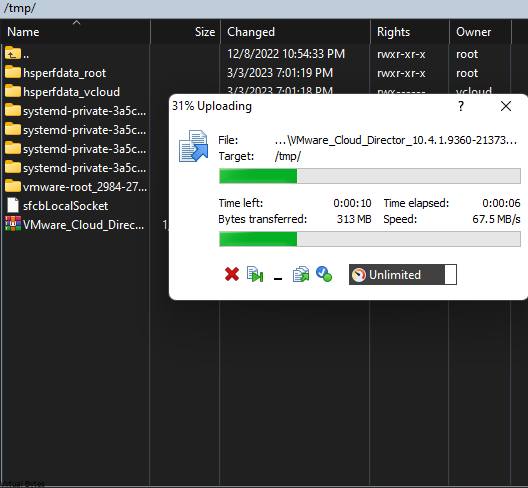
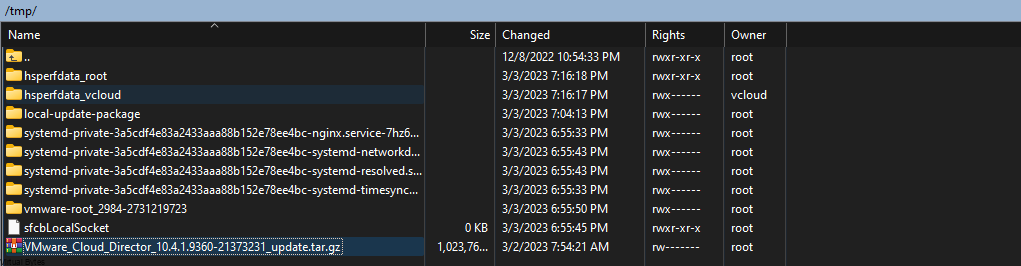
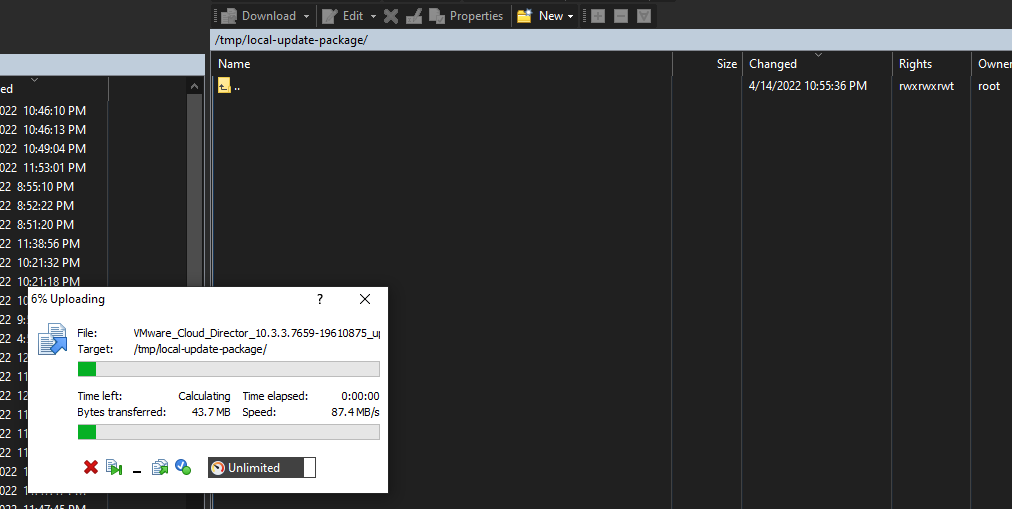
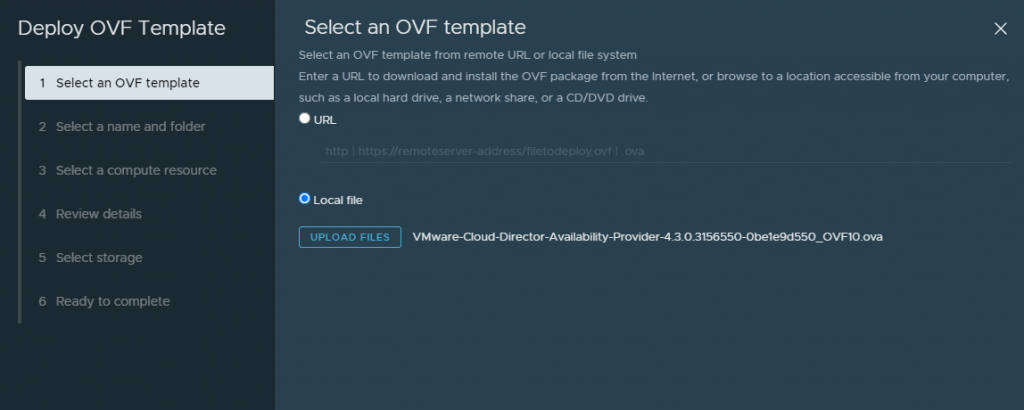
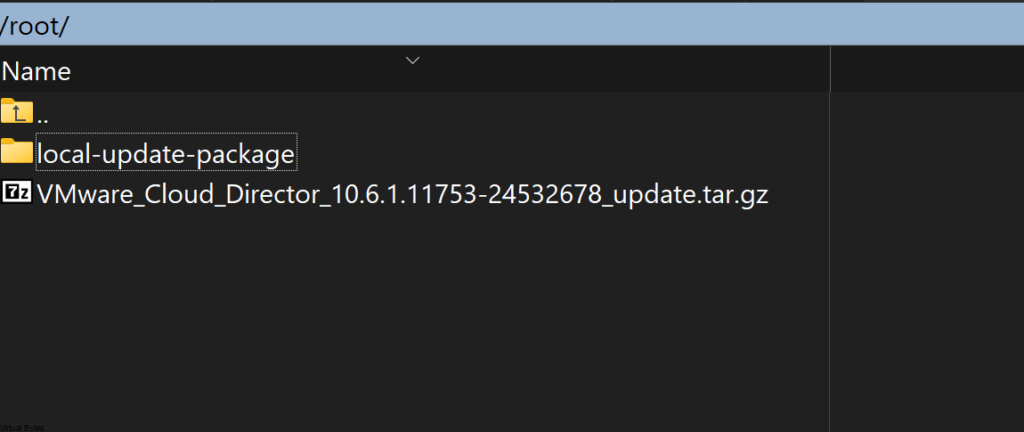
3. Upload the VMware_Cloud_Director_10.6.1.11753-24532678_update.tar.gz into the VCD appliance.

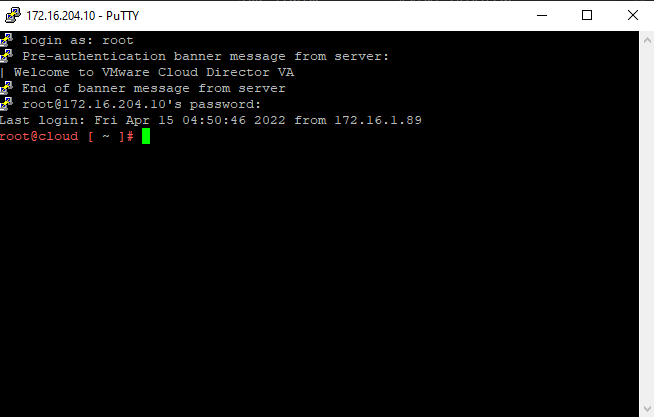
Once the update file is uploaded, SSH into the first VCD Cell appliance.

After you will need to SSH into all appliances – and you will shutdown VMware Cloud Director by running the command below:

/opt/vmware/vcloud-director/bin/cell-management-tool -u administrator cell --shutdown

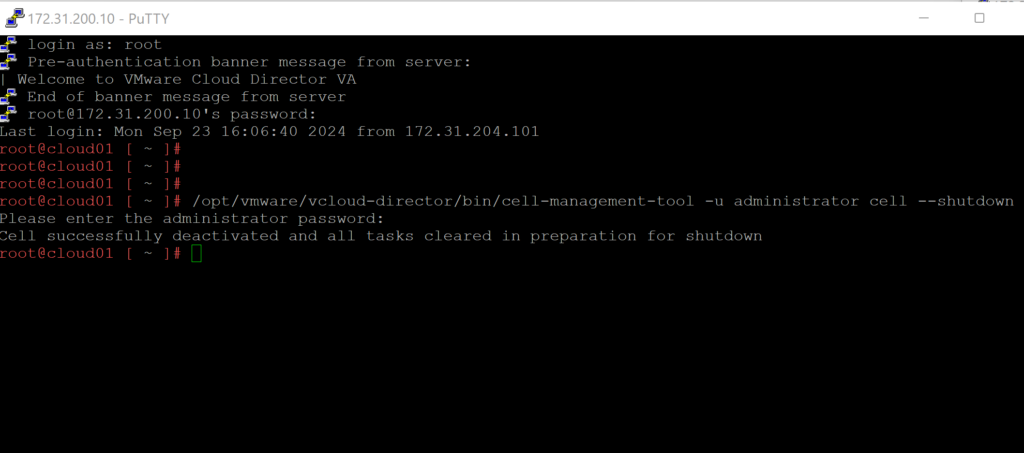
Note: It is required to upgrade the primary VCD appliance first!

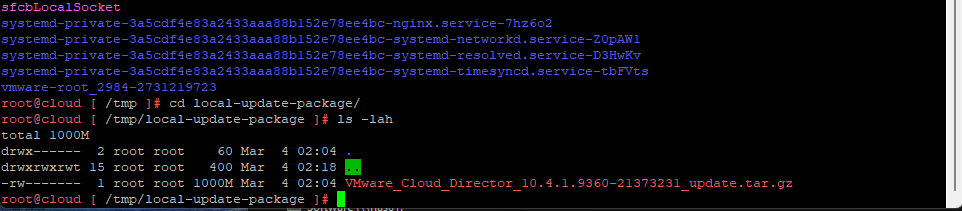
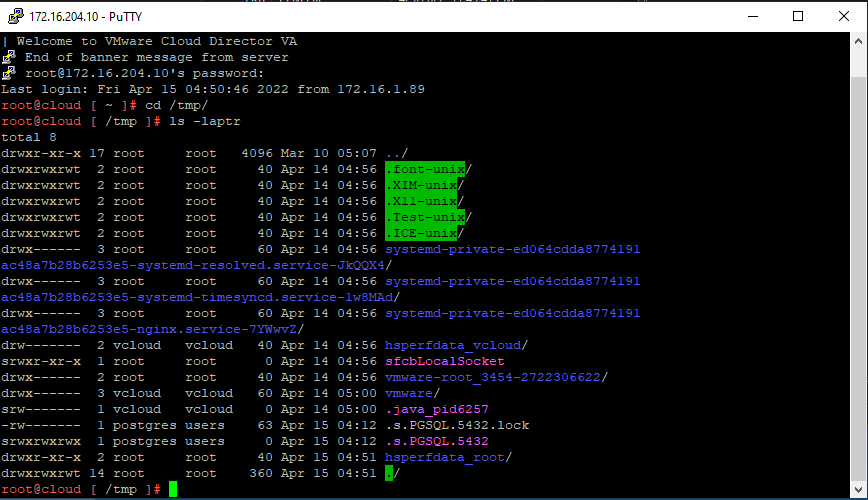
4. Lets start upgrading VCD 10.6.1 on the first appliance. Below we will un tar the Update package into the /tmp/local-update-package directory.

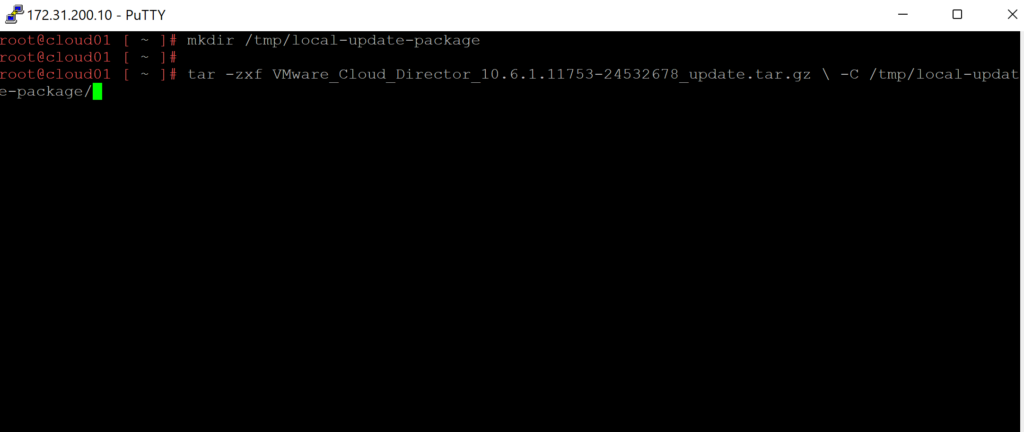
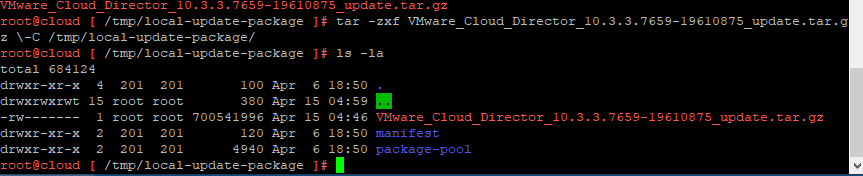
5. Let Extract the update files into the directory we created above.

tar -zxf VMware_Cloud_Director_10.6.1.11753-24532678_update.tar.gz \-C /tmp/local-update-package/

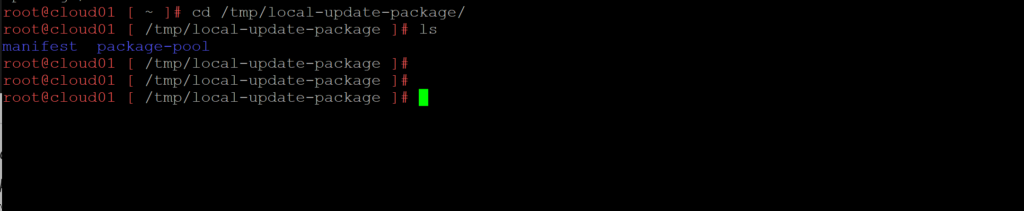
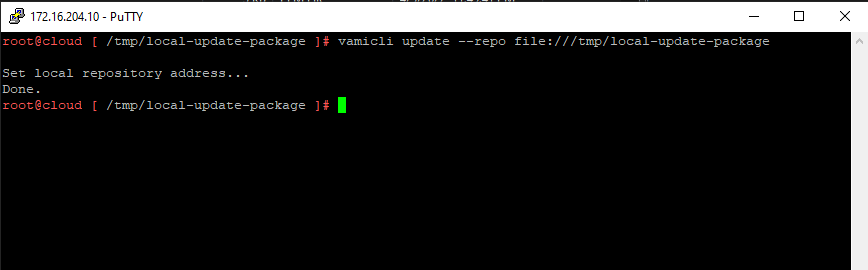
6. Now that the update package has been unzipped we will set the local-update-package be the update directory.

vamicli	update --repo file:///tmp/local-update-package

7. Using the vamicli update –check we will check the repo for the newest upgrade of VCD.

vamicli update --check

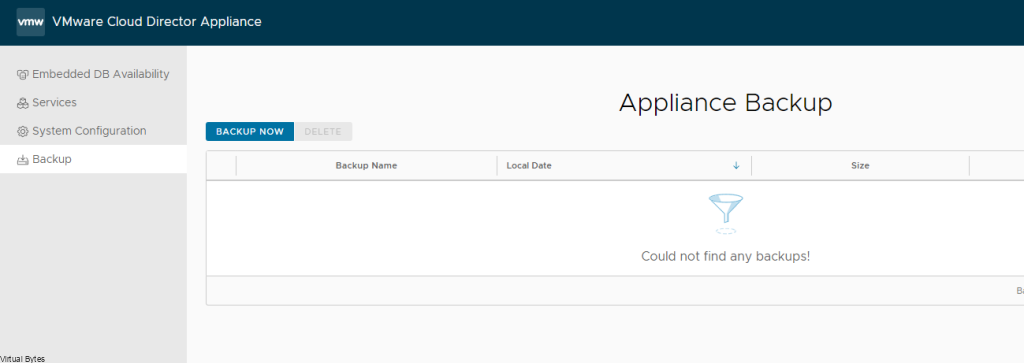
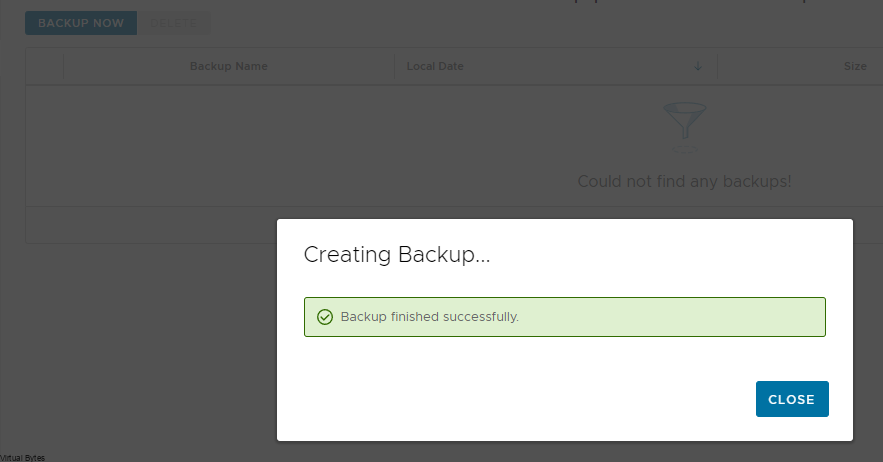
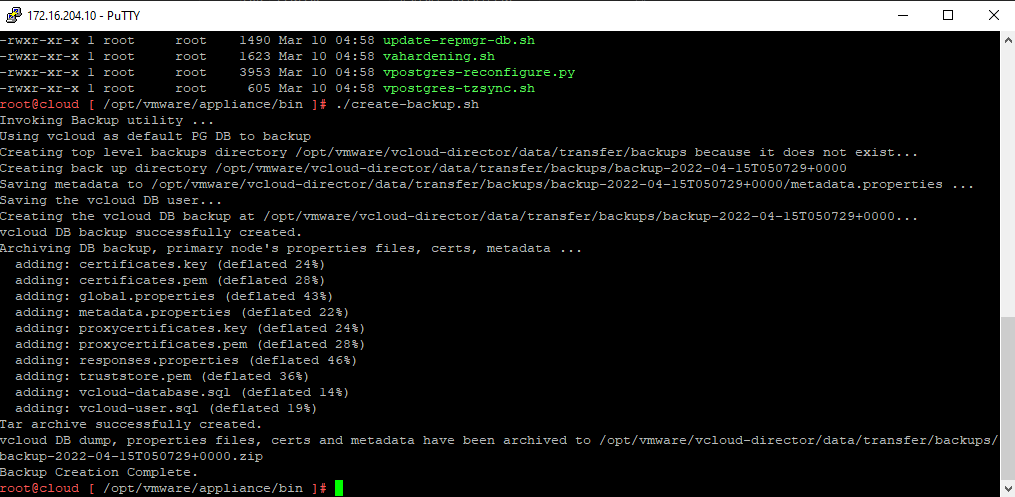
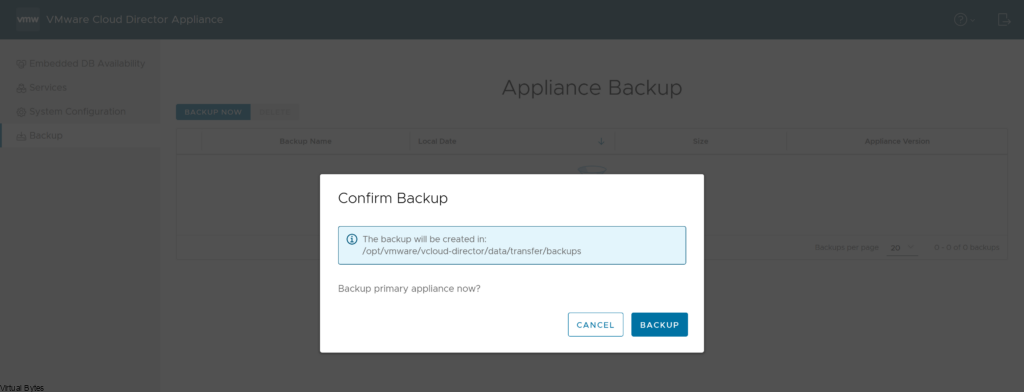
Before we start the upgrade, it is important to take a backup of the VCD Appliances, log into each VCD Node via VAMI https://IP_Address:5480 and go to Backup and take a backup.

vamicli update --install latest

Now that the primary appliance is upgrade, repeat the steps above to the other appliances that need, steps 3 through 7.

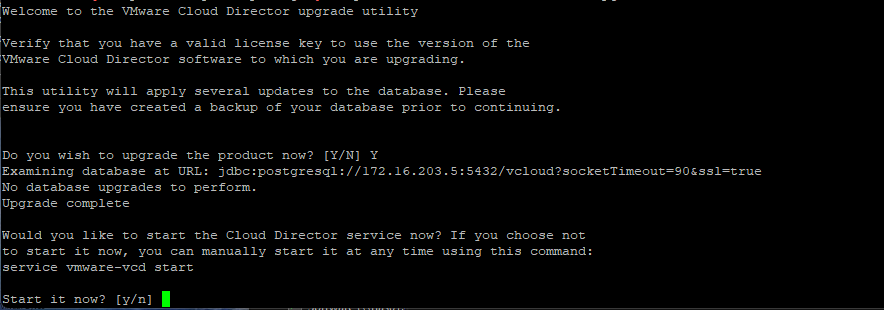
After the other VCD appliances have the upgrade staged and updated now go back to the primary appliance and execute the upgrade utility.

/opt/vmware/vcloud-director/bin/upgrade

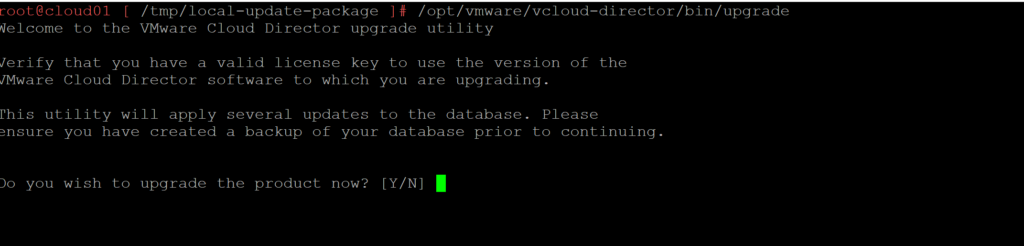
Follow the prompts from the upgrade utility, it will ask if you are ready for the upgrade and if you have taken a backup.

Once the first appliance is upgraded, then repeat the upgrade process above for the additional VCD appliances.

After the upgrade is complete, lets reboot the full appliance so for this option do No (N)

We have successfully upgraded VMware Cloud Director to 10.6.1!


Troubleshooting After Upgrade

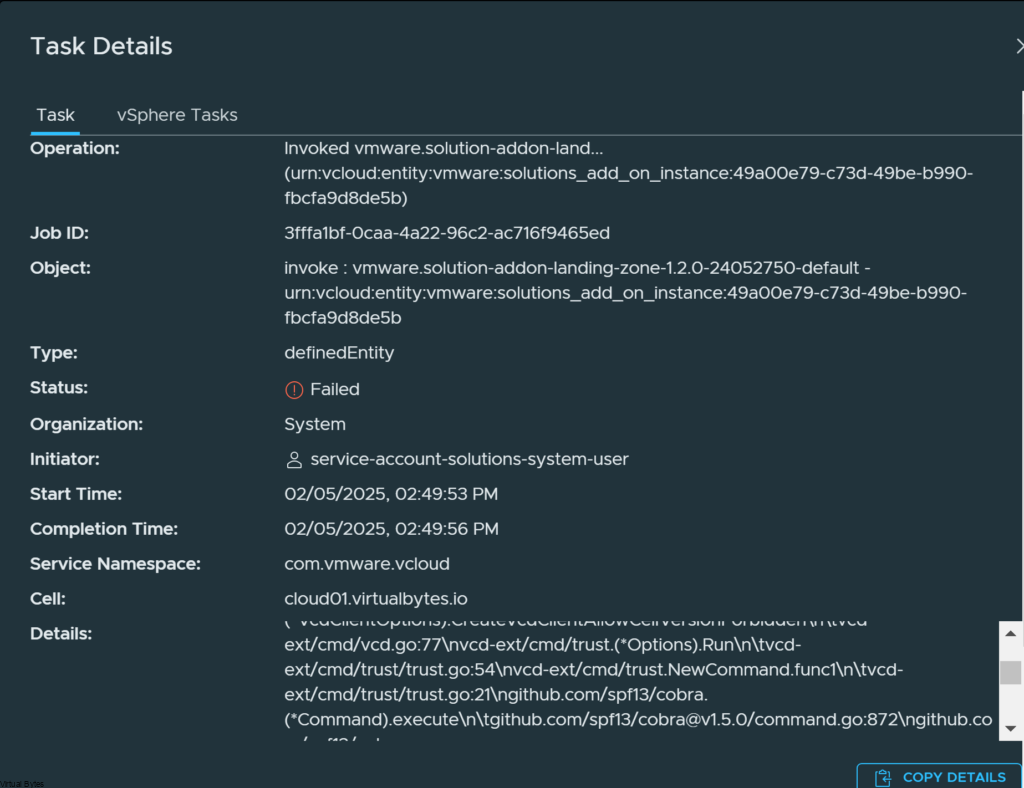
I logged into my VCD, first thing I noticed is that I kept getting this error:
invoke : vmware.solution-addon-landing-zone-1.2.0-24052750-default – urn:vcloud:entity:vmware:solutions_add_on_instance:49a00e79-c73d-49be-b990-fbcfa9d8de5b.

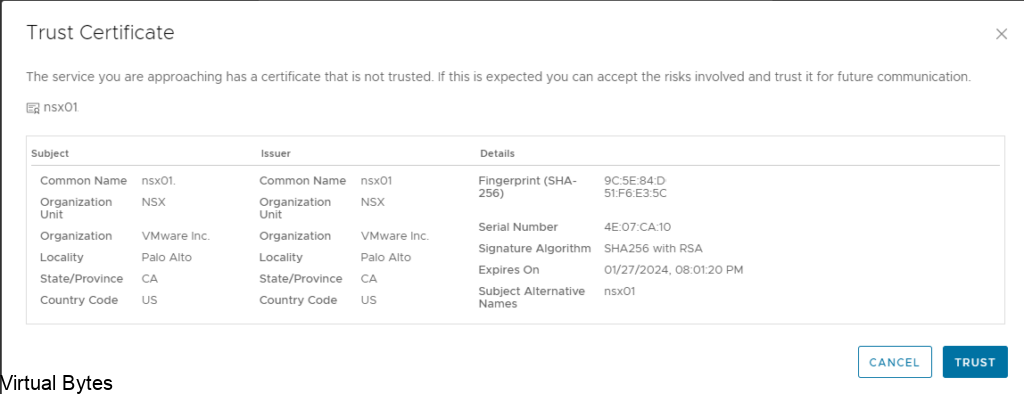
Then i started looking into the issue and it was related to certificates that were expired or needed to be reapplied. After I added the new certificate the issue went away.

Go to Certificates Library and remove any expired certs and replace them with up-to-date ones.

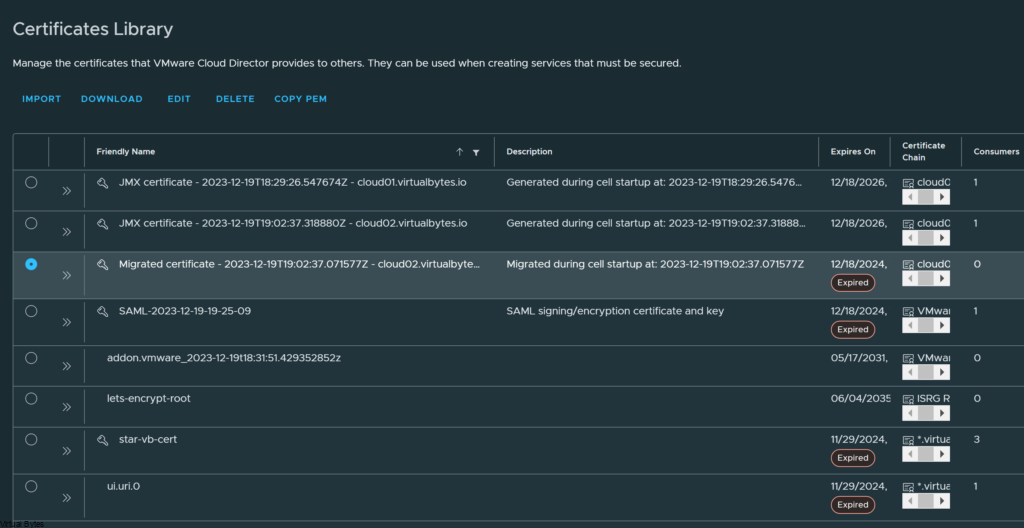
Also update the Public Addresses Certificate with the same one you uploaded into the Certificates Library if you are using a Wildcard Cert or Multiple SANs within the certificate.

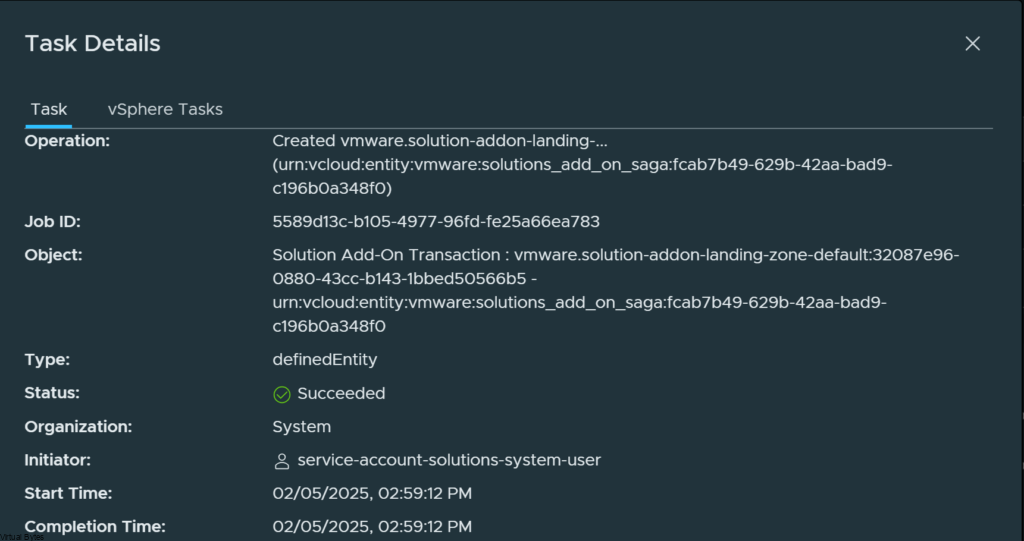
Once you have all the certificates updated and cleaned up, the Task will be running automatically and here it will look like this below:
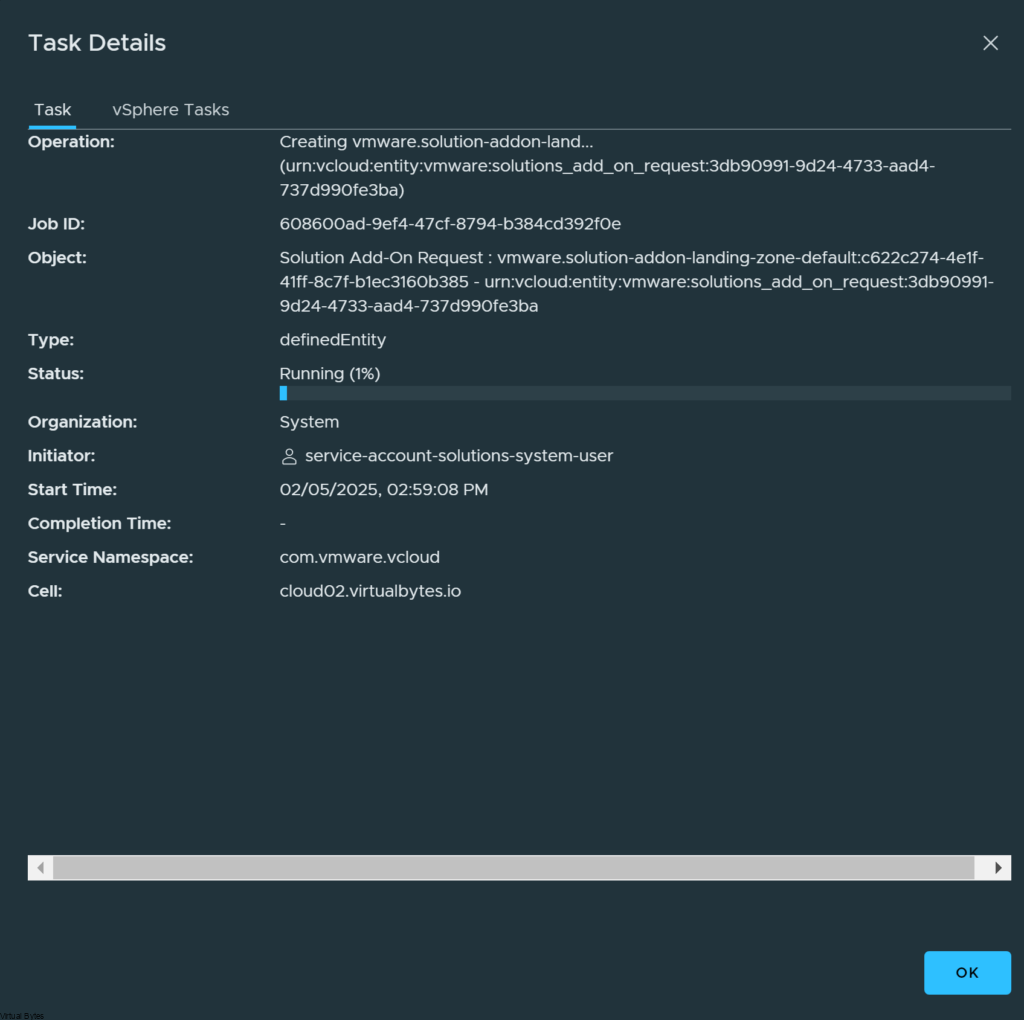
Issue Fixed!

February 5, 2025 0 comments 682 views
0 FacebookTwitterLinkedinEmail
Cloud

VMware Cloud Director – Failed to Start

by Tommy Grot September 23, 2024
written by Tommy Grot 3 minutes read

Welcome, tech enthusiasts, to another thrilling dive into the depths of VMware’s cloud management platform, Cloud Director. Today, we find ourselves confronted by an issue that has left many a cloud administrator scratching their heads: the mysterious failure of Cloud Director to initiate its services due to a missing public address in the AllowedOrigins configuration. This blog is your lifeline, offering a comprehensive roadmap to navigate through this technical maze and restore the harmony of your Cloud Director environment!

“Failed to Start: An error occurred during the initialization” error when trying to access vCloud Director after updating public addresses

Additional Informatoin avaiabled from VMware’s Support Site – Failed to Start: An error occurred during the initialization

Procedure:

  • Take a Powered off snapshot of your VMware Cloud Director Cells, (ensure to turn them off properly).
  • Power on the VCD Appliances

Login into VCD Administration Provider Portal

Go to Swagger API

Expand the GET /1.0.0/site/settings/cors

Click ” Try it out “

When you hit ” Execute” Below as in the screenshot provided you should see a similar output. Once you see your output, and you see missing entries for any additional VCD Cells, you will need to input them into the following order as provided.

Once you have staged and prepared your JSON for the AllowedOrigins, using Notepad ++ or VS Code then you will go to the PUT section of Swagger API Explorer as in screenshot below.

An Example of JSON: As provided ensure to replicate the missing FQDN or IP for each section as the sample JSON below.
{
  "resultTotal": 18,
  "pageCount": 1,
  "page": 1,
  "pageSize": 25,
  "associations": null,
  "values": [
    {
      "origin": "172.31.181.200"
    },
    {
      "origin": "172.31.200.10"
    },
    {
      "origin": "172.31.200.11"
    },
    {
      "origin": "IP ADDRESS For Missing Node"
    },
    {
      "origin": "cloud.virtualbytes.io"
    },
    {
      "origin": "cloud01.virtualbytes.io"
    },
    {
      "origin": "cloud02.virtualbytes.io"
    },
    {
      "origin": "FQDN for Missing Node"
    },
    {
      "origin": "http://172.31.181.200"
    },
    {
      "origin": "http://172.31.200.10"
    },
    {
      "origin": "http://172.31.200.11"
    },
    {
      "origin": "IP ADDRESS For Missing Node"
    },
    {
      "origin": "http://cloud.virtualbytes.io"
    },
    {
      "origin": "http://cloud01.virtualbytes.io"
    },
    {
      "origin": "http://cloud02.virtualbytes.io"
    },
    {
      "origin": "FQDN for Missing Node"
    },
    {
      "origin": "https://172.31.181.200"
    },
    {
      "origin": "https://172.31.200.10"
    },
    {
      "origin": "https://172.31.200.11"
    },
    {
      "origin": "FQDN for Missing Node"
    },
    {
      "origin": "https://cloud.virtualbytes.io"
    },
    {
      "origin": "https://cloud01.virtualbytes.io"
    },
    {
      "origin": "https://cloud02.virtualbytes.io"
    },
    {
      "origin": "FQDN for Missing Node"
    }
  ]
}

After your JSON is ready, you will want to paste it into the white body of the PUT request and hit execute.

Toward the bottom of the CORS PUT Section you should see a 200 OK Status, after you see that you should see VCD cells that were missing start up and also if you re-run the GET command you should see your missing nodes.

September 23, 2024 0 comments 575 views
0 FacebookTwitterLinkedinEmail
Cloud

VMware Cloud Director 10.4.x & Terraform Automation Part 1

by Tommy Grot April 3, 2023
written by Tommy Grot 5 minutes read

Today’s post is about VMware Cloud Director 10.4.x and Terraform!

With Terraform there are endless possibilities, creating a virtual data center and being able to tailor to your liking and keeping it in an automated deployment. In this multi-part blog post we will get into VCD and Terraform Infrastructure as Code automation. This will be a multi-part post, for now we are starting off at Part 1!

What You will Need:

  • A Linux VM to execute Terraform from
  • Latest Terraform Provider (I am using beta 3.9.0-beta.2 )
  • Gitlab / Code Repo (Optional to store your code)
  • VMware Cloud Director with NSX-T Integrated already
  • Local Account with Provider Permissions on VCD (mine is terraform)

Lets Begin!

To begin our terraform main.tf, we will specify the terraform provider VCD version which I am using 3.9.0-beta.2

 terraform {
  required_providers {
    vcd = {
      source  = "vmware/vcd"
      version = "3.9.0-beta.2"
    }
  }
}

provider "vcd" {
  url                  = "https://cloud.virtualbytes.io/api"
  org                  = "system"
  user                 = "terraform"
  password             = "VMware1!"
  auth_type            = "integrated"
  max_retry_timeout    = 60
  allow_unverified_ssl = true

Once you have your Terraform Provider configured and administrative privilege account next, we will start creating an Organization within VCD.

# Creating VMware Cloud Director Organization#
resource "vcd_org" "demo-org-10" {
  name             = "demo-org-10"
  full_name        = "demo-org-10"
  description      = ""
  is_enabled       = true
  delete_recursive = true
  delete_force     = true
  

  vapp_lease {
    maximum_runtime_lease_in_sec          = 3600 # 1 hour
    power_off_on_runtime_lease_expiration = true
    maximum_storage_lease_in_sec          = 0 # never expires
    delete_on_storage_lease_expiration    = false
  }
  vapp_template_lease {
    maximum_storage_lease_in_sec       = 604800 # 1 week
    delete_on_storage_lease_expiration = true
  }
}

Next the code below will create a Virtual Data Center within that Organization you have created above.

resource "vcd_org_vdc" "demo-org-10" {
  depends_on  = [vcd_org.demo-org-10]
  name        = "demo-org-10"
  description = ""
  org         = "demo-org-10"
  allocation_model  = "Flex"
  network_pool_name = "VB-POOL-01"
  provider_vdc_name = "Provider-VDC"
  elasticity = true
  include_vm_memory_overhead = true
  compute_capacity {
    cpu {
      allocated = 2048
    }

    memory {
      allocated = 2048
    }
  }

  storage_profile {
    name    = "vCloud"
    limit   = 10240
    default = true
  }
  network_quota            = 100
  enabled                  = true
  enable_thin_provisioning = true
  enable_fast_provisioning = true
  delete_force             = true
  delete_recursive         = true
}

Next, we will specify the automation to create a template library within that Virtual Data Center.

#Creating Virtual Data Center Catalog#
resource "vcd_catalog" "NewCatalog" {
  depends_on = [vcd_org_vdc.demo-org-10]
  org = "demo-org-10"

  name             = "Templates"
  description      = "Template Library"
  delete_recursive = true
  delete_force     = true
}

The next step will depend on if you have NSX already configured and ready to consume a Tier-0 VRF into this Provider Gateway we are about to ingest into this Virtual Data Center. My Tier-0 VRF is labeled = vrf-tier-0-edge-03-gw-lab, as I tell Terraform the existing data where to pull from NSX and to assign it to this VDC.

# Add NSX Edge Gateway Tier 0 to VDC
data "vcd_nsxt_manager" "main" {
  name = "nsx-m01"
}

data "vcd_nsxt_tier0_router" "vrf-tier-0-edge-03-gw-lab" {
  name            = "vrf-tier-0-edge-03-gw-lab"
  nsxt_manager_id = data.vcd_nsxt_manager.main.id
}

resource "vcd_external_network_v2" "ext-net-nsxt-t0" {
  depends_on = [vcd_org_vdc.demo-org-10]
  name        = "lab-03-pro-gw-01"
  description = "vrf-tier-0-edge-03-gw-lab"

  nsxt_network {
    nsxt_manager_id      = data.vcd_nsxt_manager.main.id
    nsxt_tier0_router_id = data.vcd_nsxt_tier0_router.vrf-tier-0-edge-03-gw-lab.id
  }

  ip_scope {
    enabled        = true
    gateway        = "192.168.249.145"
    prefix_length = "29"

    static_ip_pool {
      start_address  = "192.168.249.146"
      end_address   = "192.168.249.149"
    }
  }
}

Now, that we have created a Provider Gateway by consuming a VRF Tier-0 from NSX, next we will create a Tier-1 Gateway and attach it into the Virtual Data Center so we can add segments!

resource "vcd_nsxt_edgegateway" "lab-03-pro-gw-01" {
  depends_on = [vcd_org_vdc.demo-org-10]
  org         = "demo-org-10"
  owner_id    = vcd_vdc_group.demo-vdc-group.id
  name        = "lab-03-pro-gw-01"
  description = "lab-03-pro-gw-01"

  external_network_id = vcd_external_network_v2.ext-net-nsxt-t0.id

    subnet {
    gateway       = "192.168.249.145"
    prefix_length = "29"
    # primary_ip should fall into defined "allocated_ips" 
    # range as otherwise next apply will report additional
    # range of "allocated_ips" with the range containing 
    # single "primary_ip" and will cause non-empty plan.
    primary_ip = "192.168.249.146"
    allocated_ips {
      start_address  = "192.168.249.147"
      end_address   = "192.168.249.149"
    }
  }
}

Now we can create a segment and attach it to our Tier-1 Gateway within the Virtual Data Center!

#### Create VMware Managment Network /24 
resource "vcd_network_routed_v2" "nsxt-backed-1" {
  depends_on = [vcd_org_vdc.demo-org-10]
  org         = "demo-org-10"
  name        = "vmw-nw-routed-01"
  edge_gateway_id = vcd_nsxt_edgegateway.lab-03-pro-gw-01.id
  gateway       = "10.10.10.1"
  prefix_length = 24
  static_ip_pool {
    start_address = "10.10.10.5"
    end_address   = "10.10.10.10"
  }
}

This is it for Part 1! Stay tuned for Part 2 where we will customize this VDC we created with Terraform!

April 3, 2023 0 comments 1.2K views
0 FacebookTwitterLinkedinEmail
Cloud

Upgrading VMware Cloud Director to 10.x Versions

by Tommy Grot March 3, 2023
written by Tommy Grot 4 minutes read

This walkthrough is valid for VMware Cloud Director 10.6.x Upgrade!


What’s New

VMware Cloud Director version 10.4.1.1 release provides bug fixes, updates the VMware Cloud Director appliance base OS and the VMware Cloud Director open-source components.

Resolved Issues

  • VMware Cloud Director operations, such as powering a VM on and off takes longer time to complete after upgrading to VMware Cloud Director 10.4.1After upgrading to VMware Cloud Director 10.4.1, VMware Cloud Director operations, such as powering a VM on or off takes longer time to complete. The task displays a Starting virtual machine status and nothing happens.The jms-expired-messages.logs log file displays an error.RELIABLE:LargeServerMessage & expiration=
  • During an upgrade from VMware Cloud Director 10.4 to version 10.4.1, upgrading the standby cell fails with a Failure: Error while running post-install scripts error messageWhen upgrading the VMware Cloud Director appliance by using an update package from version 10.4 to version 10.4.1, the upgrade of the standby cell fails with an error message.Failure: Error while running post-install scriptsThe update-postgres-db.log log file displays an error.> INFO: connecting to source node> DETAIL: connection string is: host=primary node ip user=repmgr> ERROR: connection to database failed> DETAIL:> connection to server at “primary node ip”, port 5432 failed: could not initiate GSSAPI security context: Unspecified GSS failure. Minor >> code may provide more information: No Kerberos credentials available (default cache: FILE:/tmp/krb5cc_1002)> connection to server at “primary node ip”, port 5432 failed: timeout expired
More Fixes and Known Issues here

More Information about VMware Cloud Director 10.4.1

VMware Cloud Director 10.4.1 introduces several new concepts that facilitate creating, deploying, running, and managing extensions. Solution Add-Ons are an evolution of VMware Cloud Director extensions that are built, implemented, packaged, deployed, instantiated, and managed following a new extensibility framework. Solution Add-Ons contain custom functionality or services and can be built and packaged by a cloud provider or by an independent software vendor. VMware also develops and publishes its own VMware Cloud Director Solution Add-Ons.

My Versions

  • VMware NSX 4.1.0.0.0.21332672
  • VMware vCSA 8.0.0 21216066
  • VMware Cloud Director 10.4.1

First. properly shutdown your VCD Cells if you have multiple cells. Once they are turned off take a snapshot of all of the appliances

Next we will want to upload the tar.gz file via WINSCP to the primary VCD Cell if you have a multi cell deployment you will need to upgrade the first cell, then second and third.

I have logged into the VCD appliance with root account

Then open up a Putty session to the VCD appliance login as root,

Then change directory to /tmp/ Once in the directory:

cd /tmp

Create a Directory within /tmp directory, with the command below:

mkdir local-update-package

Start to upload the VMware_Cloud_Director_10.4.1.9360-21373231_update.tar.gz file for the upgrade into /tmp/local-update-package via winscp

File has been successfully uploaded to the VCD appliance.

Next steps we will need to prepare the appliance for the upgrade:

We will need to move the VMware_Cloud_Director_10.4.1.9360-21373231_update.tar.gz from the /tmp directory to /tmp/local-update-package/

mv VMware_Cloud_Director_10.4.1.9360-21373231_update.tar.gz /tmp/local-update-package

Once in the local-update-package director, and you have your VMware_Cloud_Director_10.4.1.9360-21373231_update.tar.gz run the command below to extract the update package in the new directory we created in /tmp/local-update-package

tar -zxf VMware_Cloud_Director_10.4.1.9360-21373231_update.tar.gz

You can run the “ls” command and you shall see the VMware_Cloud_Director_10.4.1.9360-21373231_update.tar.gz file along with manifest and package-pool

After you have verified the local update directory then we will need to set the update repository.

vamicli update --repo file:///tmp/local-update-package

Check for update with this command after you have set the update package into the repository address

vamicli update --check

Now, we see that we have a upgrade that is staged and almost ready to be ran! But, we will need to shutdown the cell(s) with this command

/opt/vmware/vcloud-director/bin/cell-management-tool -u administrator cell --shutdown

Next is to take a backup of the database, log into VMware Cloud Director Appliance, https://<your-ip>:5480 , same port as vCSA VAMI.

Backup was successful! Now, time for the install

Apply the upgrade for VCD, the command below will run will install the update

vamicli update --install latest

Now, the next step is important, if you have any more VCD Cell appliances you will want to repeat first few steps and then just run the command below to upgrade the other appliances:

/opt/vmware/vcloud-director/bin/upgrade 

Select Y to Proceed with the upgrade

After successful upgrade, you may reboot VCD appliance and test, and after successful tests remove your snapshot.

March 3, 2023 0 comments 3.4K views
3 FacebookTwitterLinkedinEmail
Cloud

VMware Cloud Director – Customization & Branding w/ API

by Tommy Grot September 9, 2022
written by Tommy Grot 3 minutes read

A in depth post on how to customize your VMware Cloud Director! If your organization has a specific theme and logo, well tonight’s post will guide you through the steps to get it all configured and looking all spiffy!

By default, installation Cloud Director offers two types of themes, the default white mode and dark mode. You can manage, create, and add your own themes to VCD. The steps we will be following through will be done system level so all Tenants and the Provider will see the updated VCD UI!

First connect to VCD Cell appliance via SSH –

Change Directory to

cd /opt/vmware/vcloud-director/bin

Run the Cell Management Tool

./cell-management-tool manage-config -n backend.branding.requireAuthForBranding -v false

Next we will utilize Postman to do the next few tasks

Access Token Authentications

You will want to get your Access Token and API Version, below I will explain on how to do that to get your API version

Get -> https://<Your-IP-Here>/api/versions

Authorization Tab

  • Basic Auth – Username: “administrator@system” & Password: <your password>

Headers Tab

  • Key: Accept Value: application/*;version=37.0

Below is the supported version I utilized, I did not used the beta version.

</VersionInfo>
<VersionInfo deprecated="false">
    <Version>37.0</Version>
    <LoginUrl>https://172.16.204.120/cloudapi/1.0.0/sessions</LoginUrl>
    <ProviderLoginUrl>https://172.16.204.120/cloudapi/1.0.0/sessions/provider</ProviderLoginUrl>
</VersionInfo>

POST API Sessions

Now we will create a POST within Postman.

POST https://172.16.204.120/api/sessions

Authorization Tab

  • Basic Auth – Username: “administrator@system” & Password: <your password>

NOTE -> Once you execute the POST, make sure you get a 200 OK status before proceeding futher.

Next you will want to save the token above as sampled in the image, you will need it for the Beare Token.

Headers

  • KEY: x-vcloud-authorization VALUE: e31a8bd0d1244282bed8b4b809ba9e1f
  • KEY: X-VMWARE-VCLOUD-ACCESS-TOKEN VALUE: <eyJ….>

Cloud Director Web Portal Customization

For this next section you will need to execute GET calls to get the current portal configuration with the above Bearer Token KEYS and VALUES

GET https://172.16.204.120/cloudapi/branding

Once you execute the call you will want to go to the Body section and you will see something like this, but a fresh installation of VCD – Portal Name will be ” VMware Cloud Director” and the theme name would be “Default” Which mine is set to Dark mode.

Sample Body Configuration

{
    "portalName": "Virtual Bytes Cloud",
    "portalColor": null,
    "selectedTheme": {
        "themeType": "BUILT_IN",
        "name": "Dark"
    },
    "customLinks": [
        {
            "name": "help",
            "menuItemType": "override",
            "url": null
        },
        {
            "name": "imprint",
            "menuItemType": "override",
            "url": null
        },
        {
            "name": "about",
            "menuItemType": "override",
            "url": null
        },
        {
            "name": "vmrc",
            "menuItemType": "override",
            "url": null
        }
    ]
}

    Then once you get your custom configuration ready you will want to do a PUT Call via Postman

Once you POST your Branding configuration, go back to Web UI of VCD and hit refresh! You should see something like below 🙂

Cloud Director Web Portal Logo Customization

Now. for our logo we will do another API call via Postman to PUT a png file for the system level logo.

Authorization Tab

  • Bearer Token from previous API call we did

Headers

  • KEY: Accept VALUE: application/*;version=37.0
  • KEY: x-vcloud-authorization VALUE: “e31a8bd0d1244282bed8b4b809ba9e1f” <- Put your value for the call not mine 🙂
  • KEY: X-VMWARE-VCLOUD-ACCESS-TOKEN VALUE: “eyJhbGciOiJSUzI…..” <- I shorted the Bearer Token

Go to Body – Change it to binary and find your logo.png file to upload and then hit Send.

Top right corner you will see the logo I uploaded to Cloud Director!

September 9, 2022 0 comments 1.7K views
0 FacebookTwitterLinkedinEmail
Cloud

VMware Cloud Director 10.3.3: Creating a Tenant

by Tommy Grot April 15, 2022
written by Tommy Grot 3 minutes read

A little about what VMware Cloud Director is – it is a CMP or also known as a cloud managment plane which supports, pools and abstracts the VMware virtualization infrastructure as (VDC) Virtual Data Centers. A provider can offer many different flavors and specifcations of a Tenant to a customer, it could be a Gold, Silver or Bronze types of capacity and tiering which allows a good allocation model depending on a customer that needs a higher guarenteed resource usage or allocation where as a lower tier customer wants to test few software solutions they could use a bronze tier and be able to save costs.

Once you are logged in, then you will want to create few things first! But my previous blog post already explains on how to add a vCenter Server and NSX-T integration here at this post.

Well lets begin! First we will want to create a Network pool which is a VXLAN that will reside within the tenant environment will run ontop of Geneve on the overlay!

  • Login into the Provider portal of VCD with the administrator account
  • https://<vcd-ip>/provider/

Go to Network Pools

The network will be Geneve backed to ride the NSX-T overlay

Select the NSX-T Manager

The network pool which is backed by NSX-T Transport Zone we will want to select the transport zone that you have created for your edge nodes during the NSX-T setup.

Once you have your Network Pool setup and followed the steps you should see something like this!

Network Pool has been successfully created as shown below

After a network pool has been created, next we will create the Provider VDC ( Virtual Data Center)

Select the Provider vCenter you have configured within the Infrastructure portion

Select the Cluster, for me – I have a vSAN Cluster

Once you select the vSAN or Cluster you have in your envirnonemnt, you may proceed but the Hardware Version should be left as default since this is the maximum hardware version VCD can run and accept.

Select vSAN Storage Policy if you have vSAN if not then select the proper storage policy your storage platform is using
The network pool we created earlier, this is where we get to consume it and we let NSX-T manager and Geneve network pool run out VCD environment
  • Next, we will create an organization for us to be able to attach a VDC to
    it, which for this walk through my org is Lab-01. That will be the same name
    you use when you login as a tenant into VCD.
  • An organization is just a logical group of resources that are presented to customers, where each organization has its own isolation/security boundaries and their own Web UI which they can use an identity manager to integrate such as LDAP for seamless user management.

Once a New Organization has been created, next we will create a Organization VDC (Virtual Data Center)

Click on Organizations VDCs and Create “NEW” Organization

Type a name of the organization you wish to create

Attach that organization to the provider virtual datacenter we created earlier

Select the allocaiton model, I have seen the Flex model be the most flexible to have the ability to have better control over the resources even at the VM level. More information is here on VMware’s website

For this demonstration, I am not allocating and resource I am giving my Tenant unlimited resources from my vSAN Cluster, but for a production environment you will want to use the proper allocation model and resources.

Select the Storage policy along with i like to enable Thin provision to save storage space!

Each organization will have its own Network Pool but it will run ontop of the Geneve overlay

About to finish up the setup of a VDC!

We have logged into the new Tenant space we have created! 🙂

April 15, 2022 0 comments 1.4K views
0 FacebookTwitterLinkedinEmail
Cloud

Upgrading VMware Cloud Director to 10.3.3

by Tommy Grot April 14, 2022
written by Tommy Grot 4 minutes read

Upgrading VMware Cloud Director from 10.3.2.1 to 10.3.3, primarily to fix a Security Vulnerability.

Also, there are some enhancements which follow:

What is New?!

The VMware Cloud Director 10.3.3 release provides bug fixes, API enhancements, and enhancements of the VMware Cloud Director appliance management user interface:

  • Backup and restore of VMware Cloud Director appliance certificates. VMware Cloud Director appliance management interface UI and API backup and restore now includes VMware Cloud Director certificates. See Backup and Restore of VMware Cloud Director Appliance in the VMware Cloud Director Installation, Configuration, and Upgrade Guide.
  • New /admin/user/{id}/action/takeOwnership API to reassign the owner of media.
  • Improved support for routed vApp network configuration of the MoveVApp API.

This release resolves resolves CVE-2022-22966. For information, see https://www.vmware.com/security/advisories.

There are also lots of fixes, if your VCD is having issues there is a possibility this upgrade could fix lots of issues!

All the Fixes are listed on this site : https://docs.vmware.com/en/VMware-Cloud-Director/10.3.3/rn/vmware-cloud-director-1033-release-notes/index.html

First things first, lets download the newest release for VMware Cloud Director 10.3.3 – File Name: VMware_Cloud_Director_10.3.3.7659-19610875_update.tar.gz

Then shutdown your VCD Cells if you have multiple of them. Once they are turned off take a snapshot of all of them, along with the NFS Transfer Service Server usually it is a VM, take a snapshot of it too just in case you want to roll back if any issues occur.

Next we will want to upload the tar.gz file via WINSCP to the primary VCD Cell if you have a HA VCD topology, then the secondary get upgraded after the primary is finished.

I have logged into the VCD appliance with root account

Then open up a Putty session to the VCD appliance login as root,

Then change directory to /tmp/

Once in the directory:

Make Directory with the command below:

mkdir local-update-package

Start to upload the tar.gz file for the upgrade into /tmp/local-update-package via WINSCP

File has been successfully uploaded to the VCD appliance.

Then next steps we will need to prepare the appliance for the upgrade:

We will need to extract the update package in the new directory we created in /tmp/

tar -zxf VMware_Cloud_Director_v.v.v.v–nnnnnnnn_update.tar.gz \ -C /tmp/local-update-package

You can run the “ls” command and you shall see the tar.gz file along with manifest and package-pool

After you have verified the local update directory then we will need to set the update repository.

vamicli update – -repo file:///tmp/local-update-package

Check for update with this command after you have set the update package into the repository address

vamicli update – -check

Now, we see that we have a upgrade that is staged and almost ready to be ran! But, we will need to shutdown the cell(s) with this command

/opt/vmware/vcloud-director/bin/cell-management-tool -u <admin username> cell –shutdown

Next is to take a backup of the database, so if your cloud director appliance was orginally version 10.2.x initially and you have upgraded it throughout its life span, then your next command will be little different which is /opt/vmware/appliance/bin/create-backup.sh – (which i have noticed it gets renamed during a upgrade process from 10.2.x to 10.3.1)

But if your appliance is 10.3.x and newer then /opt/vmware/appliance/bin/create-db-backup will be your backup to run.

I changed directory and went all the way down to the “bin” of the backup file and now i executed the script.

Backup was successful! Now, time for the install 🙂

Apply the upgrade for VCD, the command below will run will install the update

vamicli update – -install latest

Now, the next step is important, if you have any more VCD Cell appliances you will want to repeat first few steps and then just run the command below to upgrade the other appliances:

/opt/vmware/vcloud-director/bin/upgrade

Select Y to Proceed with the upgrade

After successful upgrade, you may reboot VCD appliance and test!

April 14, 2022 0 comments 2.8K views
1 FacebookTwitterLinkedinEmail
Cloud

Deploying VMware Cloud Director Availability 4.3

by Tommy Grot March 24, 2022
written by Tommy Grot 4 minutes read

Todays topic is deploying VMware Cloud Director Availability for VMware Cloud Director! Todays topic is deploying VMware Cloud Director Availability for VMware Cloud Director! This walkthrough will guide you on how to deploy VCDA from a OVA to an working appliance. All this is created within my home lab. A different guide will be on how to setup VCDA and multi VCDs to create a Peer between and show some Migrations and so on! 🙂

A little about VCDA! – From VMware’s site

VMware Cloud Director Availabilityâ„¢ is a Disaster Recovery-as-a-Service (DRaaS) solution. Between multi-tenant clouds and on-premises, with asynchronous replications, VMware Cloud Director Availability migrates, protects, fails over, and reverses failover of vApps and virtual machines. VMware Cloud Director Availability is available through the VMware Cloud Provider Program.VMware Cloud Director Availability introduces a unified architecture for the disaster recovery and migration of VMware vSphere Â® workloads. With VMware Cloud Director Availability, the service providers and their tenants can migrate and protect vApps and virtual machines:

  • From an on-premises vCenter Server site to a VMware Cloud Directorâ„¢ site
  • From a VMware Cloud Director site to an on-premises vCenter Server site
  • From one VMware Cloud Director site to another VMware Cloud Director site

Cloud SiteIn a single cloud site, one VMware Cloud Director Availability instance consists of:

  • One Cloud Replication Management Appliance
  • One or more Cloud Replicator Appliance instances
  • One Cloud Tunnel Appliance

Links!

Replication Flow – Link to VMware

  • Multiple Availability cloud sites can coexist in one VMware Cloud Director instance. In a site, all the cloud appliances operate together to support managing replications for virtual machines, secure SSL communication, and storage of the replicated data. The service providers can support recovery for multiple tenant environments that can scale to handle the increasing workloads.

Upload the OVA for VCDA

Create a friendly name within this deployment, i like to create a name that is meaningful and corellates to a service.

Proceed to step 4

Accept this lovely EULA 😛

Since in my lab for this deployment i did a combined appliance. I will also do a seperate applaince for each service configuration.

Choose the network segment you will have your VCDA appliance live on, i put my appiliance on a NSX-T backed segment on the overlay network.

Fill in the required information, also create an A record for the VCDA appliance so that when it does its recersive DNS it will succesffuly generate a self signed certificate and allow the appliance to keep building, successfuly.

After you hit submit and watch the deployment you can open the vmware web / remote console and just watch for any issues or errors that may cause the deployment to fail.

I ran into a snag! What happened was the network configuration did not accept all the information i filled in for the network adapter on the VCDA appliance OVA deployment. So here, I had to login as root into the VCDA appliance, it did force me to reset the password that I orginally set on the OVA deployment.

Connect to the VMware Cloud Director Availability by using a Secure Shell (SSH) client.

Open an SSH connection to Appliance-IP-Address.
Log in as the root user.

To retrieve all available network adapters, run: /opt/vmware/h4/bin/net.py nics-status

/opt/vmware/h4/bin/net.py nic-status ens160

/opt/vmware/h4/bin/net.py configure-nic ens160 — static –address 172.16.204.100/24 –gateway 172.16.204.1

After you have updated all the network configuration you can check the config by :

To retrieve the status of a specific network adapter,

/opt/vmware/h4/bin/net.py nic-status ens160

After the networking is all good, then you may go back to your web browser and go to the UI of the VCDA. Here we will configure next few steps.

Add the license you have recived for VCDA – this license is different than what VMware Cloud Director utilizes.

Configure the Site Details for your VCDA. I did Classic data engines since I do not have VMware on AWS.

Add your first VMware Cloud Director to this next step

Once you have added the first VCD, then you will be asked for the next few steps. Here we will add the look up service which is the vCenter Server lookup service along with the Replicator 1 which for my setup i did a combined appliance so the IP is the same as my deployment of VCDA but my port will be different.

Then I created a basic password for this lab simulation. Use a secure password!! 🙂

Once All is completed you shall see a dashboard like this below. We have successfully deployed VMware Cloud Director Availability! Next blog post we will get into the nitty gritty of the the migration and RPOs, and SLAs as we explore this new service which is a addon to VMware Cloud Director!

March 24, 2022 0 comments 3.3K views
0 FacebookTwitterLinkedinEmail
Cloud

VMware Cloud Director 10.3.2 Installation / Configuration

by Tommy Grot January 19, 2022
written by Tommy Grot 1 minutes read

Installing VMware Cloud Director, this walkthrough will guide you on how to deploy VMware Cloud Director 10.3.2. My next blog post will be on how to configure tenants and different network toplogies within vCD.

Download the OVA from VMware’s website login will be required to gain access to the installation medium

Login into vCenter, then right click on the Cluster, Deploy OVF Template

Select the VMware Cloud Director OVA and then click Next

Chose the naming convention of your vcd instance

Select the Compute Cluster that you wish to deploy VCD on

Review the details

Accept that lovely EULA! 🙂

Select the Configuration of the VCD instance. Each confiruation has different resouce allocations.

Select the Storage you wish to deploy the VCD instance too, for mine i chose my vSAN Storage

Select the Networks that VCD will utilize, for my setup I am using two NSX-T overlay backed Segments with the Database segment being isolated and the vcd segment being routable

Verify all settings before hitting Finish!

After the deployment is completed you can integrate VCD with NSX-T and vCenter

Login via https://x.x.x.x/provider (this will allow you to login into VCD as the provider)

Once logged in, go to Infrastructure Resource

Click ADD – to add vCenter server

Once you accepted the SSL Certificate from vCenter, then you will enable tenant access and click finish. After vCenter has been added you will see an overall vCenter Info, like in the screenshots below

After vCenter has been added, you may add NSX-T managers

Click on ADD – fill in the NSX-T Manager(s) URL/IP and user account

Trust the certificate from NSX-T Managers, then you are all set!

January 19, 2022 0 comments 2.4K views
1 FacebookTwitterLinkedinEmail


Recent Posts

  • Deploying & Configuring the VMware LCM Bundle Utility on Photon OS: A Step-by-Step Guide
  • VMware Cloud Foundation: Don’t Forget About SSO Service Accounts
  • VMware Explore Las Vegas 2025: Illuminating the Path to Cloud Excellence!
  • Securing Software Updates for VMware Cloud Foundation: What You Need to Know
  • VMware Cloud Foundation 5.2: A Guide to Simplified Upgrade with Flexible BOM

AI AVI Vantage cloud Cloud Computing cloud director computing configure cyber security director dns domain controller ESXi las vegas llm llms multi-cloud multicloud NSx NSX-T 3.2.0 NVMe private AI servers ssh storage tenant upgrade vcd vcda VCDX vcenter VCF VDC vexpert Virtual Machines VMs vmware vmware.com vmware aria VMware Cloud Foundation VMware cluster VMware Explore VMware NSX vrslcm vsan walkthrough

  • Twitter
  • Instagram
  • Linkedin
  • Youtube

@2023 - All Right Reserved. Designed and Developed by Virtual Bytes

Virtual Bytes
  • Home
  • Home Data Center 2025
  • VMware
    • Cloud
    • Datacenter & Cloud Infrastructure
      • VMware ESXi
      • VMware vCenter
      • VMware vSAN
    • Networking & Security
    • Desktop & App Virtualization
      • Omnissa Horizon
    • Troubleshooting
    • Ansible
  • Education
  • Hardware
    • Hardware Tips & Tricks
  • Events
  • About
    • About Me
    • Home Lab Archives
      • Home Lab 2020-2022
      • Home Lab 2016-2020