Installing VMware Cloud Director, this walkthrough will guide you on how to deploy VMware Cloud Director 10.3.2. My next blog post will be on how to configure tenants and different network toplogies within vCD.
Download the OVA from VMware’s website login will be required to gain access to the installation medium
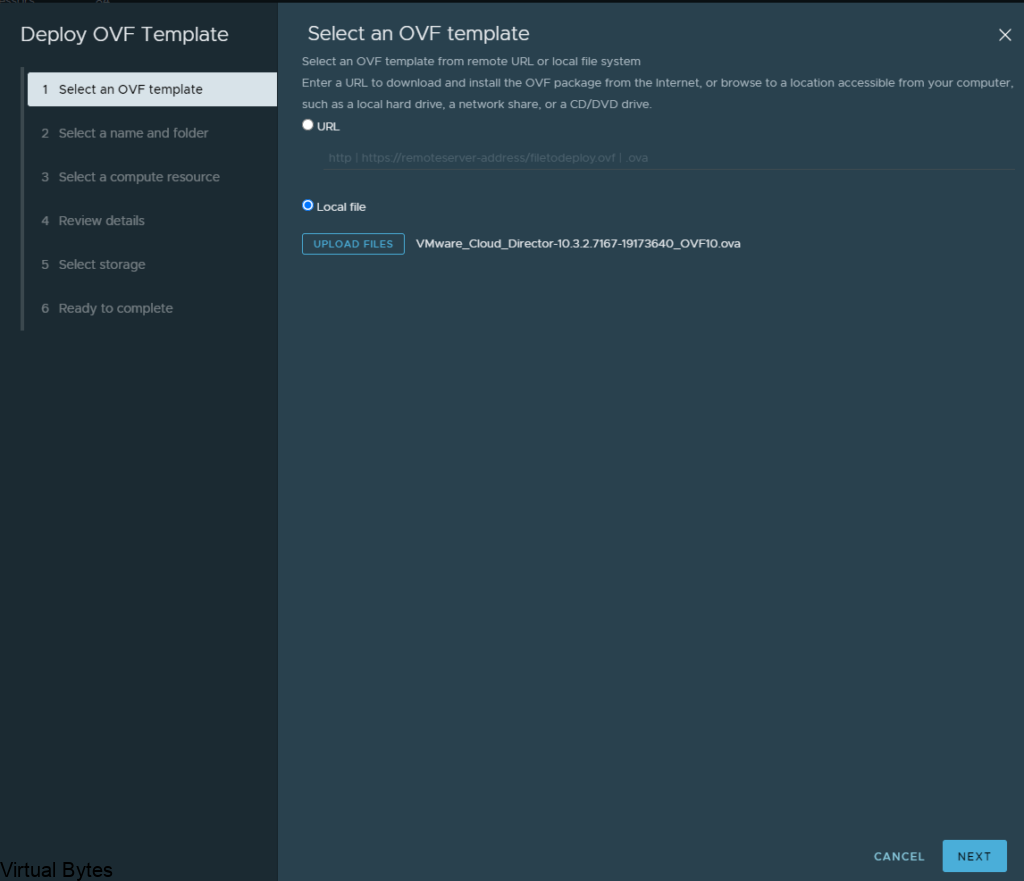
Login into vCenter, then right click on the Cluster, Deploy OVF Template

Select the VMware Cloud Director OVA and then click Next
Chose the naming convention of your vcd instance

Select the Compute Cluster that you wish to deploy VCD on

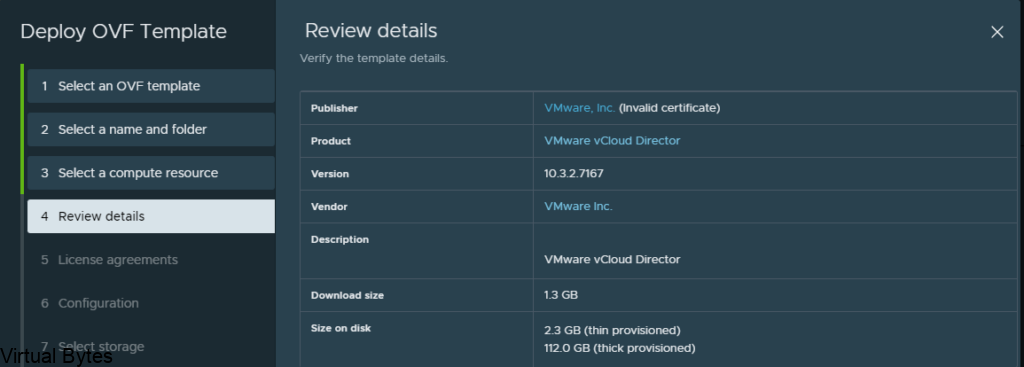
Review the details
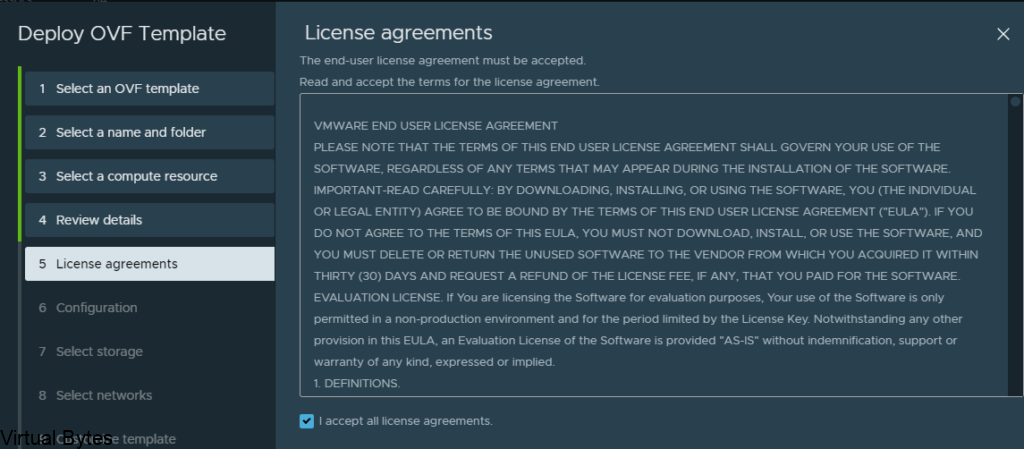
Accept that lovely EULA! 🙂
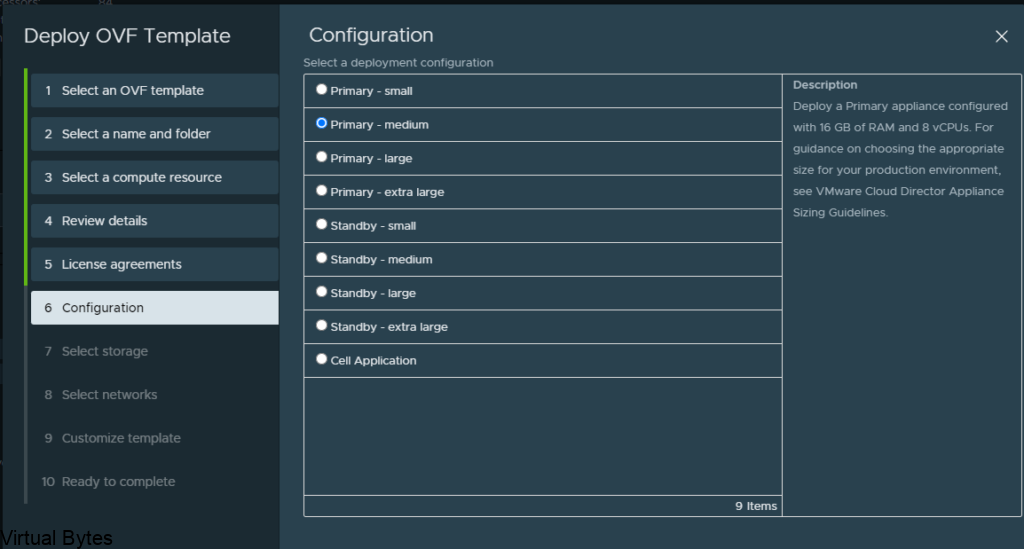
Select the Configuration of the VCD instance. Each confiruation has different resouce allocations.
Select the Storage you wish to deploy the VCD instance too, for mine i chose my vSAN Storage

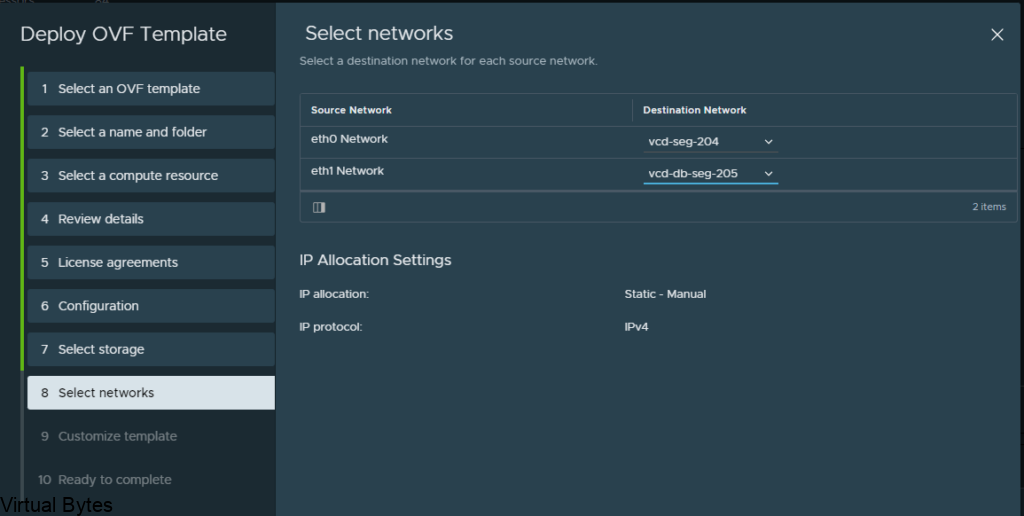
Select the Networks that VCD will utilize, for my setup I am using two NSX-T overlay backed Segments with the Database segment being isolated and the vcd segment being routable
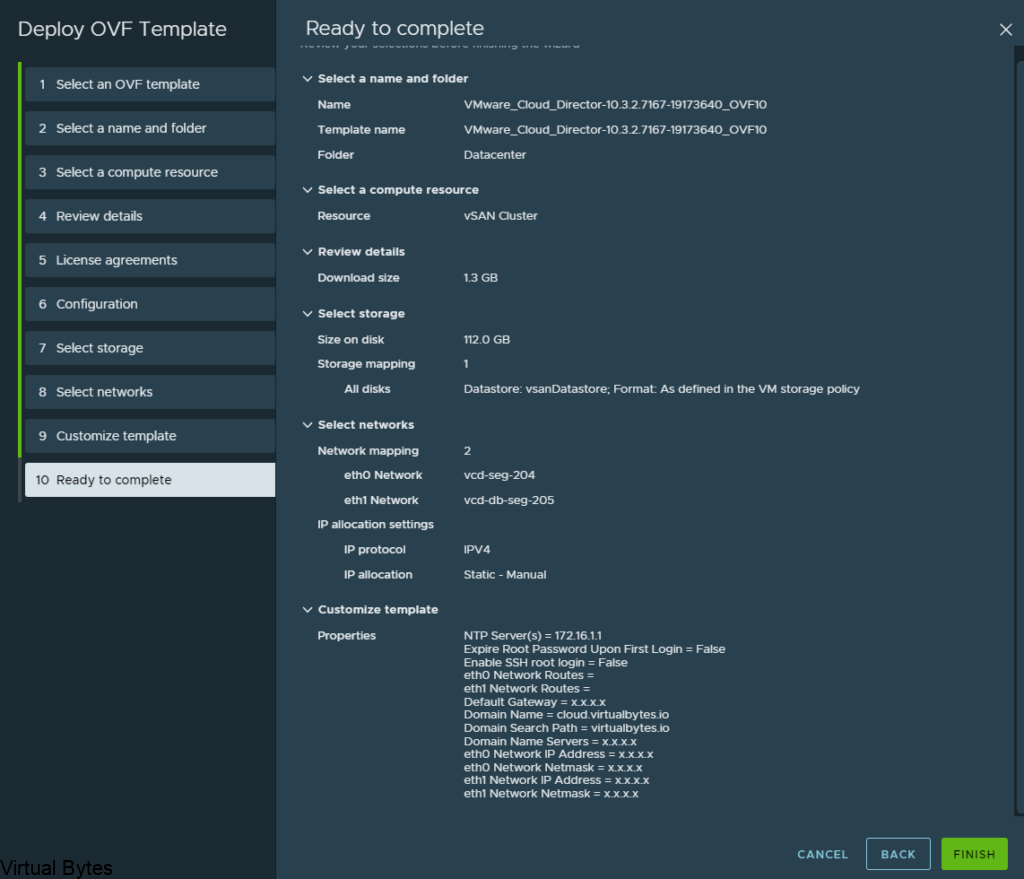
Verify all settings before hitting Finish!
After the deployment is completed you can integrate VCD with NSX-T and vCenter
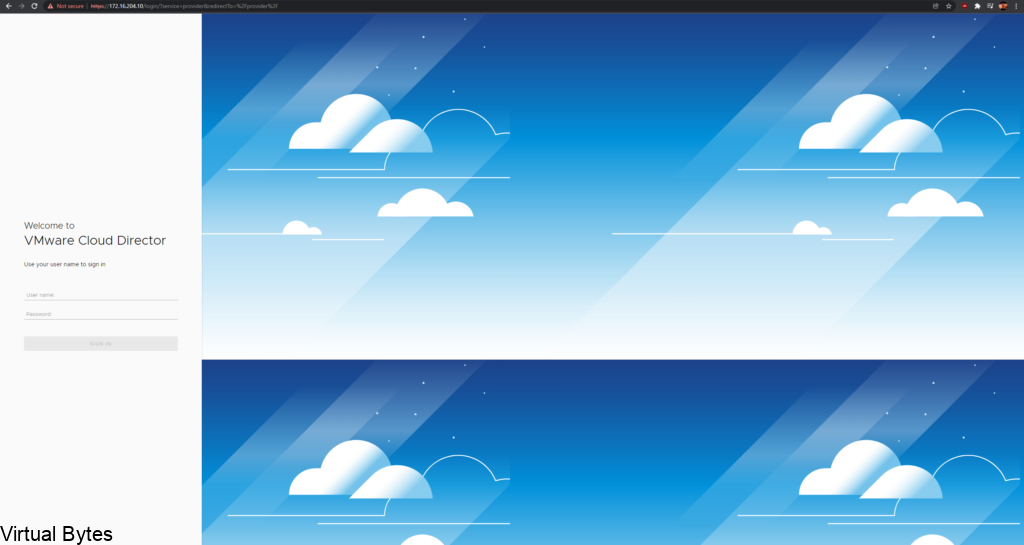
Login via https://x.x.x.x/provider (this will allow you to login into VCD as the provider)
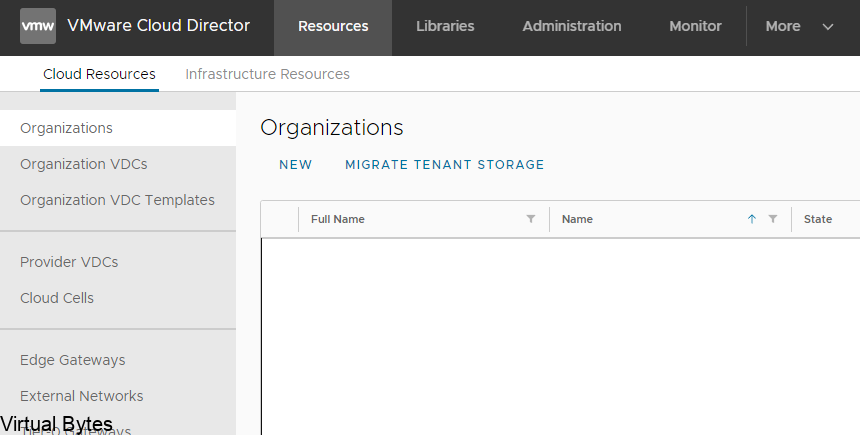
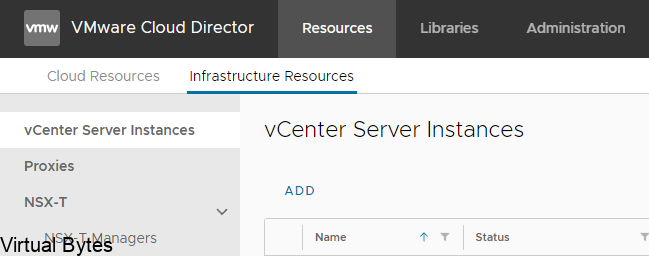
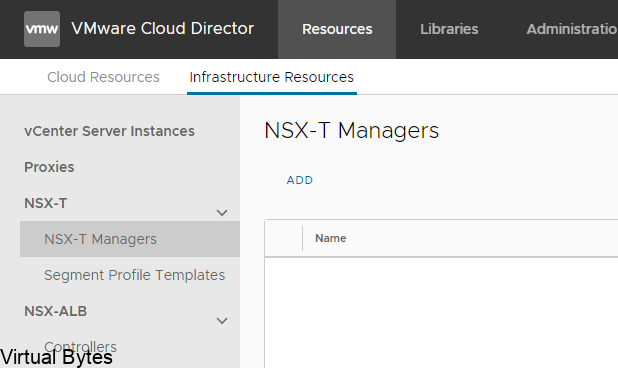
Once logged in, go to Infrastructure Resource
Click ADD – to add vCenter server
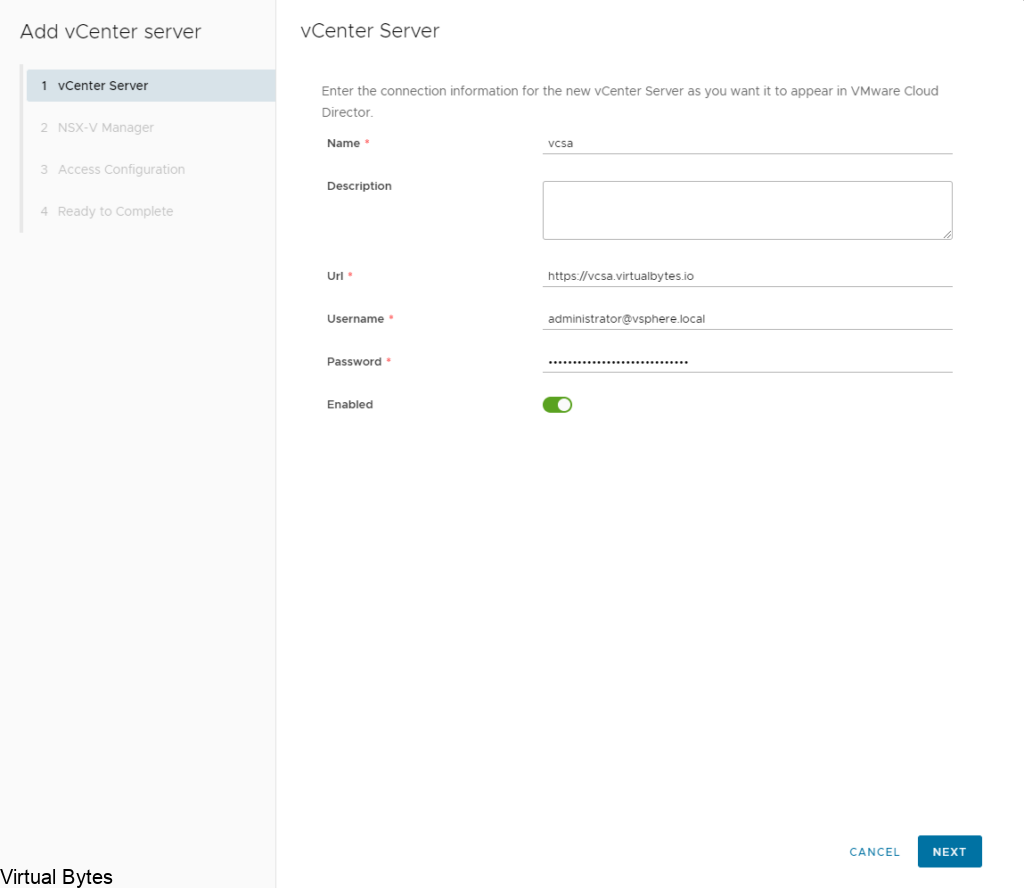
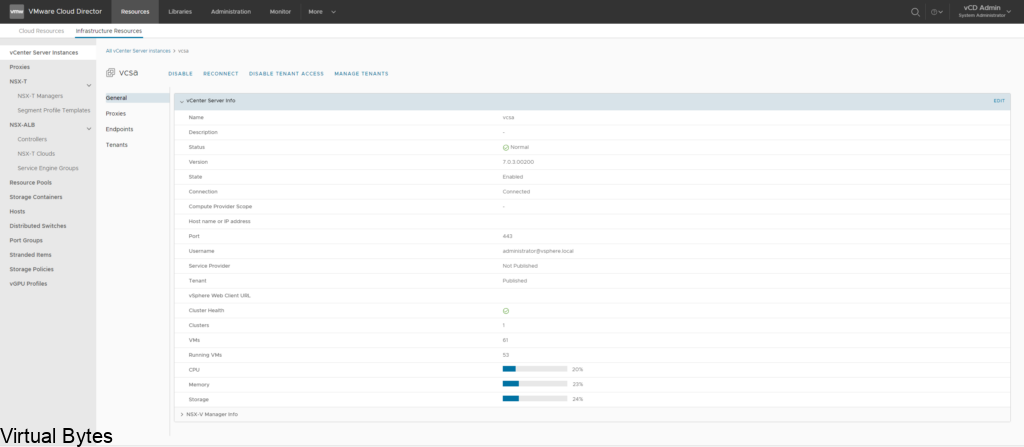
Once you accepted the SSL Certificate from vCenter, then you will enable tenant access and click finish. After vCenter has been added you will see an overall vCenter Info, like in the screenshots below
After vCenter has been added, you may add NSX-T managers
Click on ADD – fill in the NSX-T Manager(s) URL/IP and user account
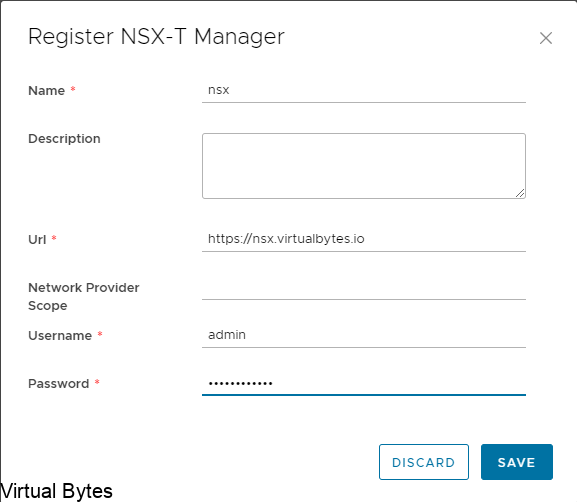
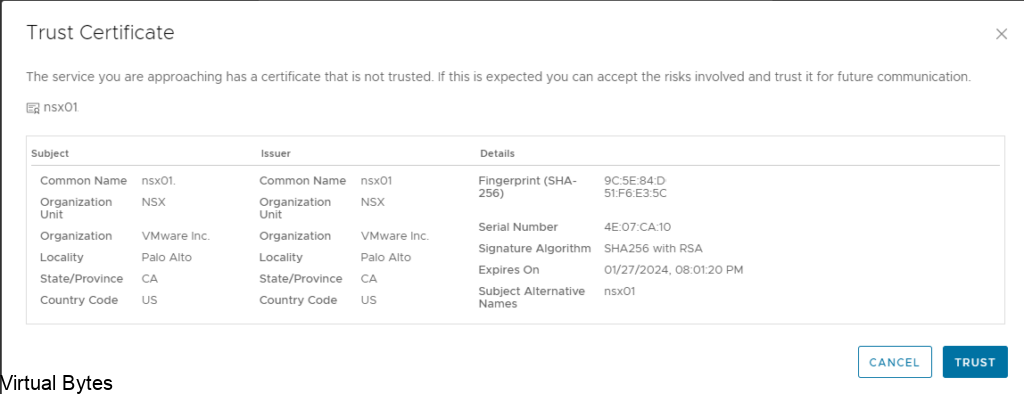
Trust the certificate from NSX-T Managers, then you are all set!