Top Posts
What’s New In VMware Cloud Foundation 9.0
Deploying & Configuring the VMware LCM Bundle Utility...
VMware Cloud Foundation: Don’t Forget About SSO Service...
VMware Explore Las Vegas 2025: Illuminating the Path...
Securing Software Updates for VMware Cloud Foundation: What...
VMware Cloud Foundation 5.2: A Guide to Simplified...
VMware Cloud Foundation 5.2: Unlocking Secure Hybrid Cloud...
VMware Cloud Foundation – Memory Tiering: Optimizing Memory...
Decoding VMware Cloud Foundation: Unveiling the numerous amount...
VMware Cloud Director 10.6.1: Taking Cloud Management to...
Virtual Bytes
  • Home
  • Home Data Center 2025
  • VMware
    • Cloud
    • Datacenter & Cloud Infrastructure
      • VMware ESXi
      • VMware vCenter
      • VMware vSAN
    • Networking & Security
    • Desktop & App Virtualization
      • Omnissa Horizon
    • Troubleshooting
    • Ansible
  • Education
  • Hardware
    • Hardware Tips & Tricks
  • Events
  • About
    • About Me
    • Home Lab Archives
      • Home Lab 2020-2022
      • Home Lab 2016-2020
Tag:

vsphere

VMware ESXi

Installing / Upgrading VMware vSphere ESXi 7 Update 1 via iDRAC 8

by Tommy Grot October 7, 2020
written by Tommy Grot 2 minutes read

This post is guiding you on how to install or upgrade VMware ESXi 7 Update 1. This walk through will be the same for installing or upgrading ESXi, the only difference would be during the install you would specify a root password along with installing it.

Disclaimer: This also works for iDRAC 8 and below. On Dell PowerEdge 13th, 12th Generation servers.

Information Regarding the VMware vSphere Update via VMware’s Website – Click Here to Download, You will need to login with your VMware credentials.

Name:VMware-VMvisor-Installer-7.0U1-16850804.x86_64
Release Date:2020-10-06
Build Number:16850804

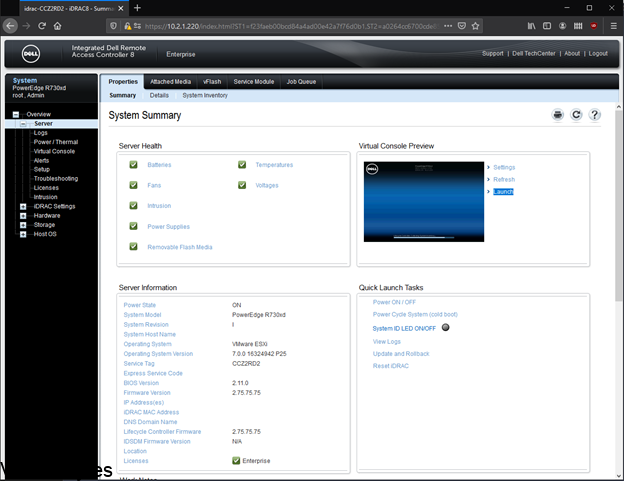
First Step: Log into iDRAC via root. Once logged in, click on Launch virtual console as below in the screenshot.

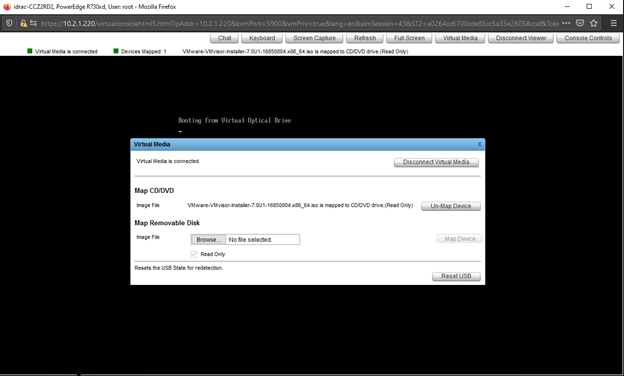
Once the Virtual Console window has opened. You will need to mount your VMware-VMvisor-Installer-7.0U1-16850804.x86_64.iso to the Virtual Optical Drive. Then click Map Device.

During the reboot of the server you may have to press F11 to get into the Boot Menu and select the One Time Boot Menu and go down to Virtual Optical Drive.

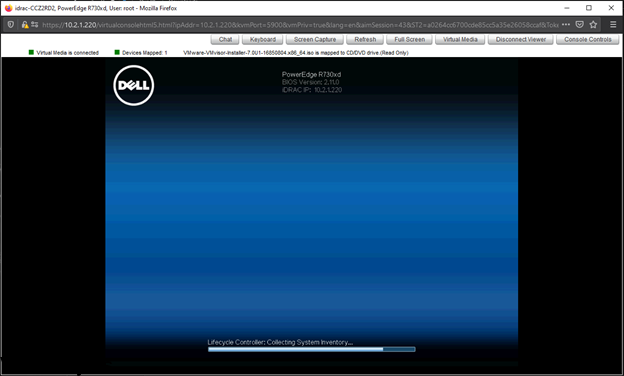
Once you select Virtual Optical Drive you will see the Dell BIOS loading and running through its boot up processes.

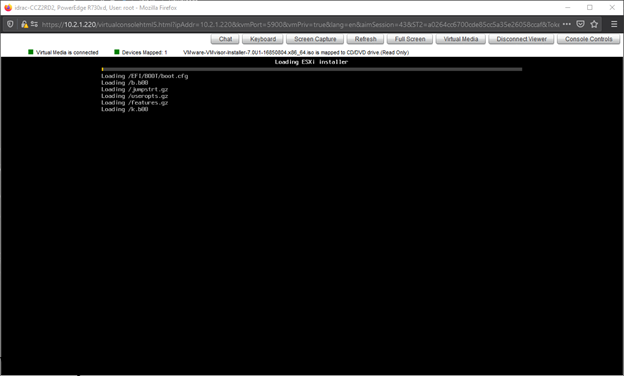
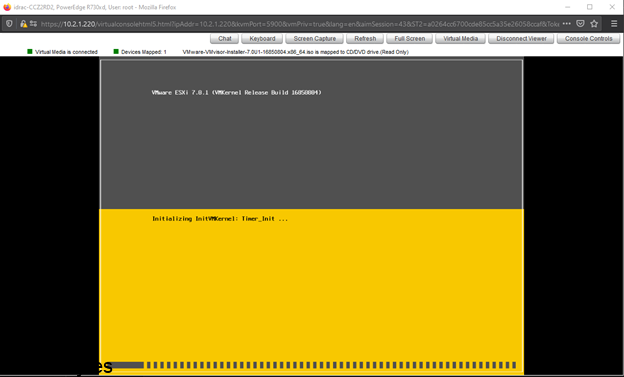
Now loading the VMware-VMvisor-Installer-7.0U1-16850804.x86_64.iso and it loads into memory.

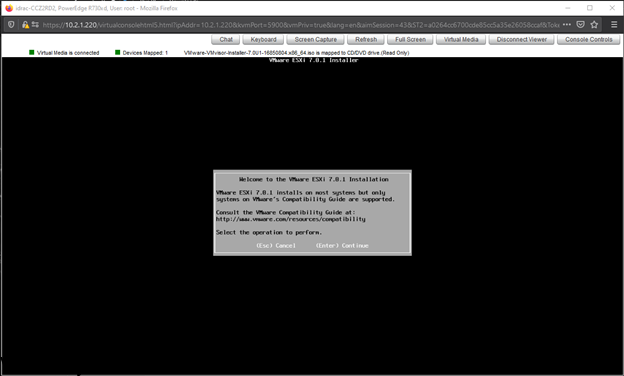
Once the VMware ESXi 7.0.1 installer has loaded you will be greeted with a menu to follow through which is pretty straightforward.
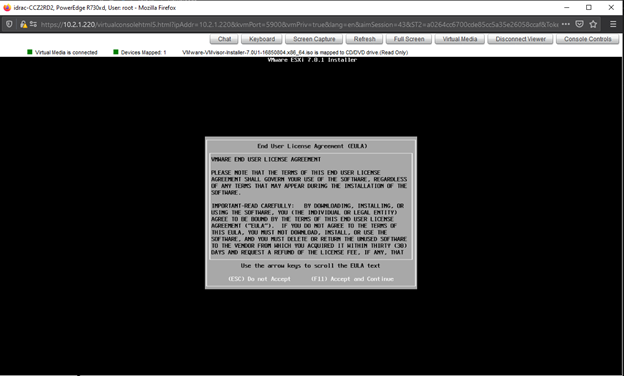
Accept EULA.

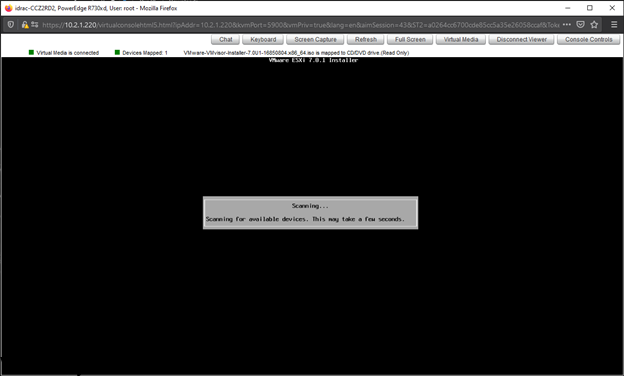
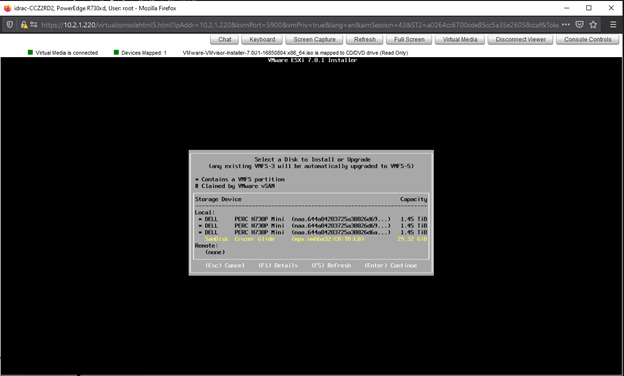
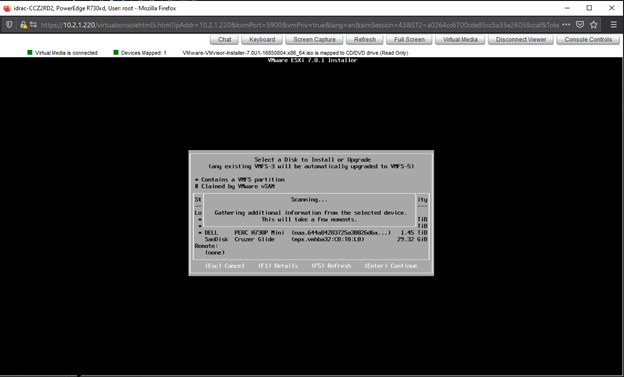
Install or Upgrade VMware ESXi 7.0.1 on the correct corresponding datastore. If it is on a SD Card or Flash it will show up. Ensure to not install it on a VMFS datastore!

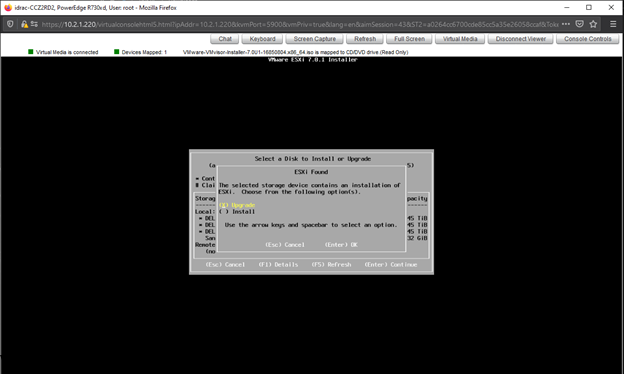
During this step. You have the ability to install a fresh or upgrade an existing environment. This will depend on your scenario. Please follow through carefully and ensure you have all backups of your DATA!

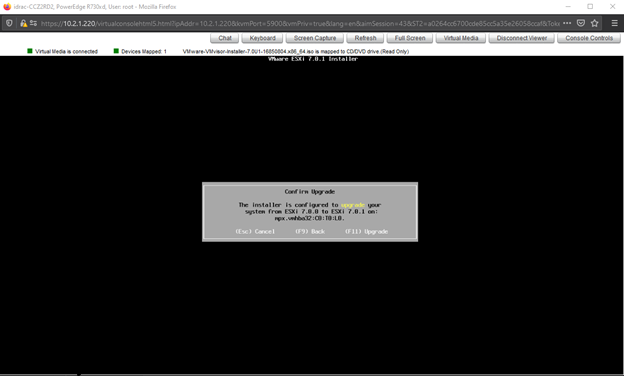
This will be the Final Screen prior to proceeding with the Installation or Upgrade! Press F11 to upgrade or accept if it is a fresh install.

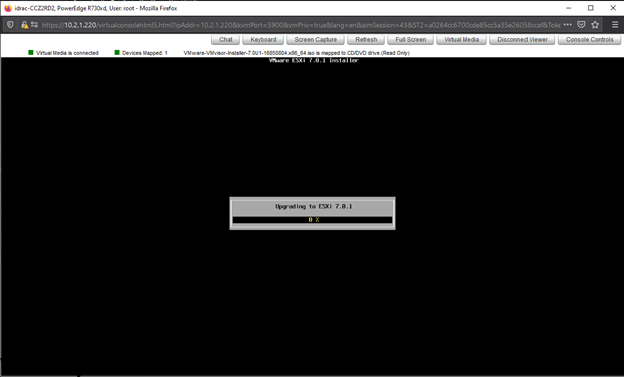
Please be patient and let install finish 🙂

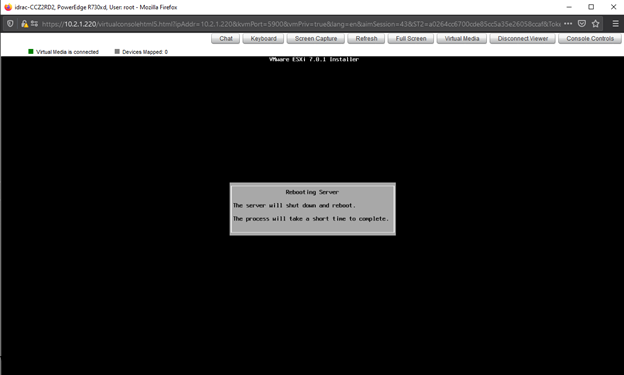
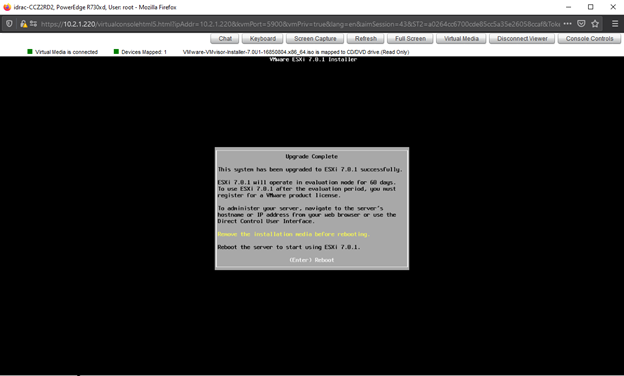
Install / Upgrade is complete! Now you may un map the virtual optical drive and reboot the host! And Enjoy the new VMware vSphere Update 7.0.1

October 7, 2020 1 comment 8.9K views
1 FacebookTwitterLinkedinEmail
VMware Troubleshooting

VMware VAMI – Unable to login

by Tommy Grot July 19, 2019
written by Tommy Grot 1 minutes read

Do you have a issue with logging into VMware vCenter Appliance Management? If so there is a little work around to getting back into your VAMI! I wanted to upgrade my vCenter Server to 6.7U2 via webUI “https://<FQDN>:5480″ and I ran into this little issue.

First Enable SSH at the vCenter Level – from your Remote Console

Login into your vCenter via Console (VMRC)

Then Go into “Troubleshooting Mode Options”

Then Enable SSH

Login into vCenter via SSH – Once logged in, run this command

service-control --status

Once you run the first command, then run this command to start all vCenter Services to a running and operational state.

service-control --start --all

After all the processes have been started, you may login into your vCenter VAMI, but I prefer to reboot the vCenter Server to give it a fresh start after the service fix.

After this is all done, make sure to DISABLE SSH! Just a security precaution.

July 19, 2019 0 comments 1.5K views
0 FacebookTwitterLinkedinEmail


Recent Posts

  • What’s New In VMware Cloud Foundation 9.0
  • Deploying & Configuring the VMware LCM Bundle Utility on Photon OS: A Step-by-Step Guide
  • VMware Cloud Foundation: Don’t Forget About SSO Service Accounts
  • VMware Explore Las Vegas 2025: Illuminating the Path to Cloud Excellence!
  • Securing Software Updates for VMware Cloud Foundation: What You Need to Know

AI AVI Vantage cloud Cloud Computing cloud director computing configure cyber security director dns domain controller ESXi How To las vegas llm llms multi-cloud multicloud NSx NSX-T 3.2.0 private AI servers ssh storage tenant upgrade vcd vcda VCDX vcenter VCF VDC vexpert Virtual Machines VMs vmware vmware.com vmware aria VMware Cloud Foundation VMware cluster VMware Explore VMware NSX vrslcm vsan walkthrough

  • Twitter
  • Instagram
  • Linkedin
  • Youtube

@2023 - All Right Reserved. Designed and Developed by Virtual Bytes

Virtual Bytes
  • Home
  • Home Data Center 2025
  • VMware
    • Cloud
    • Datacenter & Cloud Infrastructure
      • VMware ESXi
      • VMware vCenter
      • VMware vSAN
    • Networking & Security
    • Desktop & App Virtualization
      • Omnissa Horizon
    • Troubleshooting
    • Ansible
  • Education
  • Hardware
    • Hardware Tips & Tricks
  • Events
  • About
    • About Me
    • Home Lab Archives
      • Home Lab 2020-2022
      • Home Lab 2016-2020