The need for streamlined VMware appliance updates is undeniable. Managing a VMware Cloud Foundation environment and its appliances can quickly become a complex and time-consuming task, especially in an offline, disconnected VCF environment. This post provides a detailed, step-by-step guide to deploying and configuring the VMware Lifecycle Manager (LCM) Bundle Utility on Photon OS, offering a significant improvement in update management efficiency. We’ll cover everything from initial setup to verifying successful configuration, providing clear instructions and practical advice for administrators comfortable with Photon OS command-line interfaces. Let’s get started!
If you’re interested in creating an offline depot for VCF, check out Aaron Rombaut; he wrote an excellent blog post tailored for VCF offline depots.
What is Required:
- Photon OS ISO (Only Supported on Photon**)
- Virtual Machine with 2+ vCPUs & 4GB+ Memory & 1TB Storage
- PuTTY
- WinSCP
** The LCM Bundle Utility is currently not supported on other Linux distributions or Windows, particularly due to the new Broadcom Token Implementation
You will need to obtain the full ISO x86_64 image.
| Download | Size | sha512 checksum |
|---|---|---|
| Full ISO x86_64 | 4.4G | 6a7a258399a258da742032987c043ab25503698d35edafaf1ae000f12127da1a161d8b84caa17fd8f23d129e81e1faa7ab087c20ab9229772a643f8f9475305f |
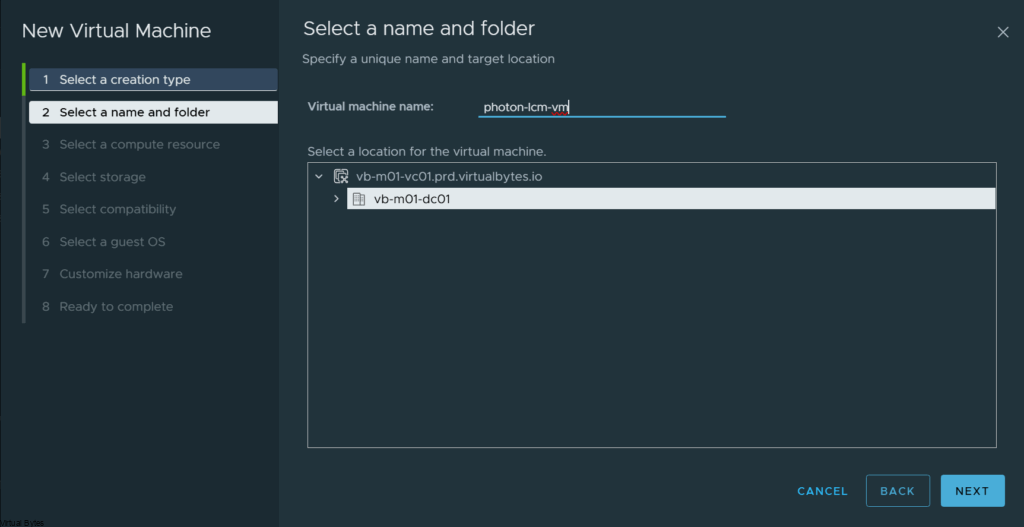
Create New Virtual Machine ->
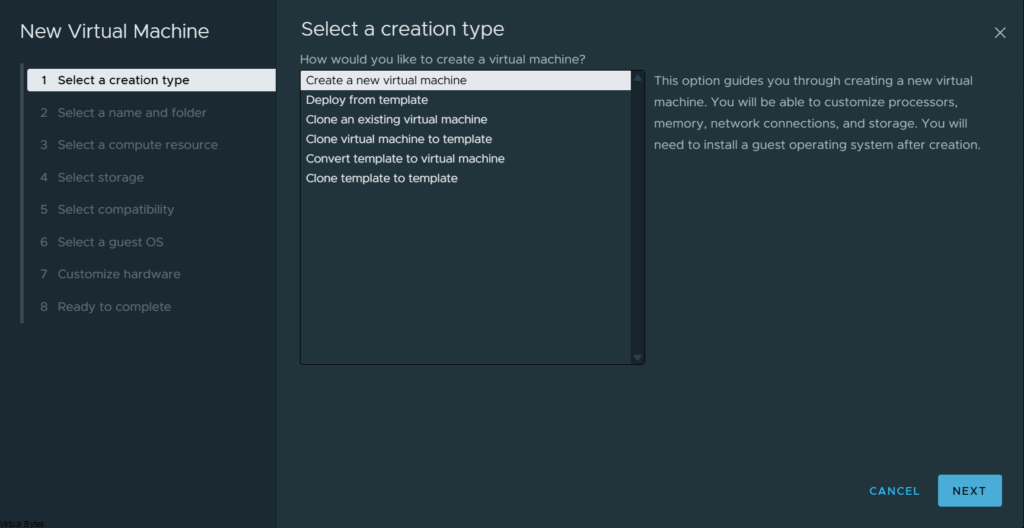
Virtual Machine name ->
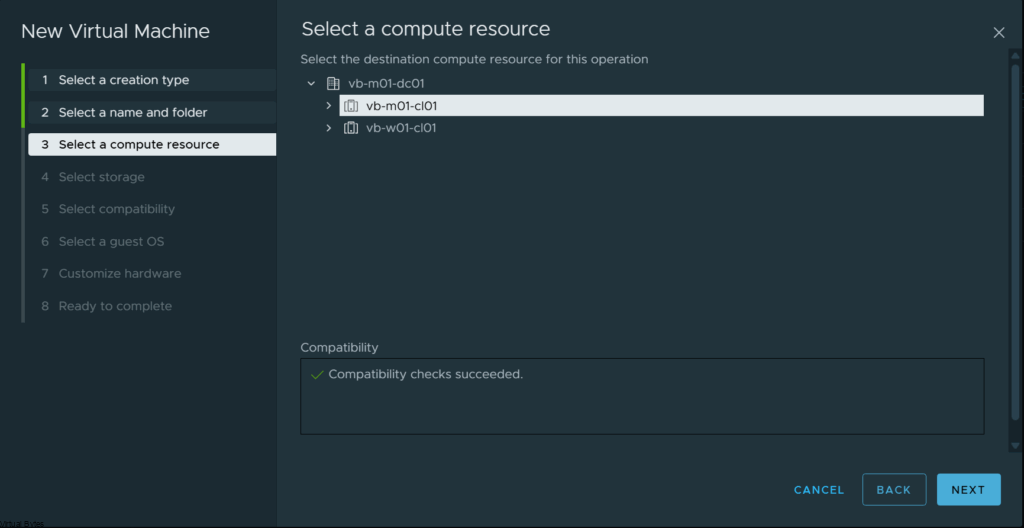
Select the compute resource ->
Select your Storage ->
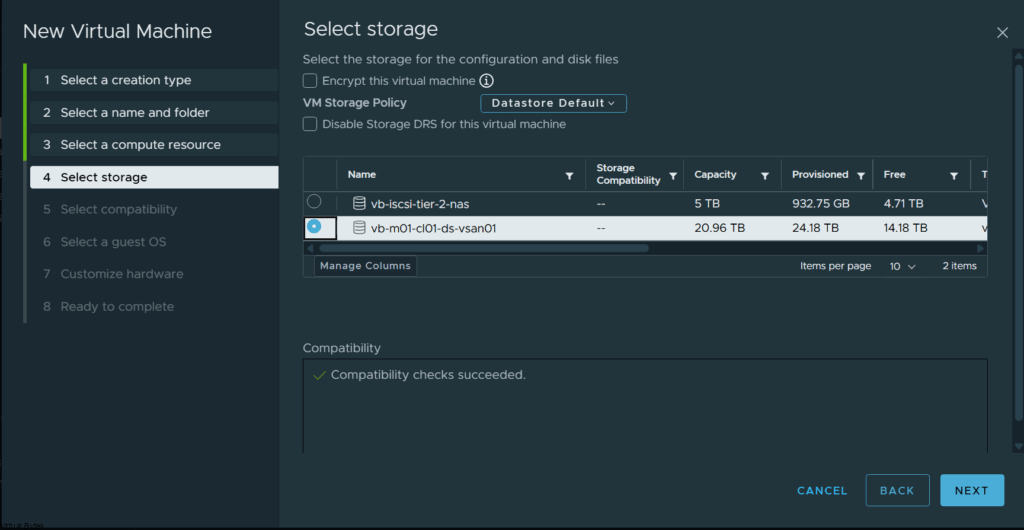
Select Default ->
Select VMware Photon OS (64-bit)
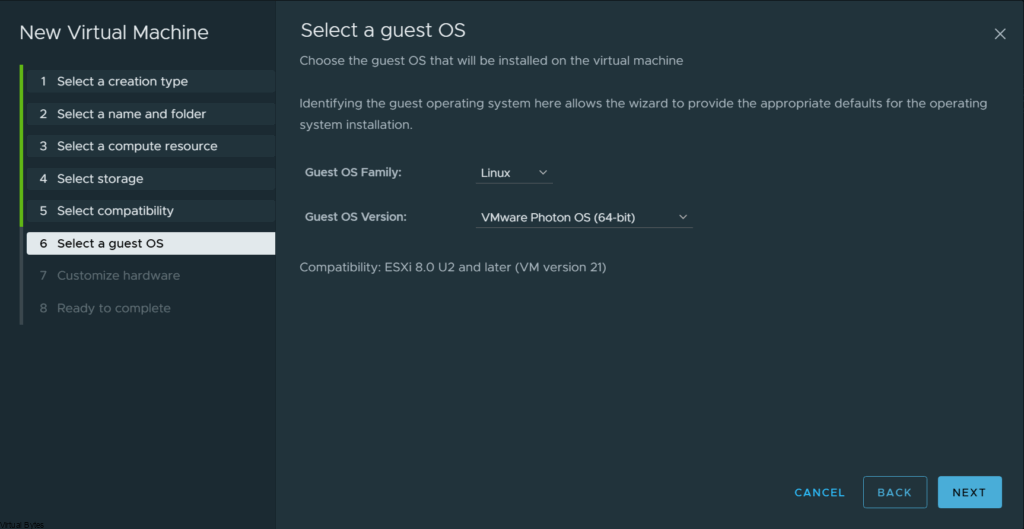
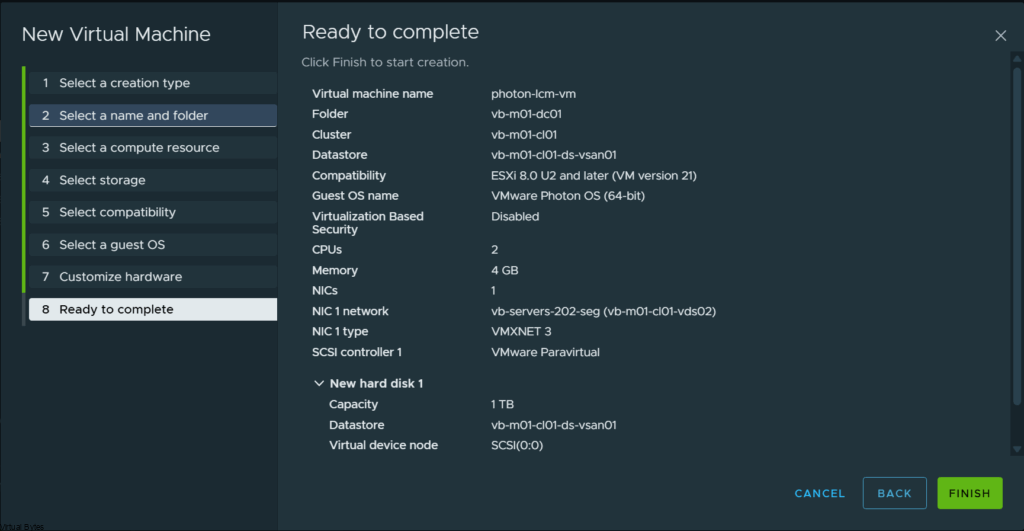
Configure the virtual machine with the following specifications: 2 vCPUs, 4GB of memory, a 1TB disk, and network access. The number of CPUs and memory can be increased later if required.

Deploy!
Now, that you have deployed the virtual machine, lets connect to it via VMRC and mount the Photon OS ISO.
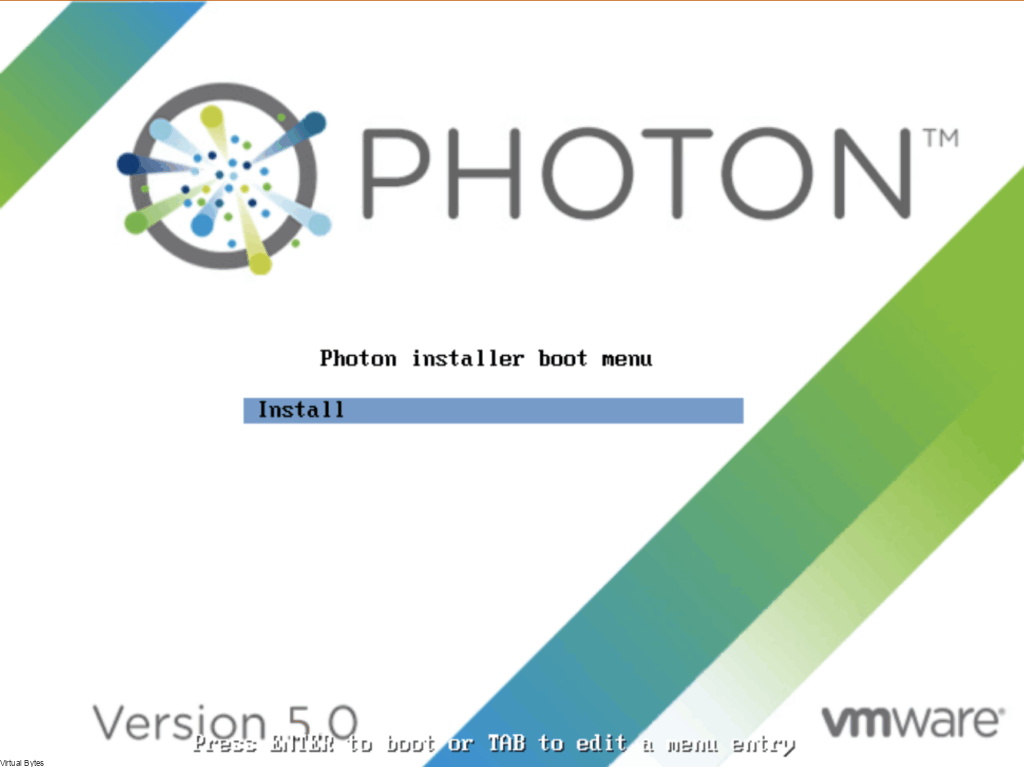
Install ->
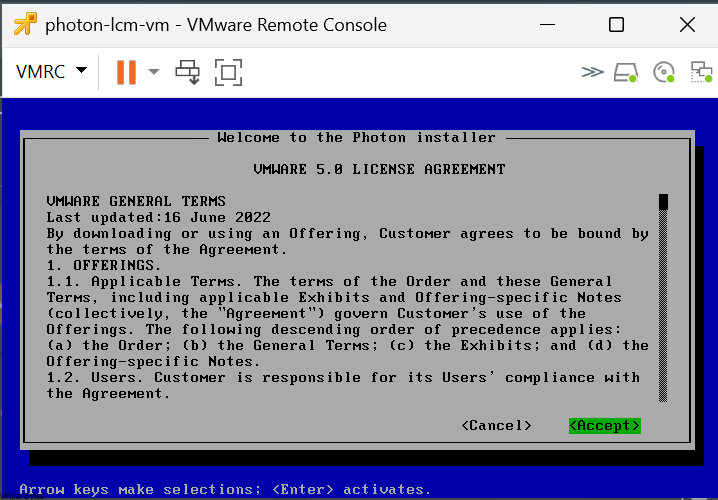
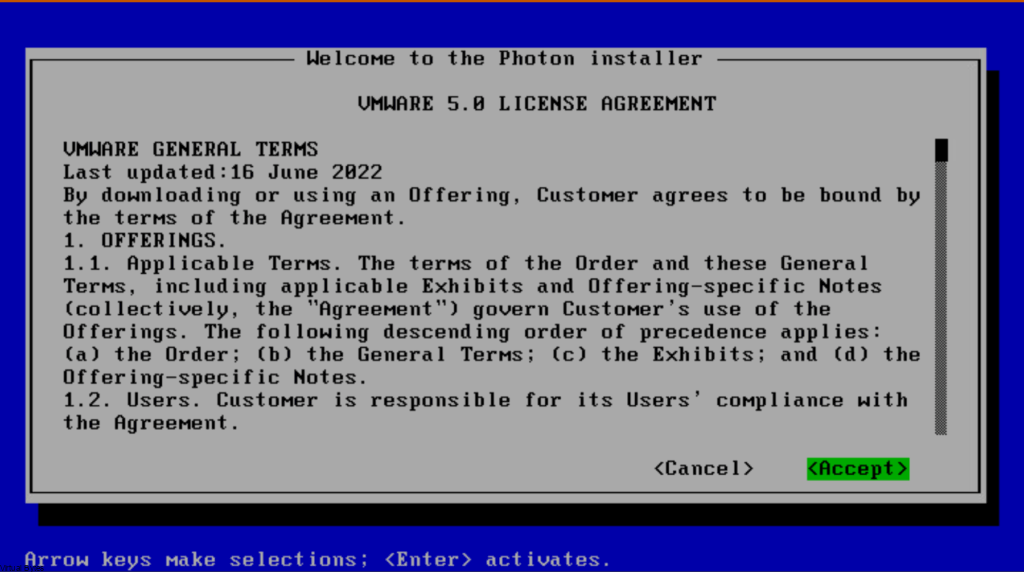
EULA ->
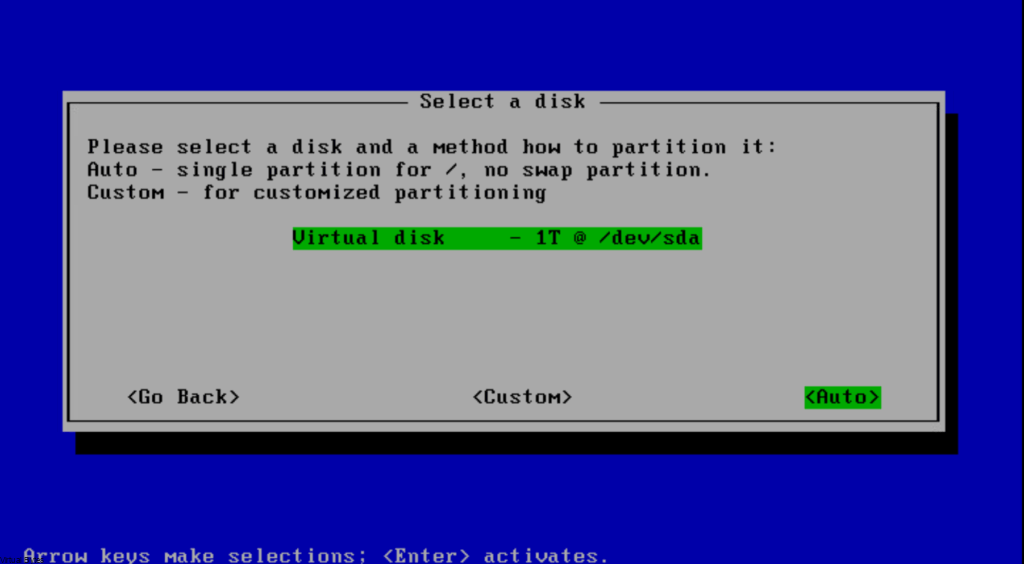
Select the 1TB disk. I kept the partitioning on Auto, but you can manually partition it if you prefer.
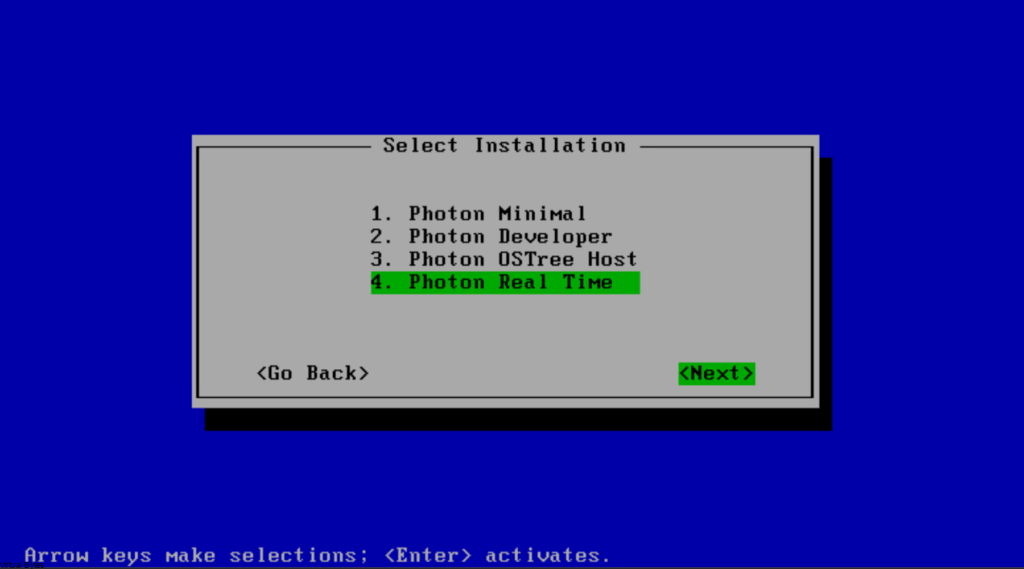
Select, Photon Real Time ->
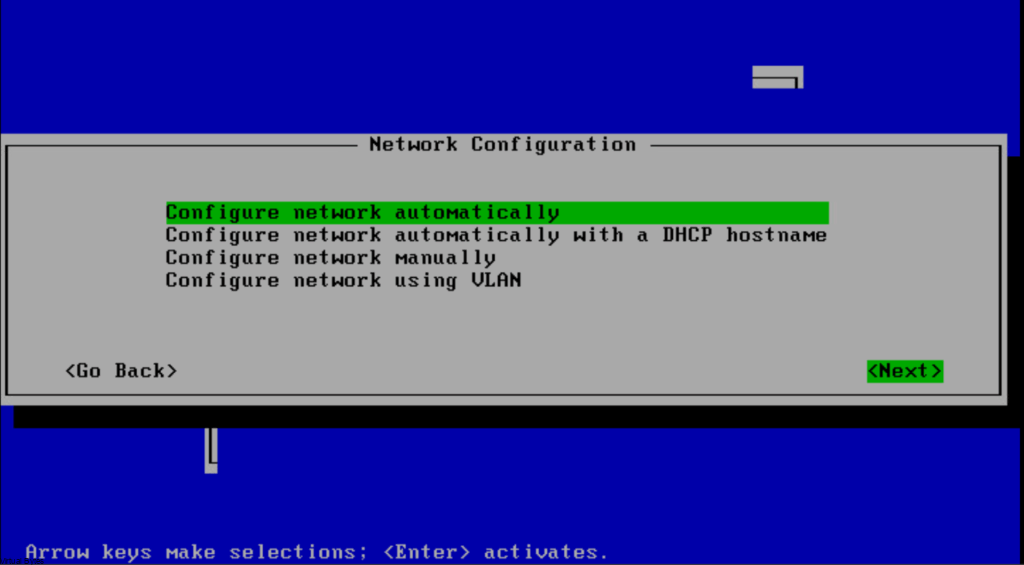
Since my Photon LCM VM is deploying on an NSX segment with DHCP, I left it on automatic, but the configuration will vary depending on your implementation.
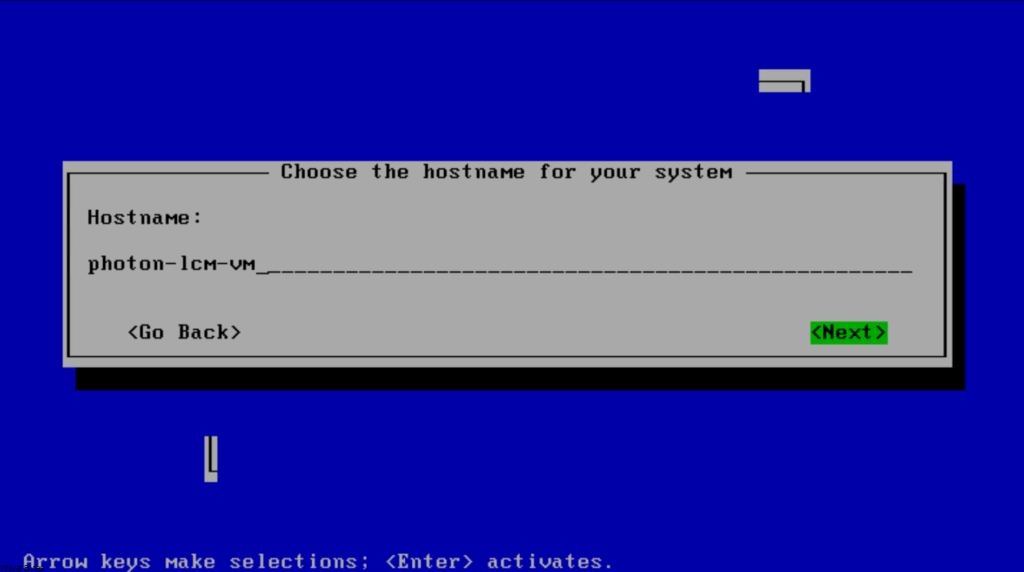
Set Host name ->
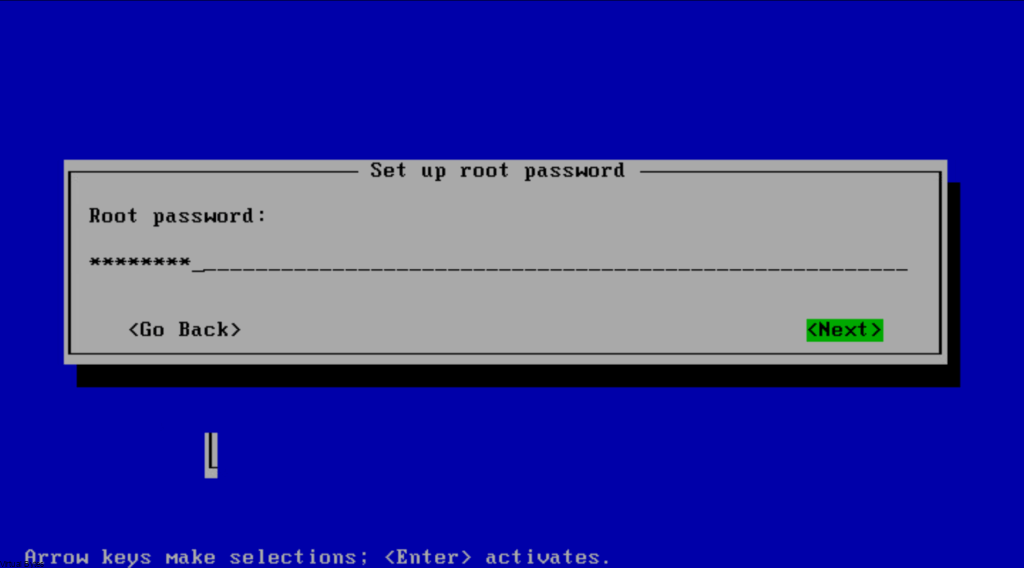
Password ->
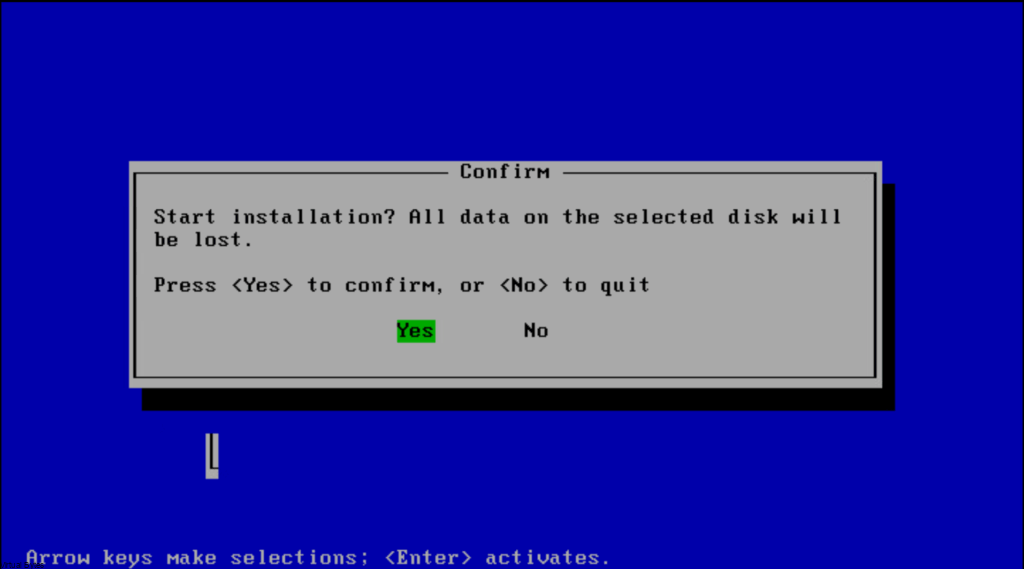
Start Install ->
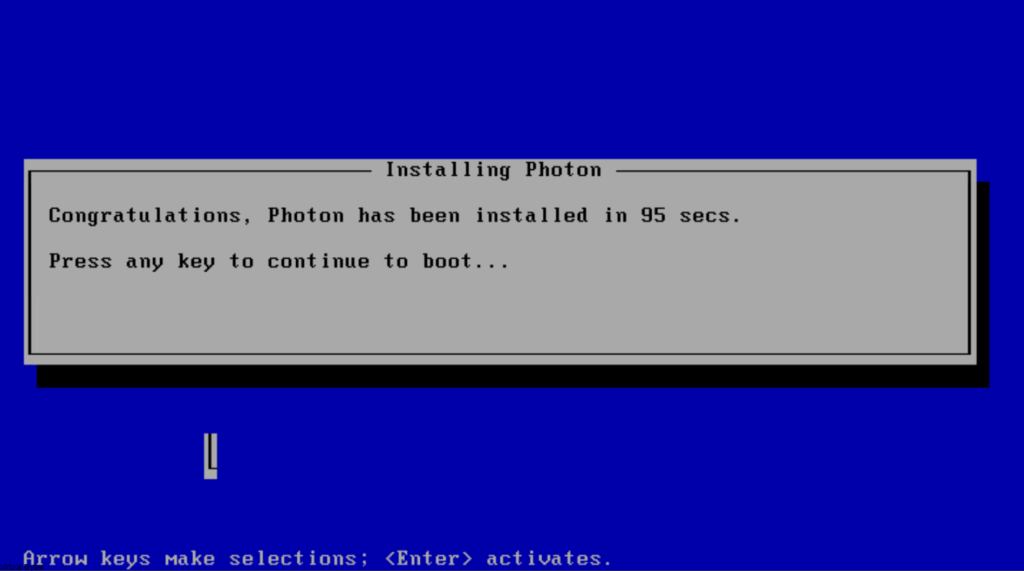
Installing…

Lets boot up to the new Photon VM!
Connect to the Photon OS VM via Remote Console and log in.

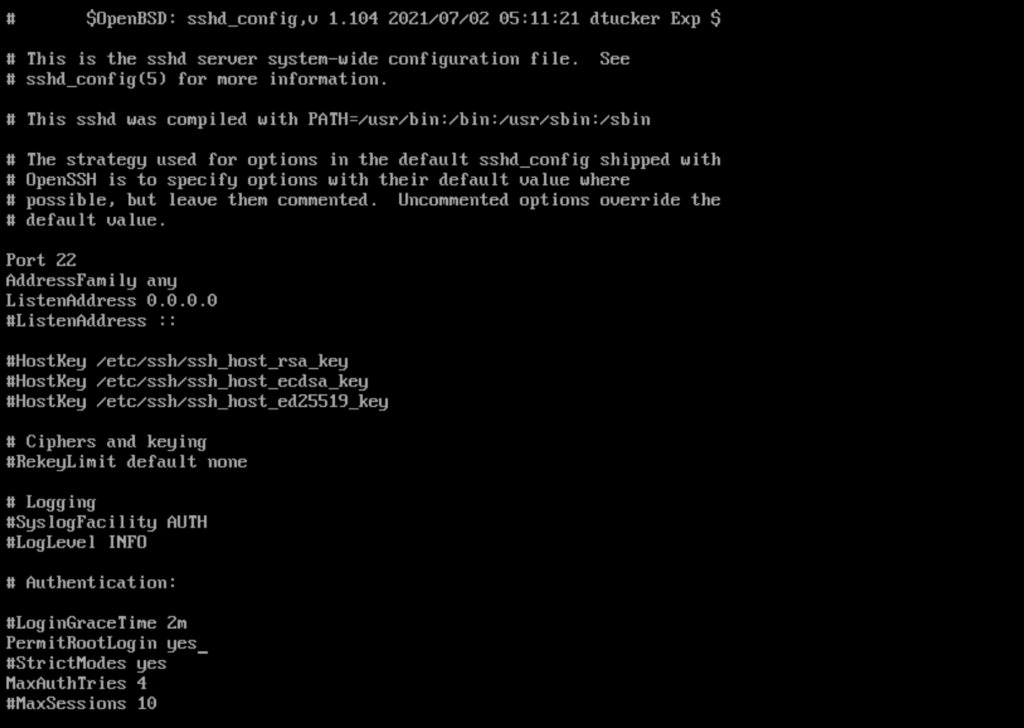
Let’s edit the sshd_config file to allow root to connect via SSH.
vi /etc/ssh/sshd_config
Update the following config and uncomment
- Port 22
- AddressFamily any
- ListenAddress 0.0.0.0
Change PermitRootLogin to yes from no
Restart SSH Service
systemctl restart sshd.service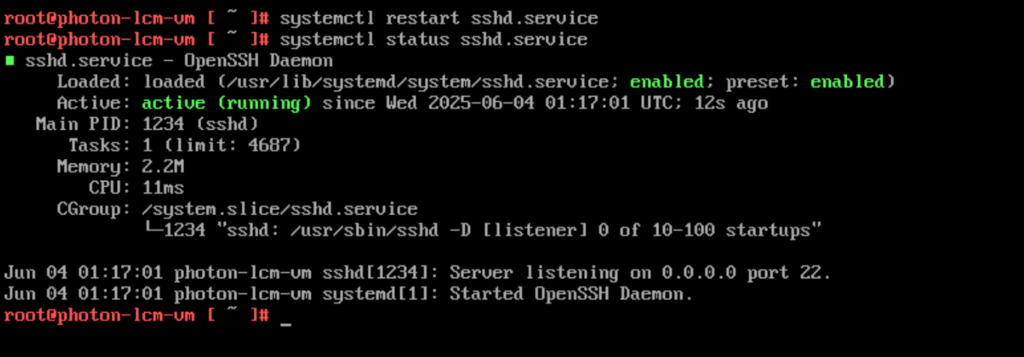
Now that we have completed deploying Photon OS and preparing the virtual machine so that we can SSH into it, we needed to update the SSH configurations within the sshd_config file to allow root to SSH and allow port 22 to listen. Next, we will upload the LCM Bundle Utility via WinSCP
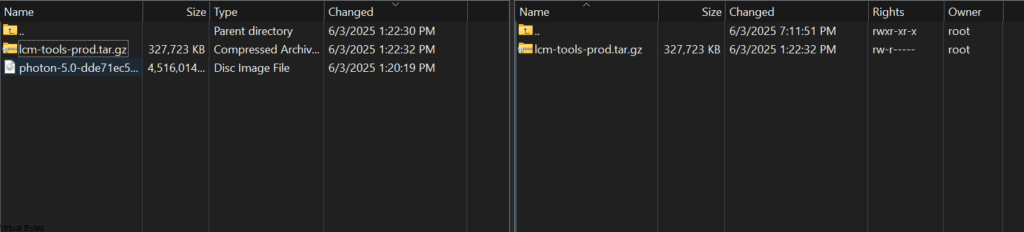
Connect via PuTTY, and then we will untar the lcm-tools-prod.tar.gz.

We will need to make the bin directory with lcm-bundle-transfer-util executable
chmod u+x -R bin/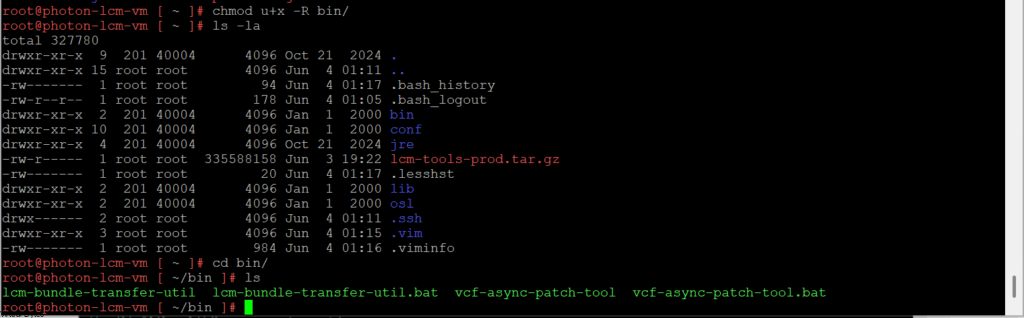
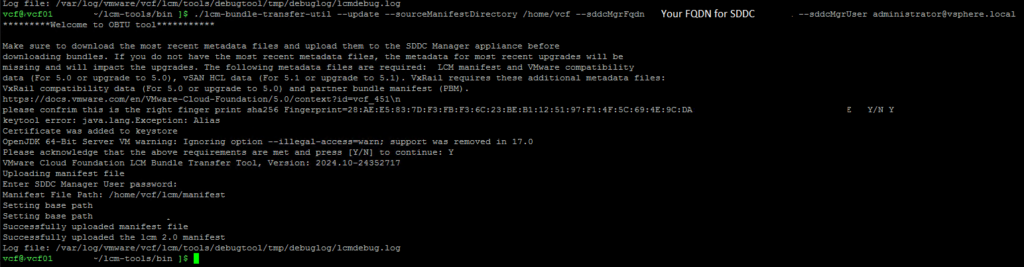
Change directory to conf. Next, we will use vi to edit the application-prod.properties file and update the required fields below.”

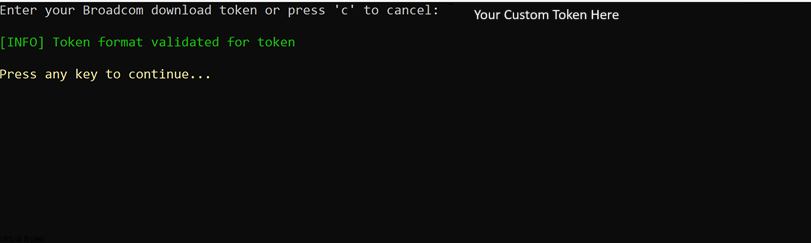
You will need to tailor the Depot Properties to accommodate the Broadcom Download Token. More information is available here.
################### Depot properties ########################
lcm.depot.adapter.certificateCheckEnabled=false
lcm.depot.adapter.port=443
lcm.depot.adapter.host=dl.broadcom.com
lcm.depot.adapter.remote.rootDir=/<Token Here>/PROD
lcm.depot.adapter.remote.repoDir=/COMP/SDDC_MANAGER_VCF
lcm.depot.adapter.remote.index.filename=index.v3
lcm.depot.adapter.remote.offline.index.filename=index.offline
lcm.depot.adapter.local.baseDir=${lcm.bundle.download.default.dir}/tmp
lcm.depot.adapter.local.input.spec.dirname=asyncPatchSpecs
lcm.depot.adapter.local.compatibility.path=v1/products/bundles/type/vcf-lcm-bundle
lcm.depot.adapter.enableBundleSignatureValidation=true
lcm.bundle.manifest.dirname=manifests
lcm.bundle.dirname=bundles
lcm.depot.adapter.lcmManifestFile=lcmManifest.json
lcm.depot.adapter.remote.productVersionCatalog.filename=productVersionCatalog.json
lcm.depot.adapter.remote.lcmManifestDir=/COMP/SDDC_MANAGER_VCF/lcm/manifest
lcm.depot.adapter.enableBundleChecksumValidation=true
lcm.depot.adapter.enableLatestToolVersionCheck=true
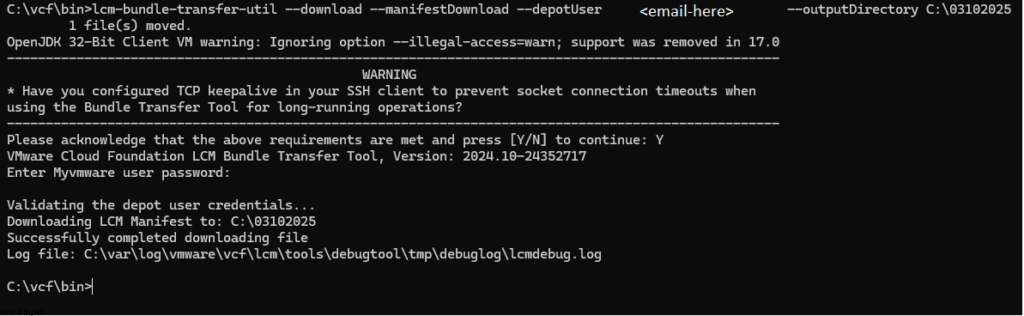
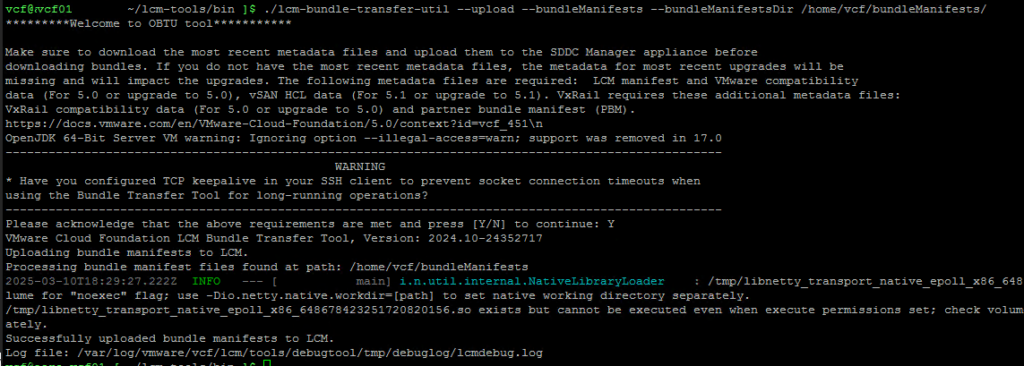
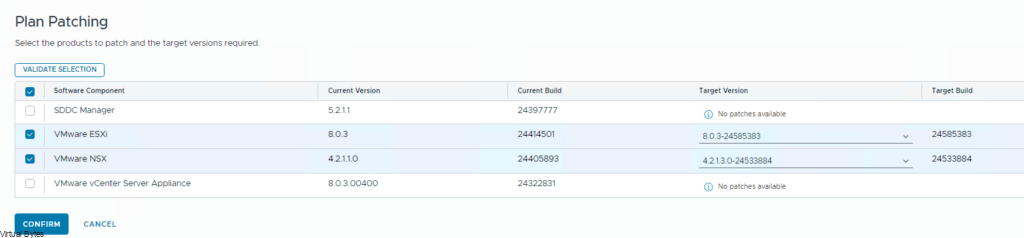
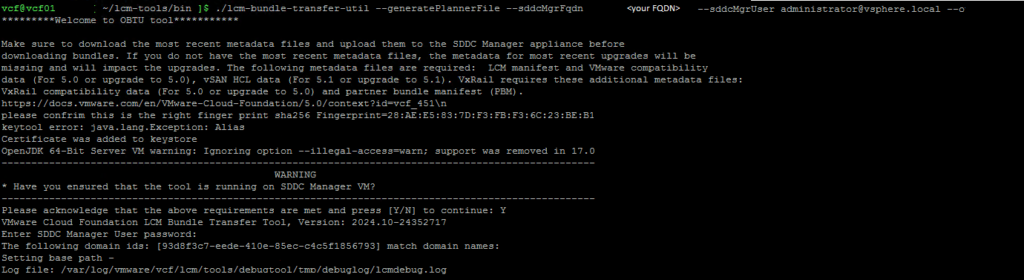
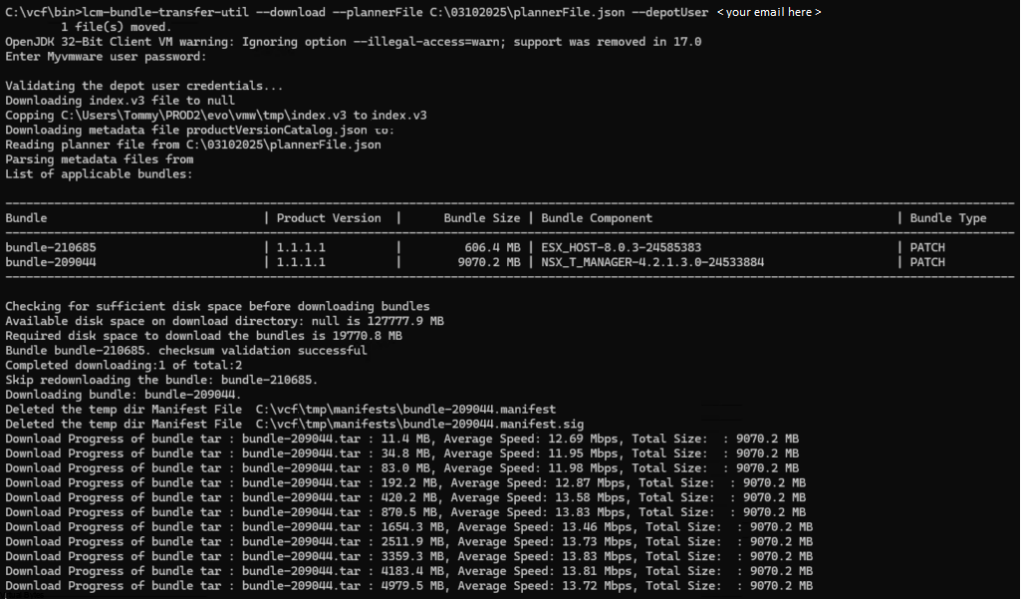
lcm.depot.adapter.remote.bundletransferconfig.repoDir:/COMP/SDDC_MANAGER_VCF/obtuNow that we have updated the applications-prod.properties file, let’s run it. I have extracted my PlannerFile and uploaded it to /root/plannerFile.json.
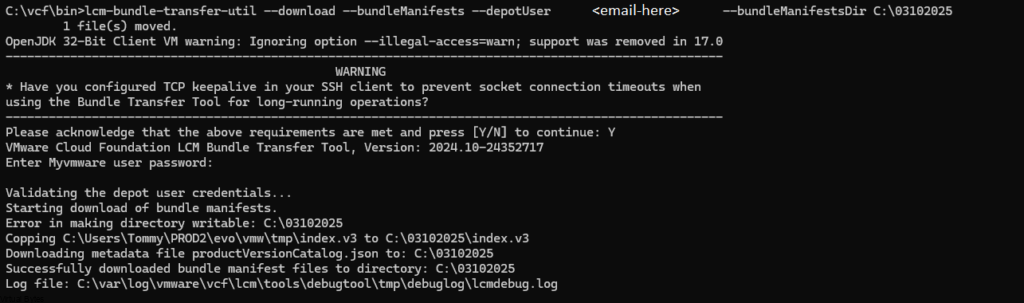
./lcm-bundle-transfer-util --download --plannerFile /root/plannerFile.json --depotUser <Email-Here>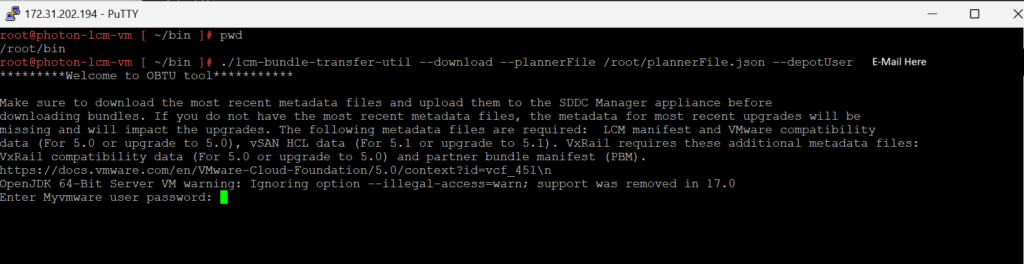
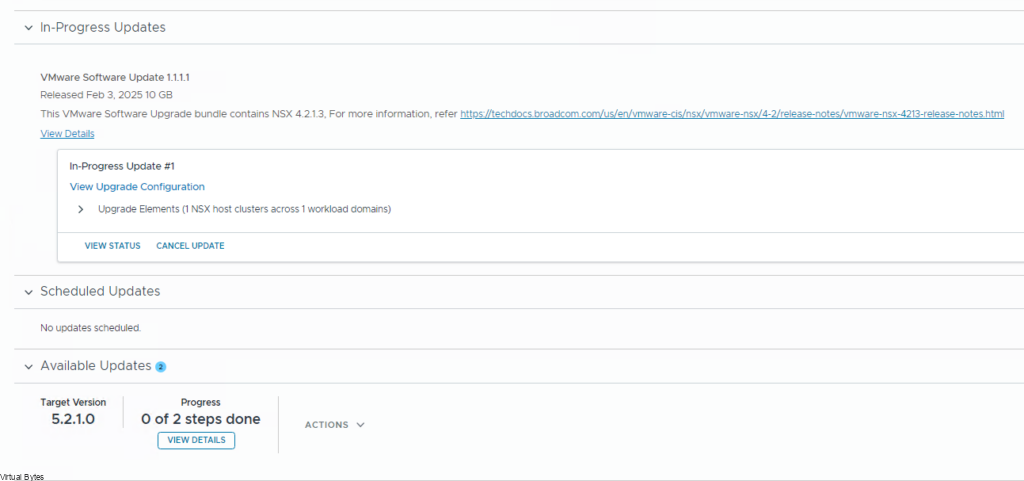
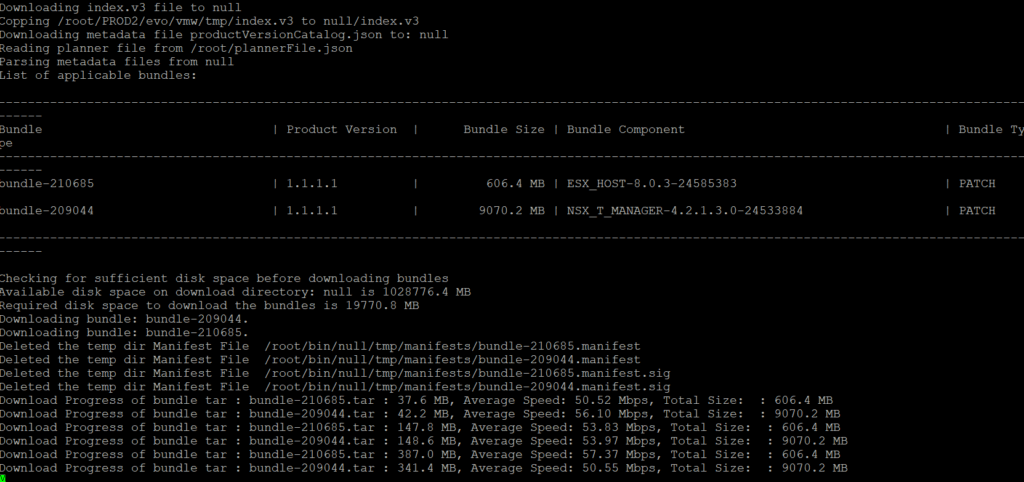
It is working on Photon OS! The download process has begun.
Deploying the VMware Lifecycle Manager Bundle Utility on Photon OS is a worthwhile investment for any administrator responsible for a VMware Cloud Foundation environment. This guide has provided the foundation for simplifying your appliance updates, reducing operational overhead, and ensuring a more stable and efficient infrastructure. Embrace this approach and take control of your VCF updates!