Top Posts
Deploying & Configuring the VMware LCM Bundle Utility...
VMware Cloud Foundation: Don’t Forget About SSO Service...
VMware Explore Las Vegas 2025: Illuminating the Path...
Securing Software Updates for VMware Cloud Foundation: What...
VMware Cloud Foundation 5.2: A Guide to Simplified...
VMware Cloud Foundation 5.2: Unlocking Secure Hybrid Cloud...
VMware Cloud Foundation – Memory Tiering: Optimizing Memory...
Decoding VMware Cloud Foundation: Unveiling the numerous amount...
VMware Cloud Director 10.6.1: Taking Cloud Management to...
Omnissa Horizon Upgrade 2406 to 2412
Virtual Bytes
  • Home
  • Home Data Center 2025
  • VMware
    • Cloud
    • Datacenter & Cloud Infrastructure
      • VMware ESXi
      • VMware vCenter
      • VMware vSAN
    • Networking & Security
    • Desktop & App Virtualization
      • Omnissa Horizon
    • Troubleshooting
    • Ansible
  • Education
  • Hardware
    • Hardware Tips & Tricks
  • Events
  • About
    • About Me
    • Home Lab Archives
      • Home Lab 2020-2022
      • Home Lab 2016-2020
Tag:

certificate

CloudVMware Cloud Foundation

VMware Cloud Director 10.5.x Certificate Replacement

by Tommy Grot March 15, 2024
written by Tommy Grot 1 minutes read

Today’s topic is about managing certificates for VMware Cloud Director. Well, you’ve come to the right place! In this blog post, we’ll walk you through the step-by-step process of changing certificates for VMware Cloud Director 10.5.x. Whether you’re a seasoned pro or a newbie in the world of virtualization, we’ve got you covered. Say goodbye to the headaches of dealing with expired or invalid certificates, and say hello to a smoother, more secure experience with VMware Cloud Director. Let’s get started!

This process is much easier! Than the days of Postman and API calls and trying to get the certificate loaded into the web store and many other pain points that were noticeable, but not anymore this processes is super easy!

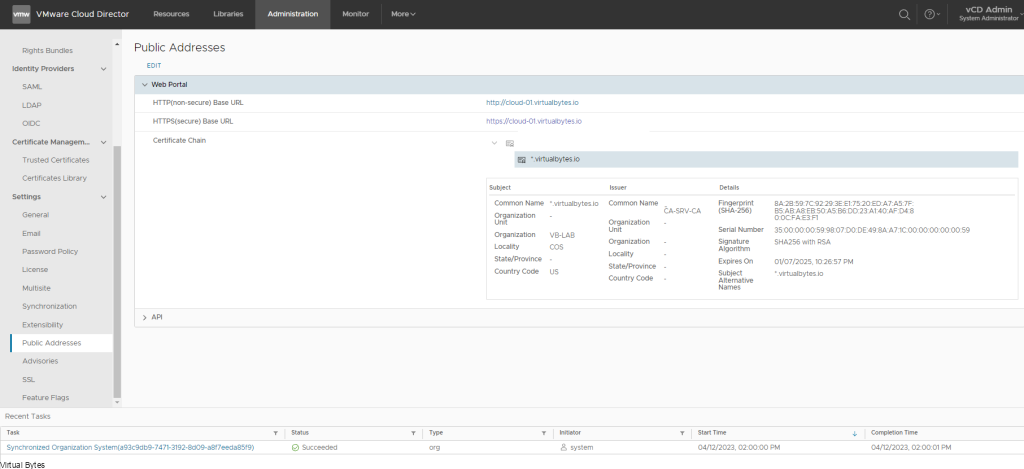
Login to your provider portal of VCD with your administrator account or a system admin account.

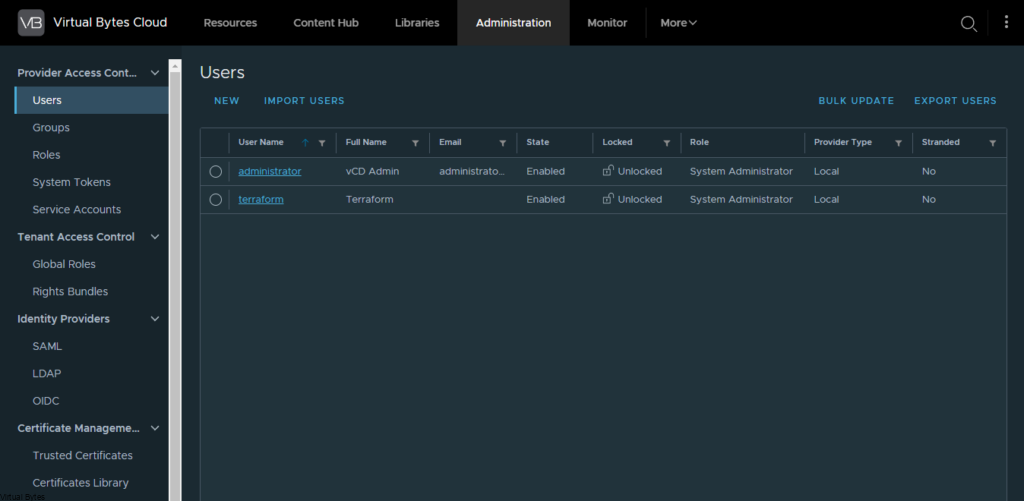
Go to – Administration

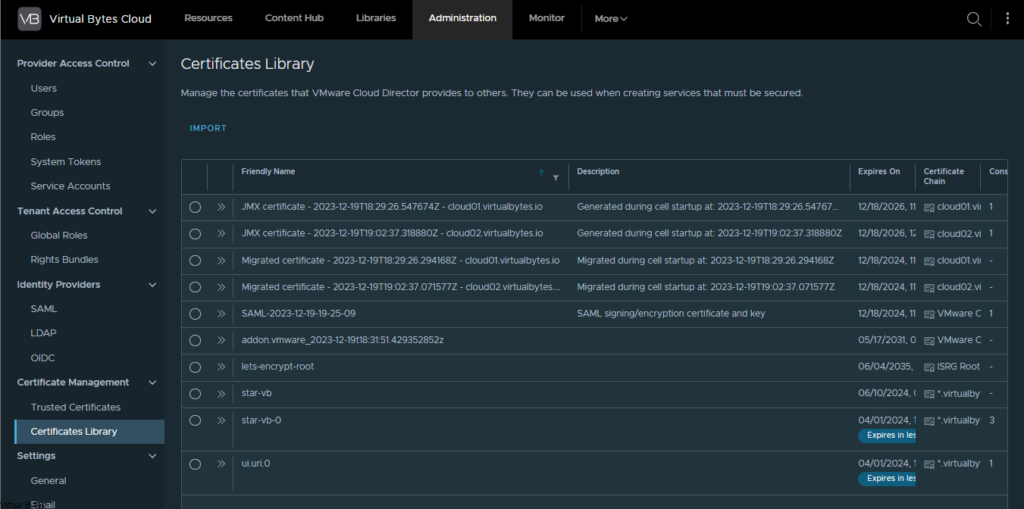
Click on Certificates Library – >

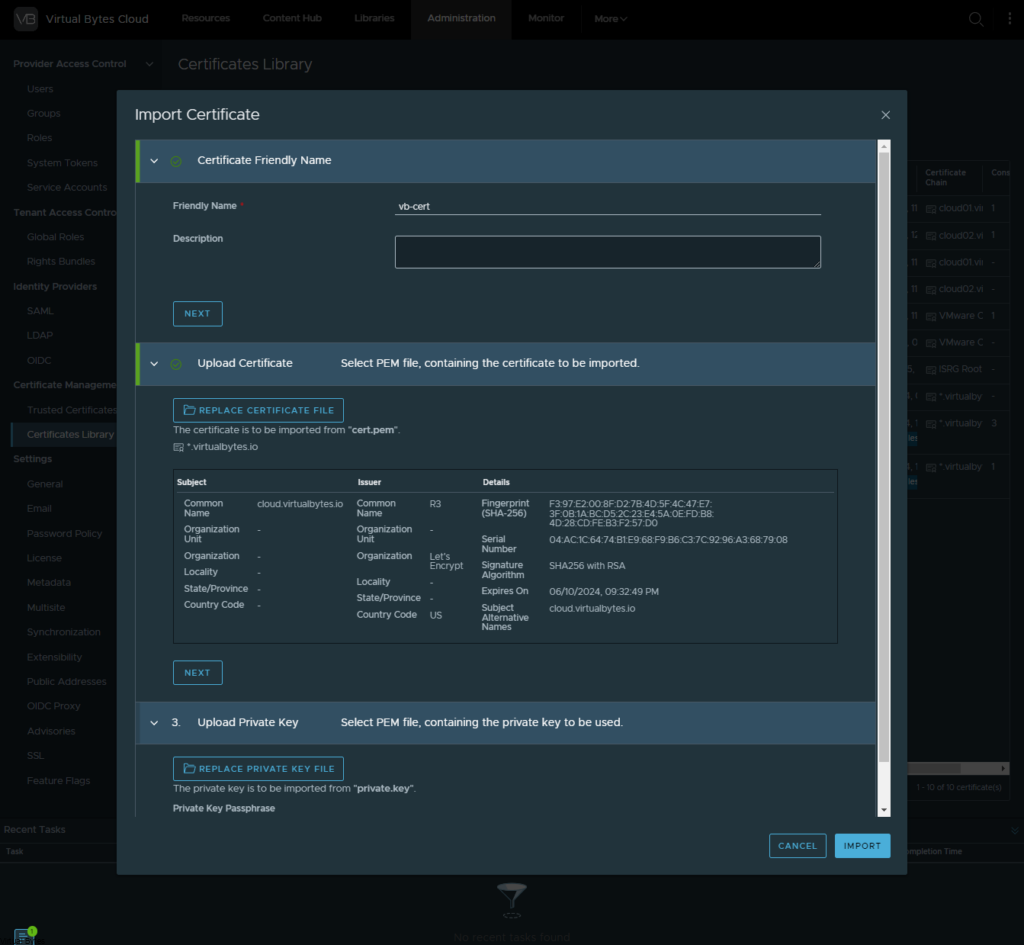
Click on Import -> Then fill our a friendly name and upload the .pem format of your cert and as well the private.key with the passphrase.

Once your certificate has been imported, also ensure to have your CA Signed Certs Trusted (Root and Subordinate) in your trusted certs library.

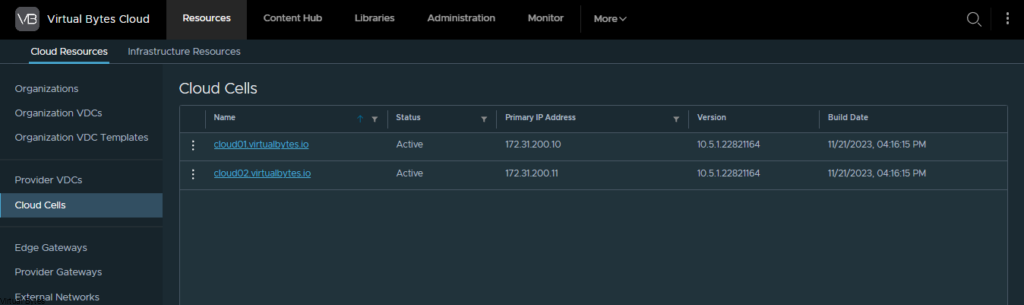
Then go back to Resources -> Cloud Cells -> Click on the Cell you want to change the certificate first in.
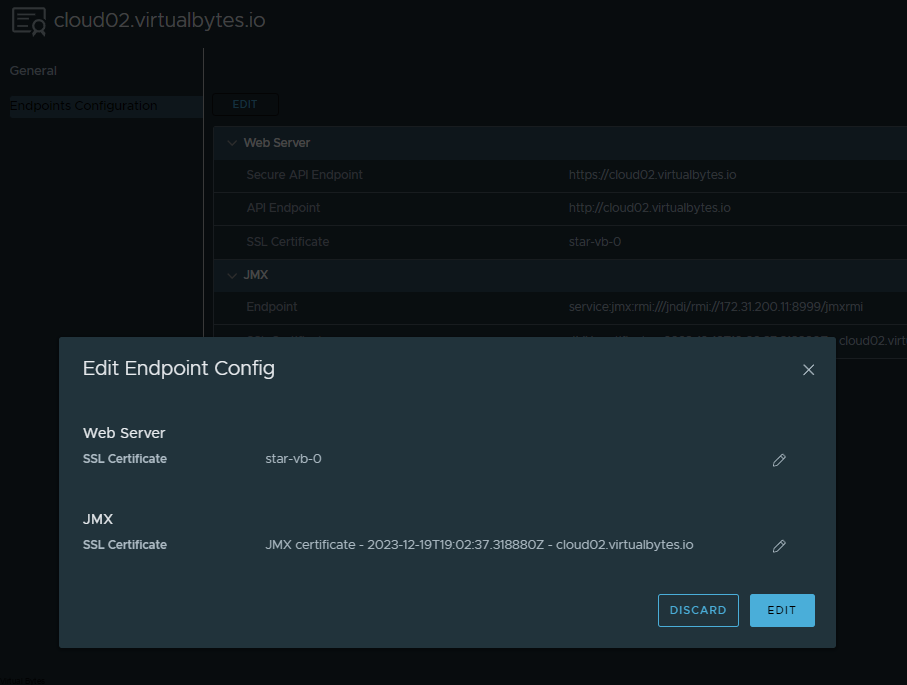
Then click on Edit

The pop up will come up to select the certificate we just imported earlier in the walk through, select that one.

Now you will “Use Certificate” and it will run the API Calls and certificate tasks behind the scenes.

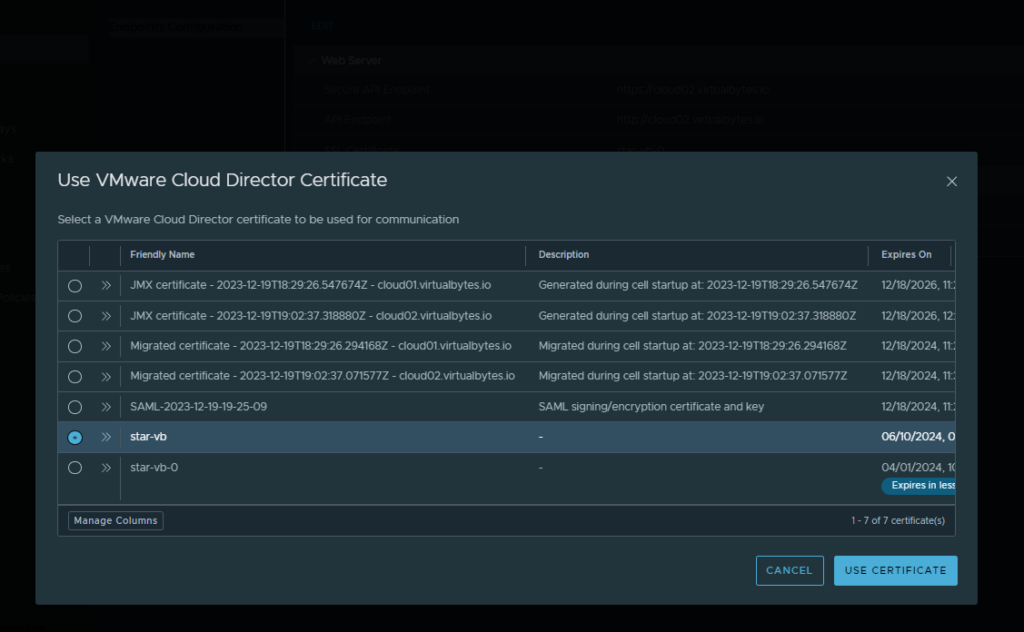
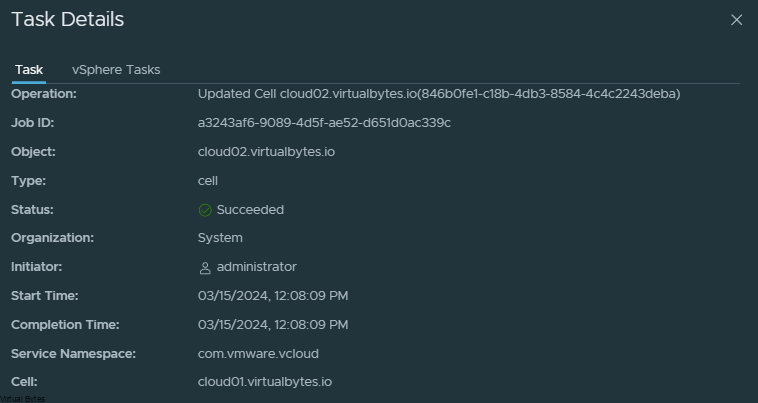
Select your certificate and then click edit and use certificate, few seconds later you should see a successful message in the recent tasks!

March 15, 2024 8 comments 3K views
2 FacebookTwitterLinkedinEmail
Cloud

Load Balancing VMware Cloud Director 10.4.x Cells with NSX ALB (AVI)

by Tommy Grot April 11, 2023
written by Tommy Grot 2 minutes read

Topic of the Day – Load Balancing VMware Cloud Director 10.4.x multi cell deployment. For this deployment I am using 3 VCD Cells, they consist of Small Size ( 2vCPU and 12GB, these are not recommended specifications for a production appliance – Per VMware.)

This walkthrough will show you how to load balancer the appliances only, we are not integrating NSX ALB into VMware Cloud Director for Tenants to consume, stay tuned for a future walkthrough for VCD and NSX ALB Integration!

What you will need:

  • Multiple VCD Appliances
  • Certificate with multiple SANs ( I used my wildcard cert)
  • Certificates and Public Addresses configured already on all VCD Appliances
  • 4 DNS A Records, 1 A Record Pointing to VIP IP address of ALB VS Pool, 3 A Records for individual appliances

More information on VMware Cloud Director 10.4.1 Certificate Implementation here

Lets login to NSX ALB, Go to Virtual Services and top right click on “Create Virtual Service”

-> Advanced Setup

Select your NSX Cloud which we will deploy the VIP pool

Select VRF Context, which for my deployment I am used my t1-edge-01-m01-gw, which is my Tier 1 Router attached to my primary Tier-0.

Next we will configured Virtual Service VIP for our Service Engine for ALB.

Attach the VsVIP to your Tier 1 Logical Router

Add a Virtual IP that is free from within your VIP Pool that is pre-allocated manually or can be via IPAM Dynamically. For my implementation I am setting the IP address statically.

Click Save -> Then it will take us back to the main page where we are deploying the Virtual Service

Next step we will set the Profile of our Virtual Service to the following

  • System-TCP-Proxy
  • System-L4-Application


(Side topic, VMware Cloud Director works better with a Layer 4 Load Balancer, there are issues that occur if a Layer 7 HTTP load balancer is utilized)

Now that our Profile is set, next we will create our Pool. I named my “VMware-Cloud-Director-Appliances-Pool”

The Following Settings that should be set are:

  • Default Server Port: 443
  • Least Connections (can use other Algorithms based on your needs)
  • Tier1 Logical Router – t1-edge01-m01-gw (this is my Tier1)
  • Servers – Created IP Address Group
  • Health Monitor
  • SSL – System-Standard, (Service Edge Client Certificate)

  1. Any other settings will depend on your implementation

Once all settings have been configured, now we will hit save and proceed to the last page “Advanced”

Ensure to select your Service Engine Group, or ALB will deploy it on the default group and might cause issues.

After you have the AVI Service Engine deploying, now you can go to VCD, and setup Public Addresses – Pre reqs are that you need to have VCD SSL CA Signed or Self Signed already configured and just need to enabled Public Addresses for the Web Portal and API.

That’s it! Very simple implementation to utilize VMware NSX Advanced Load Balancer and Load Balance VMware Cloud Director Appliances!

April 11, 2023 0 comments 2.5K views
1 FacebookTwitterLinkedinEmail


Recent Posts

  • Deploying & Configuring the VMware LCM Bundle Utility on Photon OS: A Step-by-Step Guide
  • VMware Cloud Foundation: Don’t Forget About SSO Service Accounts
  • VMware Explore Las Vegas 2025: Illuminating the Path to Cloud Excellence!
  • Securing Software Updates for VMware Cloud Foundation: What You Need to Know
  • VMware Cloud Foundation 5.2: A Guide to Simplified Upgrade with Flexible BOM

AI AVI Vantage cloud Cloud Computing cloud director computing configure cyber security director dns domain controller ESXi las vegas llm llms multi-cloud multicloud NSx NSX-T 3.2.0 NVMe private AI servers ssh storage tenant upgrade vcd vcda VCDX vcenter VCF VDC vexpert Virtual Machines VMs vmware vmware.com vmware aria VMware Cloud Foundation VMware cluster VMware Explore VMware NSX vrslcm vsan walkthrough

  • Twitter
  • Instagram
  • Linkedin
  • Youtube

@2023 - All Right Reserved. Designed and Developed by Virtual Bytes

Virtual Bytes
  • Home
  • Home Data Center 2025
  • VMware
    • Cloud
    • Datacenter & Cloud Infrastructure
      • VMware ESXi
      • VMware vCenter
      • VMware vSAN
    • Networking & Security
    • Desktop & App Virtualization
      • Omnissa Horizon
    • Troubleshooting
    • Ansible
  • Education
  • Hardware
    • Hardware Tips & Tricks
  • Events
  • About
    • About Me
    • Home Lab Archives
      • Home Lab 2020-2022
      • Home Lab 2016-2020