Want to setup a load balancer and reverse proxy with VMware NSX Advanced Load Balancer, and you want to replace your Nginx Reverse Proxy, well let’s get started!
First, we will make sure that you already have NSX ALB setup and configured within your environment, this walkthrough will only step you through on building a Virtual Service and Pools and VIPs for your multiple web servers. During this deployment you can set up many different FQDNs.
Requirements
- Public FQDN
- Lets Encrypt SSL Certificate (Wild Card or SAN or Single Cert)
- NAT – Service Engine
- Virtual IP
- Service Pool
- Web Server(s)
Product Versions:
- VMware NSX ALB: 22.1.2
- VMware NSX: 4.0.1.1.0.20598726
Steps
Login as an administrator account to NSX ALB ->
Go to Virtual Services -> Create Virtual Service
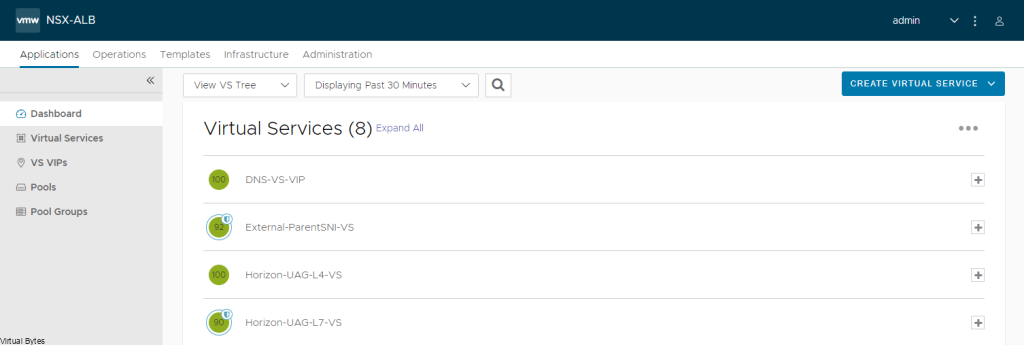
Select -> Advanced Setup

Next prompt -> Select your Cloud (For my setup I am doing everything NSX Overlay Backed)

Click Next -> Select your VRF Context (I am using a Tier 1 Gateway)

So now at this point – you should see this screen below, we will create a New Virtual Service, this will be the main ingress and egress point of your network and the external world. I have a NAT from my firewall going to this Virtual Service (VIP) Virtual IP.
- Name: External-ParentSNI-VS (This is my naming convention, but you can choose your own)
- Select: Enable Virtual Hosting VS
- Virtual Hosting Type: SNI
- VS VIP – (Create the main VIP for Ingress/Egress NAT, that is routable)
- Application Profile: System-Secure-HTTP
- WAF ( You can enable if you would like too, this is optional)
- Service Port ( 80,443 – For 443 you will want to select SSL)
- Pool – (Create a Pool, I used one of my very first web servers to start the pool)
- SSL Certificate – Select your Cert – by default ALB will put System-Default-Cert
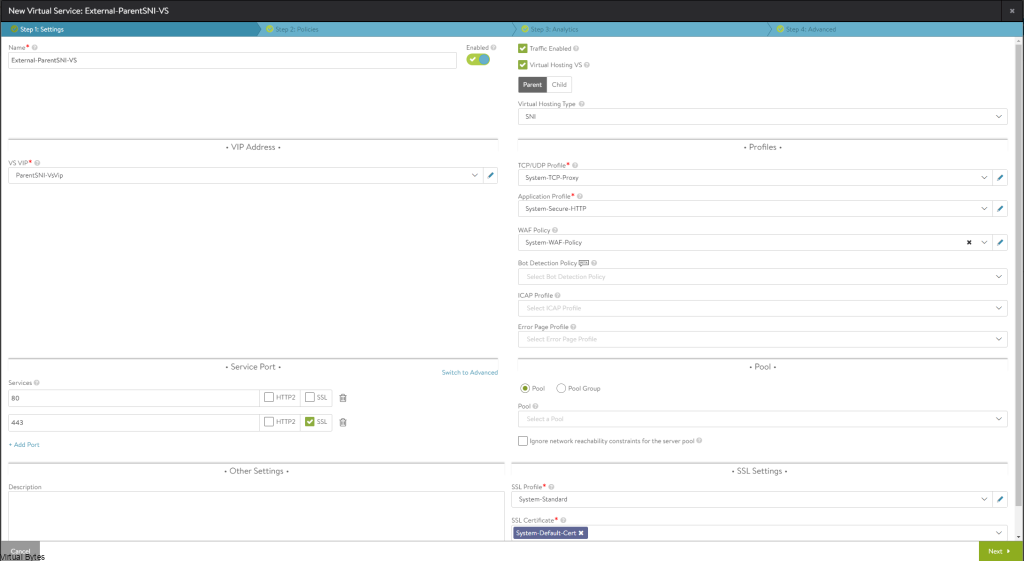
Click Save / Next – For this portion of the Virtual Service with Parent SNI we are done, next we will deploy the Child SNI which will be a parent to the main Ingress/Egress SNI Virtual Service.
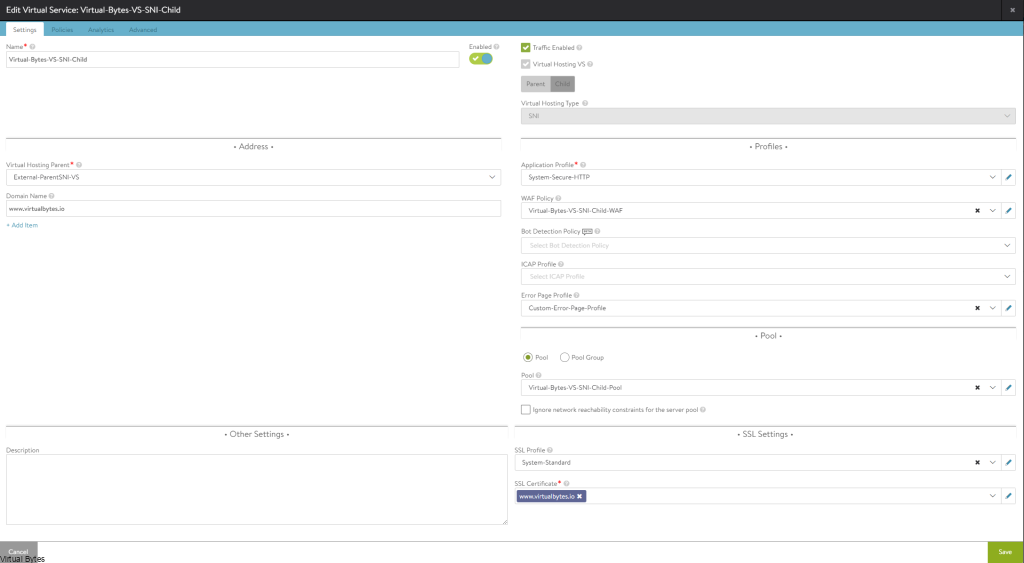
As an example – I will use my Virtual Bytes SNI Child Virtual hosting.
Click on drop down for Pool, if you have not created a pool we will do so now.
- Name: External-Parent-SNI-VS-Pool
- VRF Context – Your Tier 1 Gateway
- Default Server Port: 443
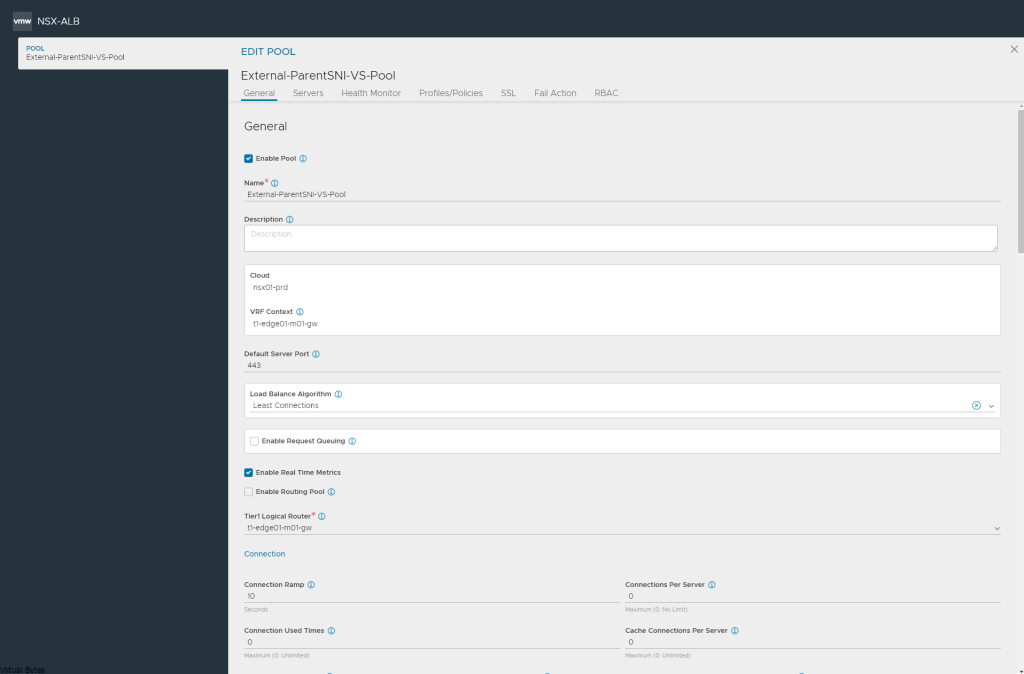
Select your first webserver, this will let you start the Virtual Service. You can do it via a IP Group or IP Address or DNS Name as well as have the capability to use a security group from NSX.
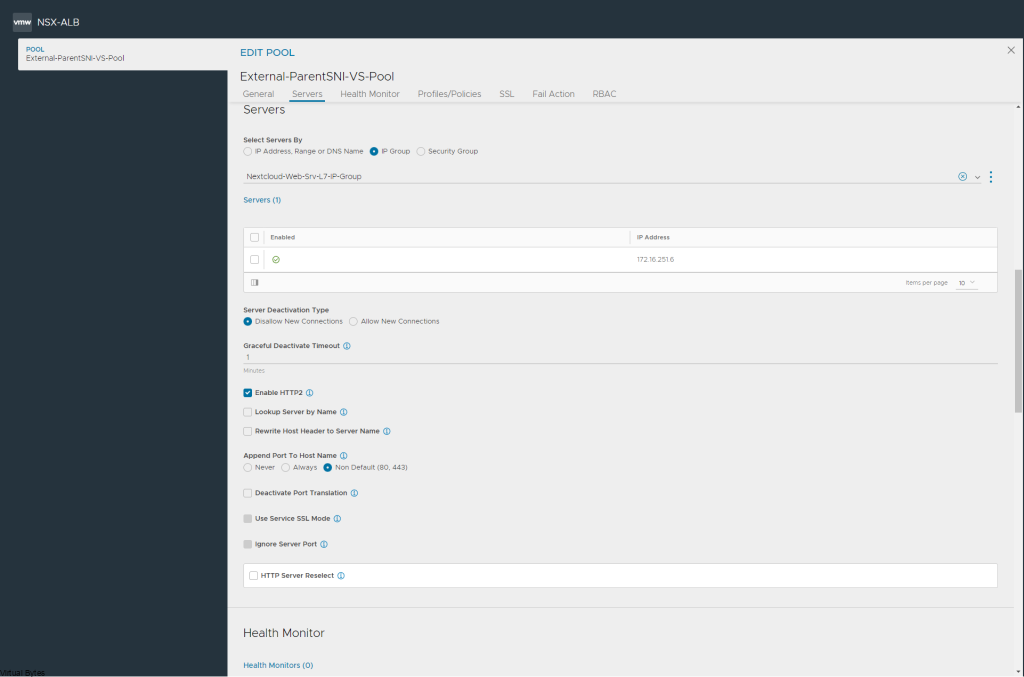
After you have created all the required services you should be able to access your web server from an internal or external (Internet) if you have NAT’d. But for the next steps we will repeat the steps for a Child SNI.
Child SNI Setup
- Go to Virtual Services – > Click on Create Virtual Service (Advanced)
- Name: You Web Server
- Check – Virtual Hosting VS
- Virtual Hosting Type: SNI
- Virtual Hosting Parent: External-ParentSNI-VS (or your own naming)
- Domain Name: www.yourdomain.com
- Application Mode: System Secure-HTTP
- Pool: Create a pool for the Virtual Machine or service you want to load balance
- SSL Certificate: Select your Certificate
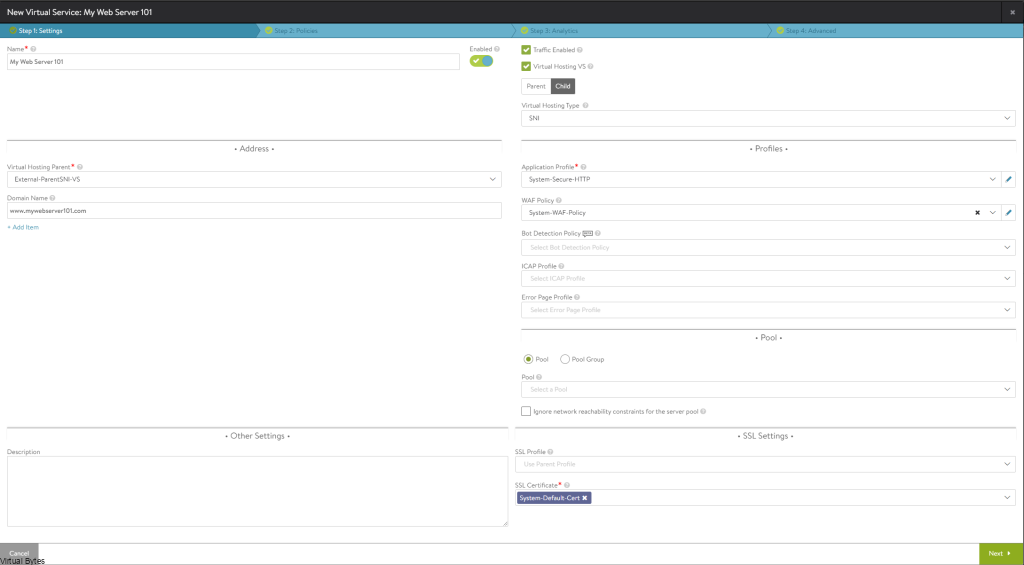
Click Next all the way till the end, and now you have successfully setup a Child SNI which now you can replicate the same steps for multiple web servers, and you no longer need to NAT anymore IPs, since your main ingress/egress is already NAT’d and everything will flow through the main Parent service.