In the ever-evolving landscape of cloud computing, security remains paramount, especially as organizations strive to build robust hybrid cloud environments. VMware, a pioneer in virtualization and cloud infrastructure, has released an update that strengthens its portfolio—VMware Cloud Foundation 5.2. This new version brings a plethora of enhancements, focusing on improved security features, and integration is with Microsoft Certificate Authority or also OpenSSL but we will utilize Microsoft Certificate Authority.
The Power of Secure Certificates
Certificates play a pivotal role in establishing secure connections within cloud environments. They ensure data encryption, authenticate users and devices, and prevent man-in-the-middle attacks. With this latest release, VMware Cloud Foundation 5.2 leverages the power of MCA to provide organizations with a centralized, automated, and scalable certificate management system.
Integrating Microsoft Certificate Authority
Microsoft Certificate Authority (MCA) is a robust solution for managing digital certificates, offering advanced security features and seamless integration with various cloud platforms. By integrating MCA into VMware Cloud Foundation 5.2, organizations can:
- Automate Certificate Deployment: Streamline the process of issuing and deploying certificates across multiple clouds and on-premises data centers.
- Centralized Management: Gain a unified view and control over all certificates from a single location, simplifying administration.
- Enhanced Security: Benefit from MCA’s advanced security features, including long-term key protection and certificate revocation, to safeguard cloud infrastructure.
- Cost Efficiency: Reduce the overhead of managing certificates independently in different environments.
What’s Ahead for Hybrid Cloud Security
VMware Cloud Foundation 5.2 marks a significant step towards simplifying and strengthening security in hybrid cloud deployments. By embracing this update, organizations can future-proof their infrastructure, ensuring data and user privacy. Stay tuned for more insights into this exciting release and its impact on the cloud computing landscape.
Procedure
This walk through assumes that you have already configured a Certificate Authority server, if you did not, ensure to get that created first but in the mean time lets get started!
First, we will go connect via RDP to the Microsoft CA Server
Ensure to install the Following:
- Certificate Authority
- Certificate Enrollment Policy Web Service
- Certificate Enrollment Web Service
- Certification Authority Web Enrollment
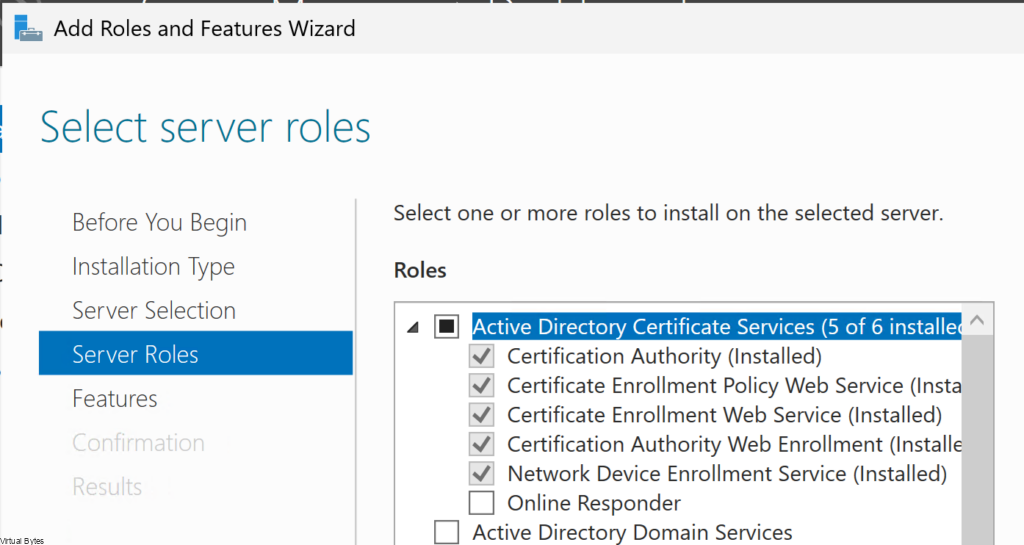
Once all the Roles are installed, give the CA Server a reboot. Next we will Configure a Role for IIS to do the Enrollment via Web Service using Basic Authentication.
Open up server manager, add the required feature under IIS.
Basic Authentication 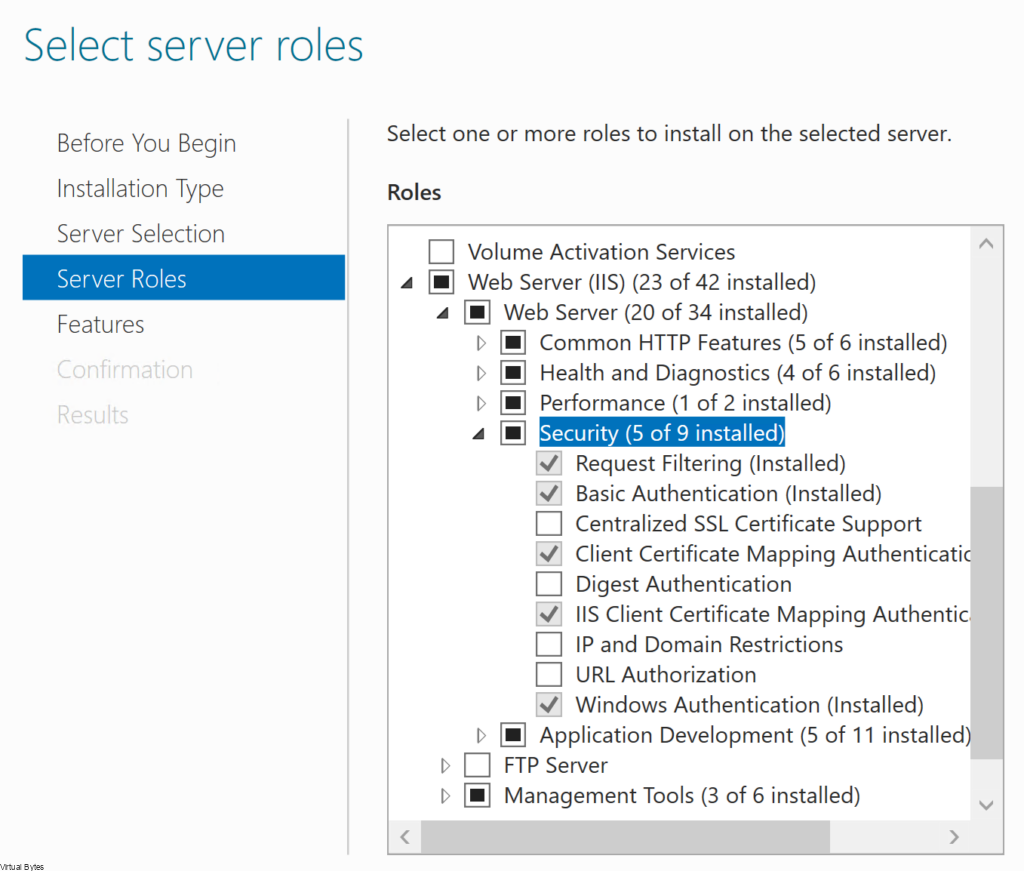
After you have installed all the required roles above, next we will enable Basic Authentication under IIS
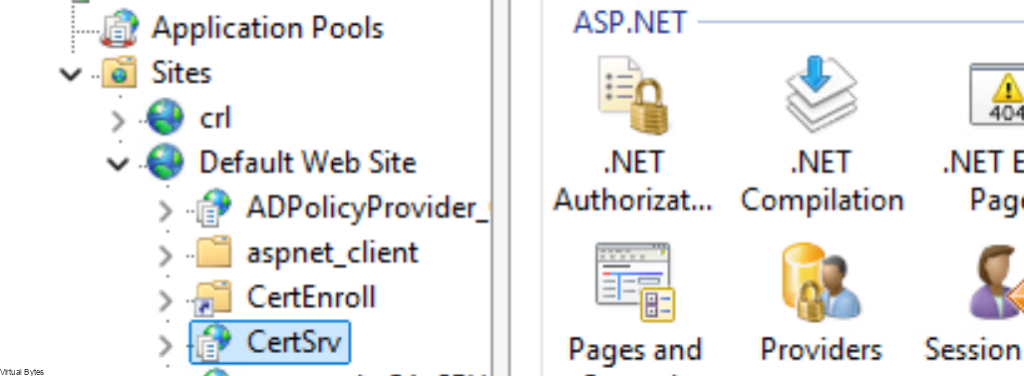
- Navigate to Sites -> Default Web Site -> CertSrv
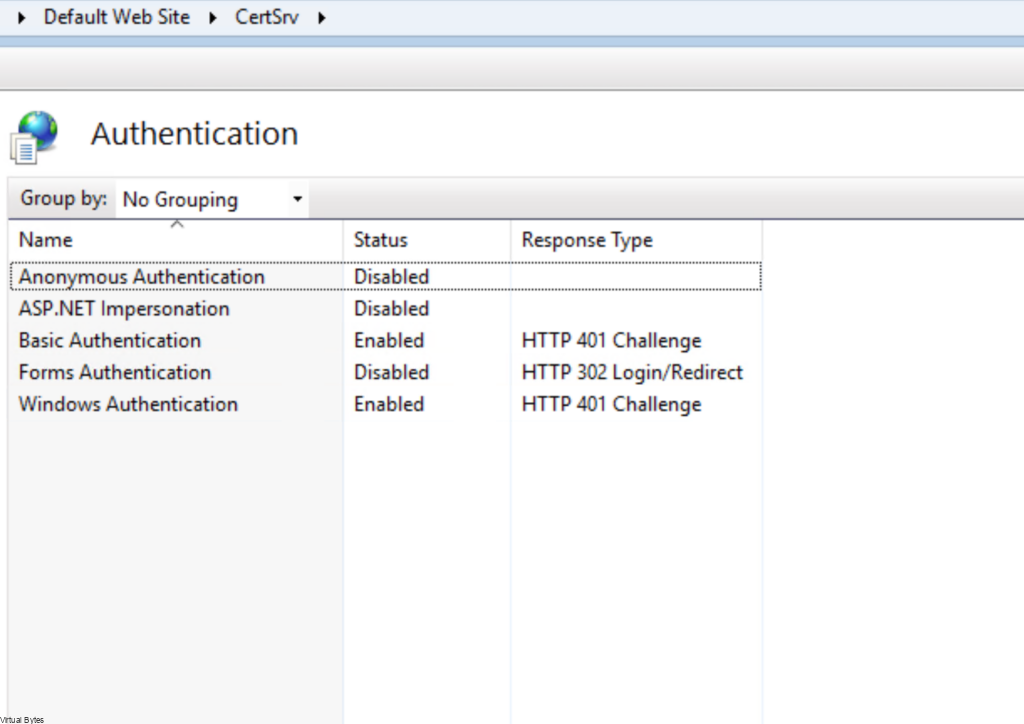
- Under IIS, double-click Authentication.
- On the Authentication page, right-click Basic Authentication and click Enable.
- In the navigation pane, select Default Web Site.
- In the Actions pane, under Manage Website, click Restart for the changes to take effect.
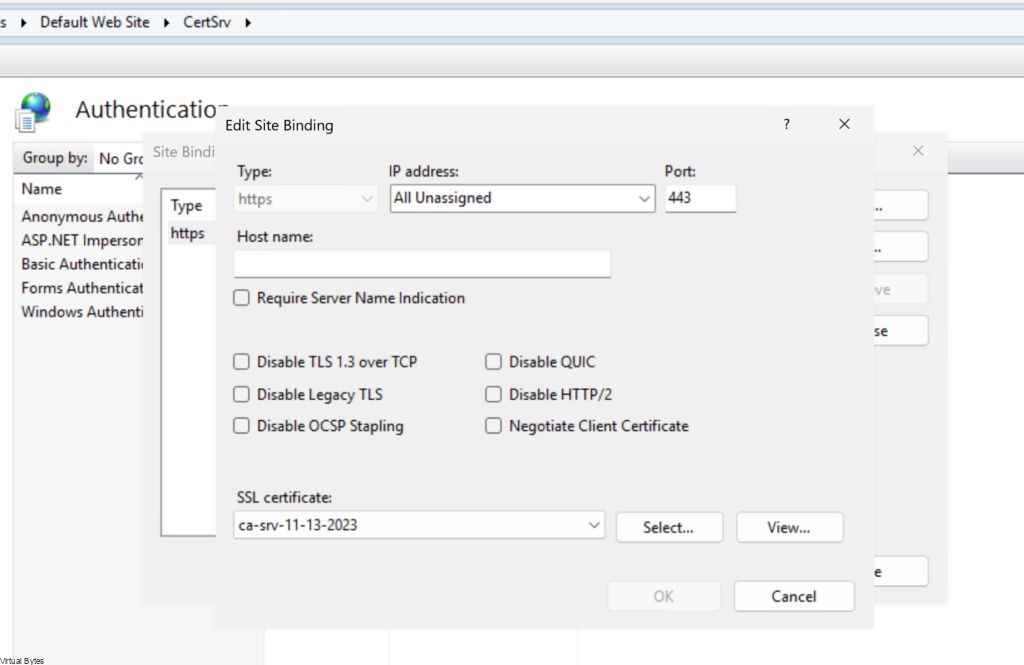
After you have enabled the Basic Authentication, we will need to ensure that the CA Server Web Enrollment has a CA Signed Certificate with the FQDN, IP in its SANs (Subject Alternative Name). The SDDC Manager requires a secure connection between the appliance and the certificate authority.
This walk through will not cover how to create a Web Server Certificate for your CA IIS Site Binding, assuming you already have it configured.
Right Click -> Default Web Site -> https 443 Binding -> Attach the new certificate for the CA Server Web Enrollment.
After all the perquisites are done we will configure a Template for SDDC Manager to utilize.
Clone the Web Server Template and we will configure it:
Configure name for the template, I used VMware SDDC
- Click Start Run, enter certtmpl.msc, and click OK.
- In the Certificate Template window, under Template Display Name, right-click Web Server and select Duplicate Template.
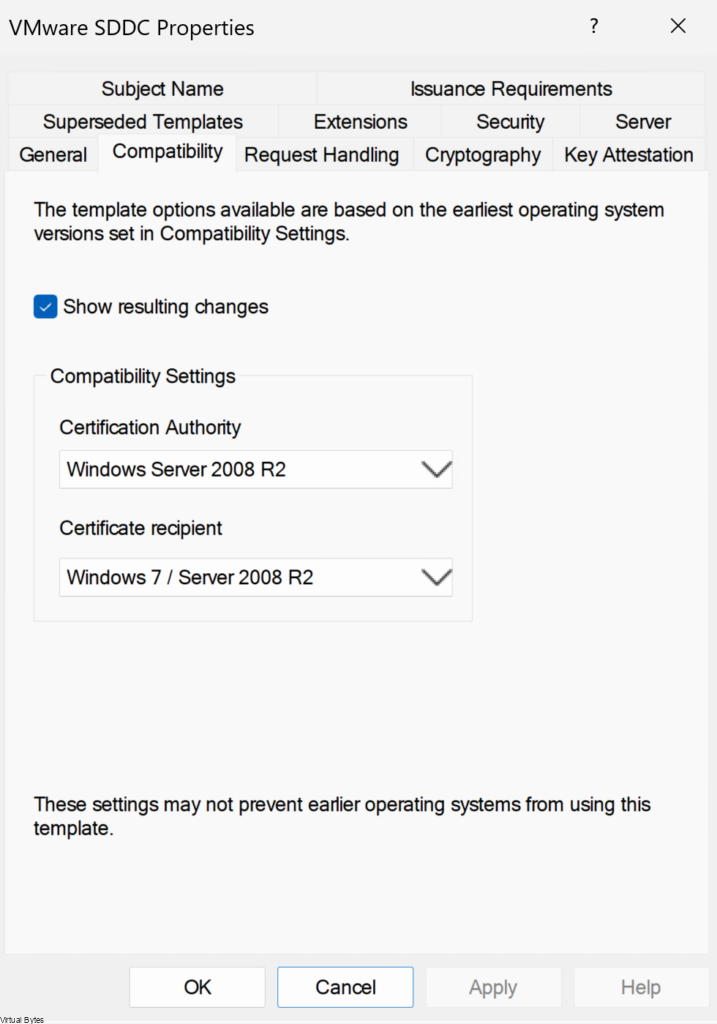
- In the Properties of New Template dialog box, click the Compatibility tab and configure the following values.
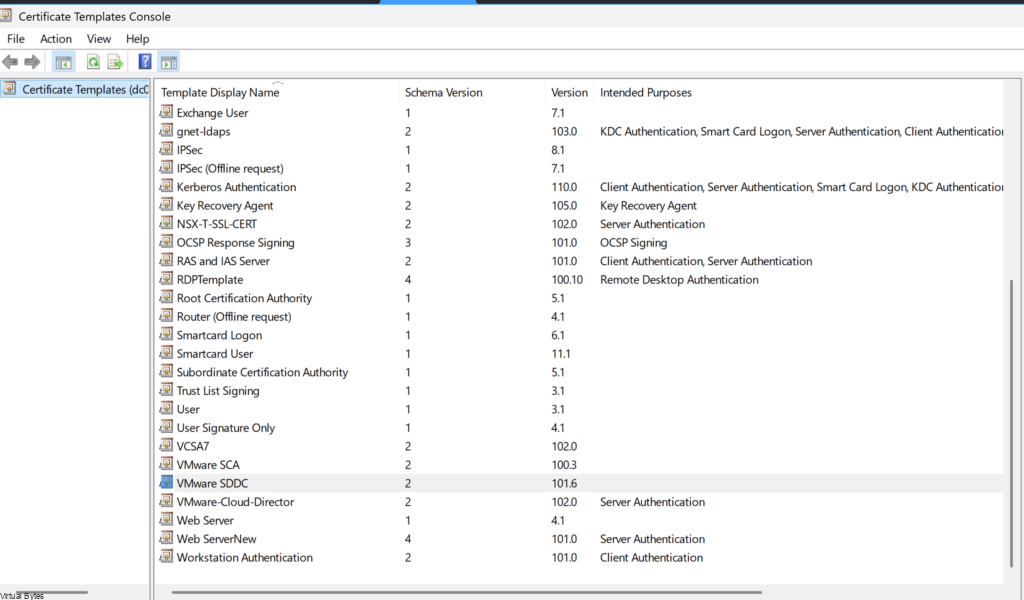
For the VMware SDDC Template – I configured 2 years, and the Template Display Name – VMware SDDC
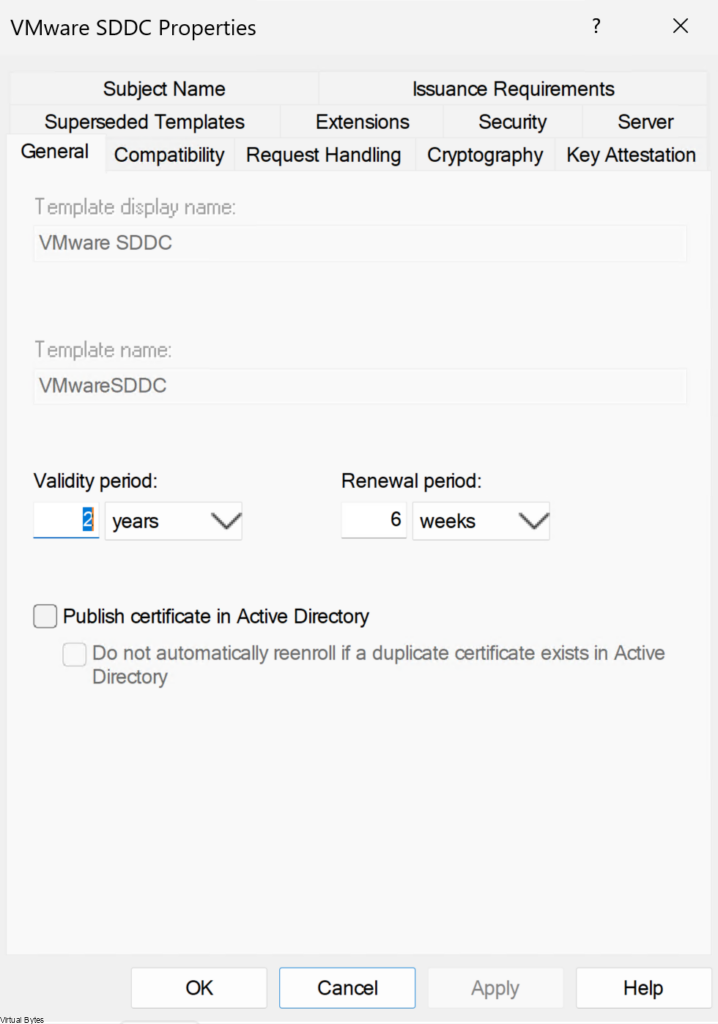
| Setting | Value |
|---|---|
| Certification Authority | Windows Server 2008 R2 |
| Certificate recipient | Windows 7 / Server 2008 R2 |
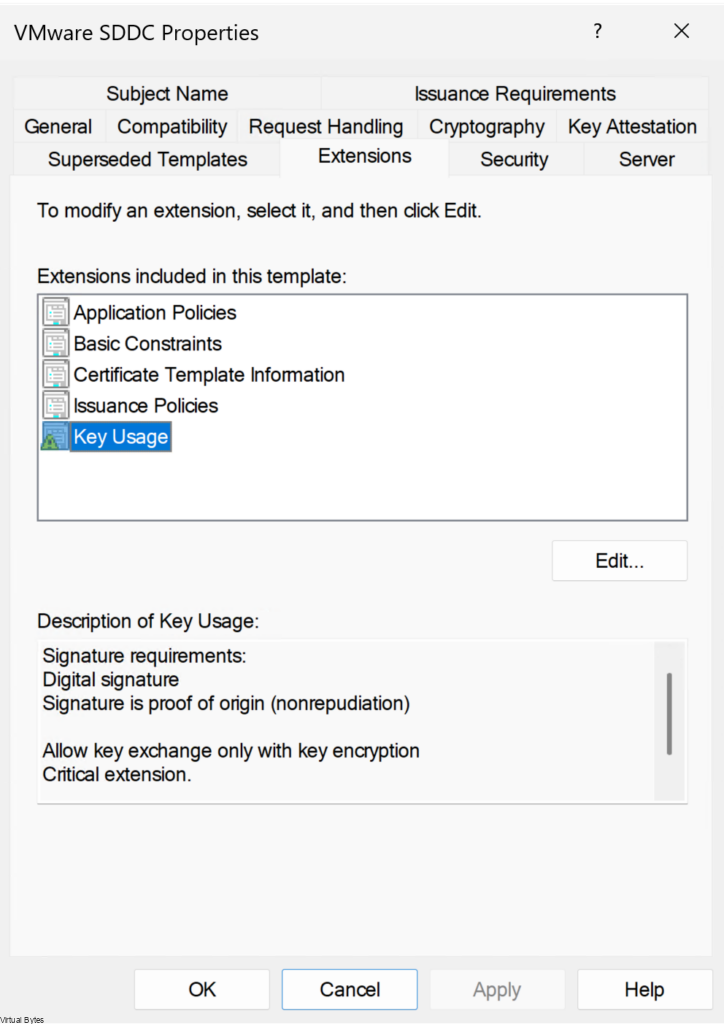
In the Properties of VMware SDDC Template dialog box, click Extensions tab and configure the option below:
- Click Application Policies and click Edit
- Click Server Authentication, click Remove, and click OK.
- Click Basic Constraints and click Edit.
- Click the Enable this extension check box and click OK.
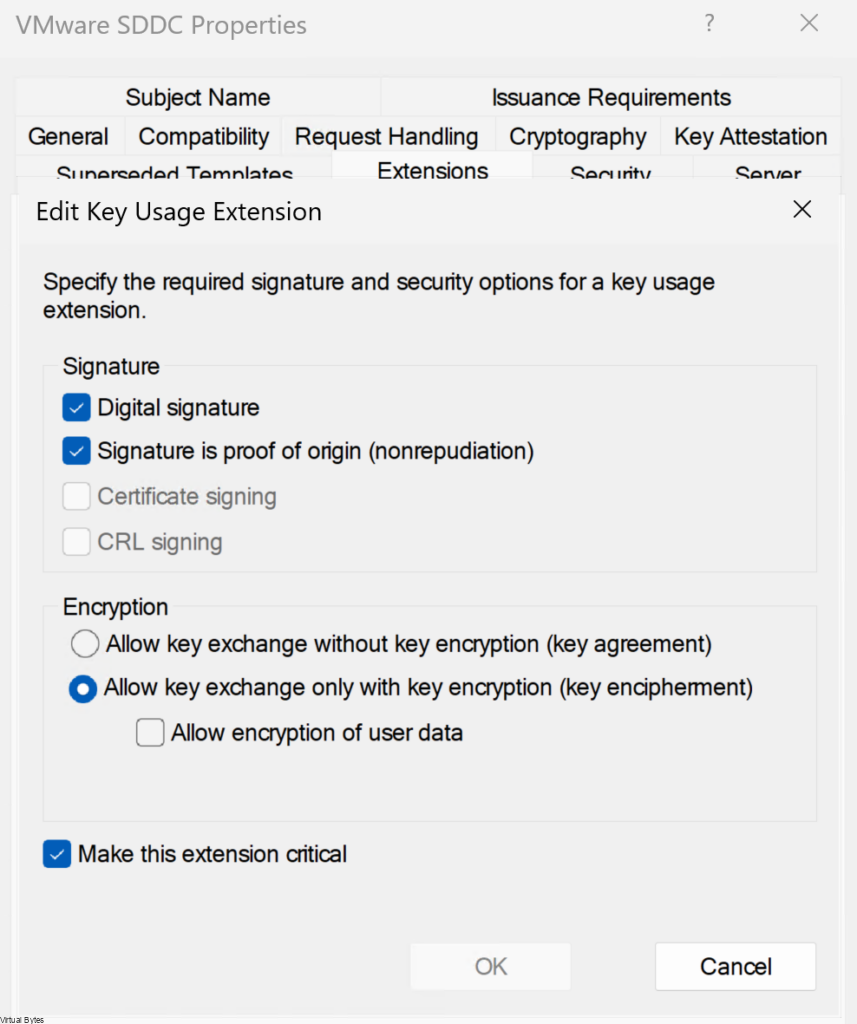
- Click Key Usage and click Edit.
- Click the Signature is proof of origin / nonrepudiation check box, leave the defaults for other options and OK.
- Start up Run, enter certsrv.msc, and click OK
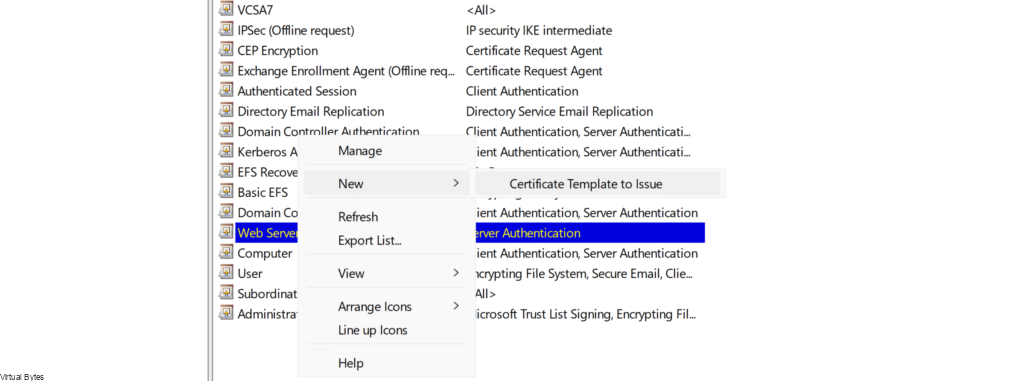
- In the Certification Authority, in the left pane, right-click Certificate Templates, and select New Certificate Template to Issue.
- In the Enable Certificate Templates dialog box, select VMware SDDC, and click OK.
Permissions
Before you can start using your new template that you created, next we will need to add permissions to the following VMware SDDC Template for the service account to utilize, my service account is [email protected]
| Setting | Value |
|---|---|
| Full Control | Deselected |
| Read | Deselected |
| Write | Selected |
| Enroll | Selected |
| Autoenro;; | Deselected |
Below we will configure the Microsoft CA and provide your FQDN that is for your Certificate Authority. I created a A record in my DNS for certs.virtualbytes.io and created a CA signed certificate for it for SDDC to accept it.
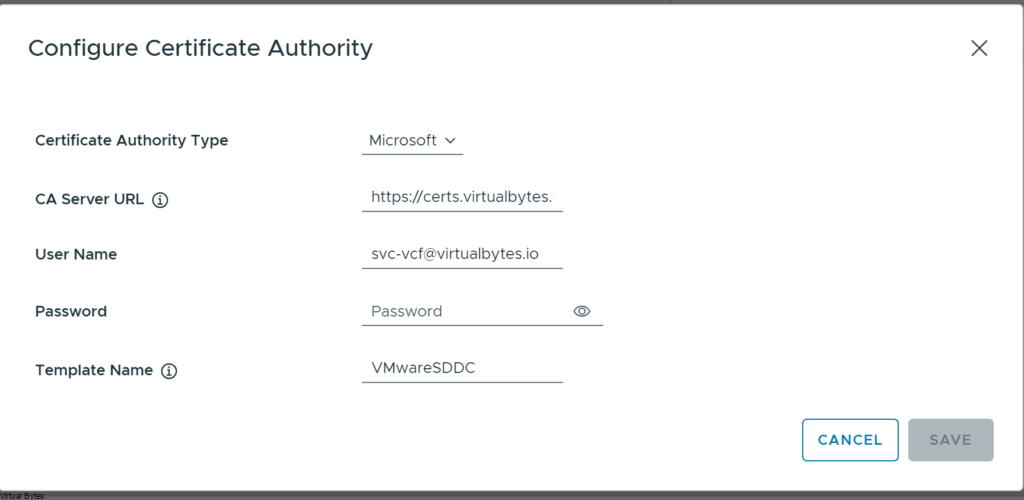
Once you have configure everything your SDDC Manager is now able to create CSRs, Certs and assign them to the products within VCF!